If you are looking to up your crafting game, let me introduce you to the xTool M1 Hybrid Laser and Blade Cutter! This new desktop hybrid laser is going to be your new best friend. Think of a Cricut on steroids with a laser! Fun, right? This machine can cut, engrave and score and it can handle materials from iron-on vinyl to leather to wood to slate coasters! Awesome, right?
Come check out the new possibilities and follow this guide to getting started with the xTool M1 Hybrid Laser/Blade Cutter!
xTool sent me this machine, however, all opinions and thoughts are 100% my own! You can read my full disclosure here.
This post may contain links to Amazon Associate and other affiliates.
As an Amazon affiliate, I earn a small commission from these links at no additional cost to you.
Getting Started with an XTool M1 Hybrid Laser and Blade Cutter
IN THIS XTOOL M1 OVERVIEW POST YOU WILL FIND:
What is the xTool M1 Hybrid Laser Cutter?
The xTool M1 is the first of its kind! It is a desktop diode laser that also has a blade, allowing it to cut vinyl and iron-on as well as laser engrave, score, and cut thicker materials like wood! So think of it as if a laser cutter and a Cricut or Silhouette cutting machine had a baby!
This new 3-in-1 machine means you can make T-shirts and tumblers just as you do now with your electronic cutting machine AND you can cut and engrave wood, some acrylics, metals, and glass with one machine!
Since this crafting machine is a beautiful marriage of both a laser cutting and electronic cutting machine, you have the ability to cut and engrave a wide selection of materials for all your crafting needs and only have the footprint of one machine! This is especially amazing for those of you with limited crafting areas!
xTool M1 Price
The most asked question! What is the price of the xtool M1?
The xTool M1 5W has an MSRP of $1299 while the xTool M1 10W has an MSRP of $1499.
xTool runs sales regularly so be sure to bookmark my Deals Page where I will be sure to share these sales with you!
After using the machine and talking with a friend who has the 5W, If you can budget for the 10W I recommend going this route. The higher laser power will result in faster completion times as well as the ability to cut through thicker materials in a single pass.

What Type of Laser does the xTool M1 Use?
The xTool Hybrid Laser/Blade Cutter M1 uses a diode laser. A diode laser is a semiconductor device where a diode is pumped directly with electrical current and creates lasing conditions at the diode’s junction. The diode laser has the ability to cut and engrave both vector and raster images.
A diode laser is more robust and lasts longer than a CO2 laser however it is not as powerful and has limits on certain colors of acrylics and materials it can cut and engrave.
I am not going to compare this machine with a CO2 laser because #1 it is not a fair comparison and #2 I have not used a CO2 laser, so my comparison will be to the functionality of this machine compared to my Cricut & Silhouette machines so you can decide if this craft tool will level up your current skills and abilities!
xTool does offer a 40W CO2 laser.
M1 Measurement and Features
M1 Measurements
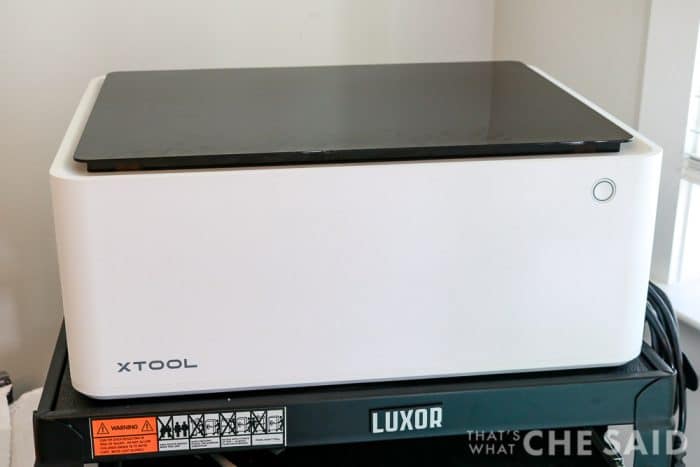
The physical measurements of both models are the same. The machine is roughly 22″x18″x9″. It fits well on a tabletop or countertop. It is about 22 lbs and I was easily able to lift it out of the box and onto my rolling cart. Both models also boast an in-bed 15″ x 12″ working space*. You can connect via USB or wifi to your computer and the machine can be used on both Windows and iOS operating systems.
There are currently two models of the xTool M1 Hybrid laser/cutter. The difference between the two models is the laser wattage. There is a 5 Watt laser and a 10W laser.
I will be using the xTool M1 10W machine for my review purposes.
xTool M1 Features
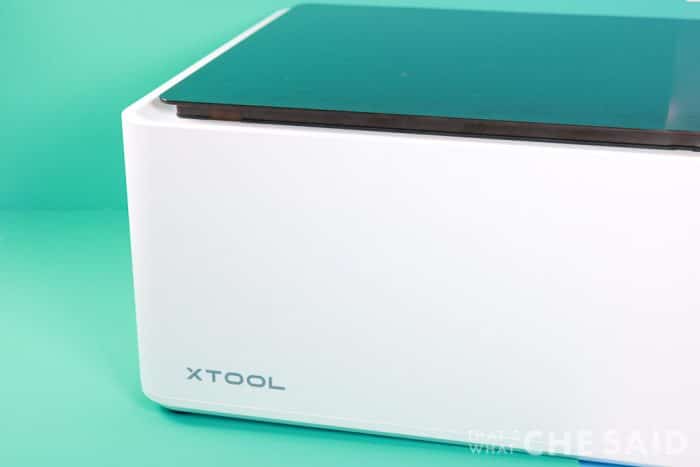
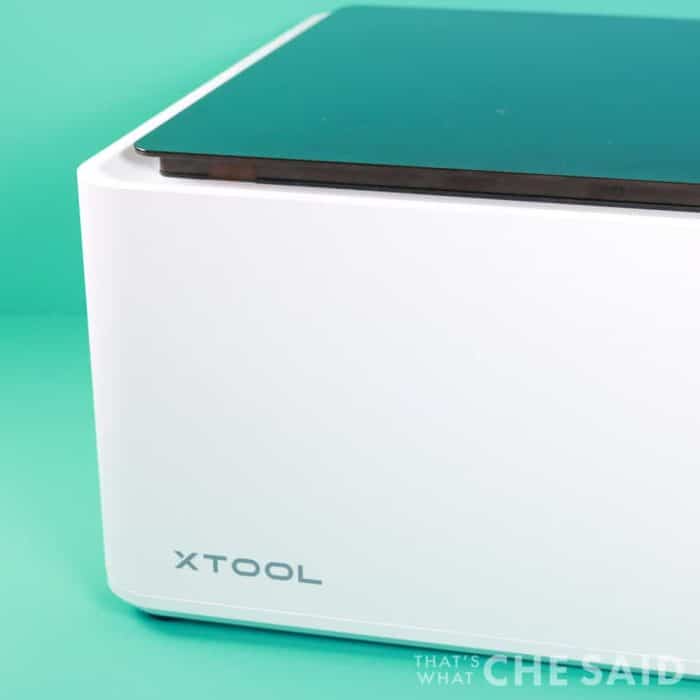
The front of the machine has one operations button. This button will change colors depending on what status of the machine and this button also starts and stops the laser module.
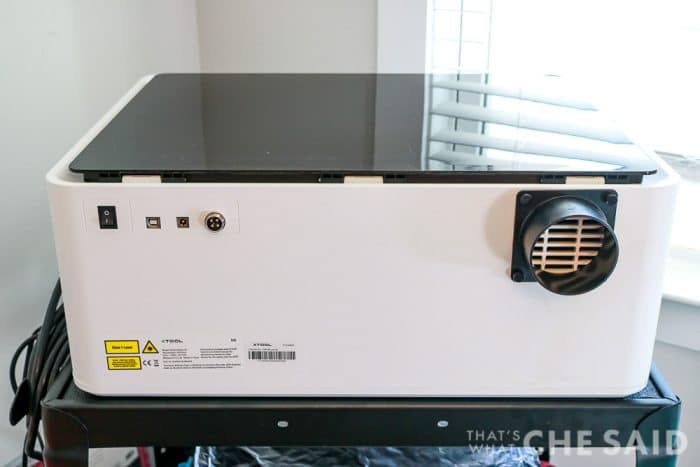
The back of the machine has a vent outlet as well as connections and a power port and the power switch.
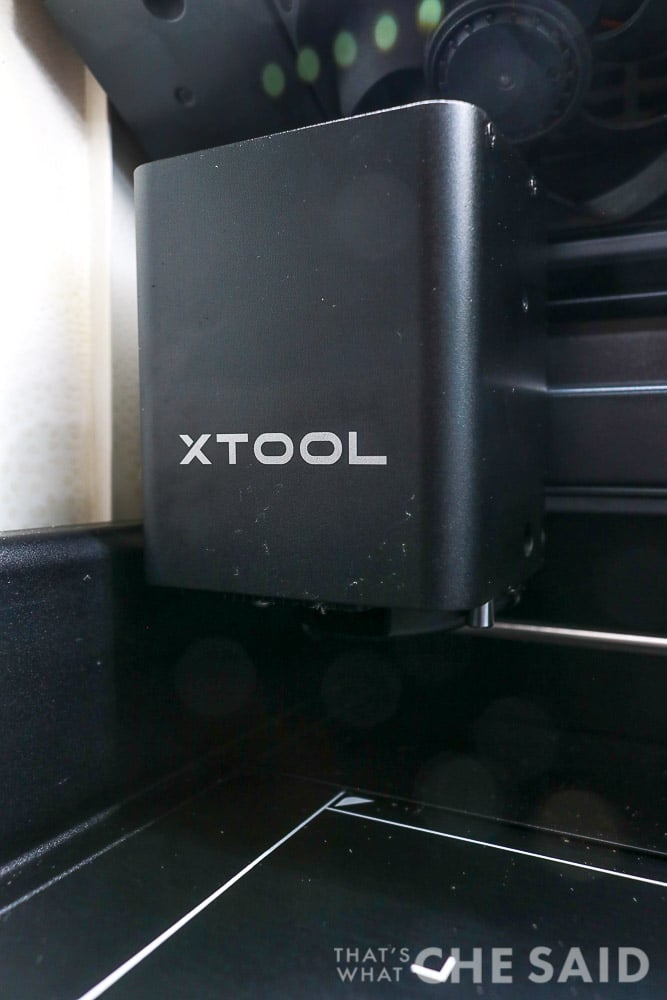
The blade housing and laser are both located in what xTool calls the “laser module”. The blade housing is magnetic and pops in and out very easily!
*The M1 has the capability of removing the base plate allowing you to create projects larger than the bed working area and it has accessories like risers to allow you to work on projects taller than the height allowed with the base plate. More on this is below.
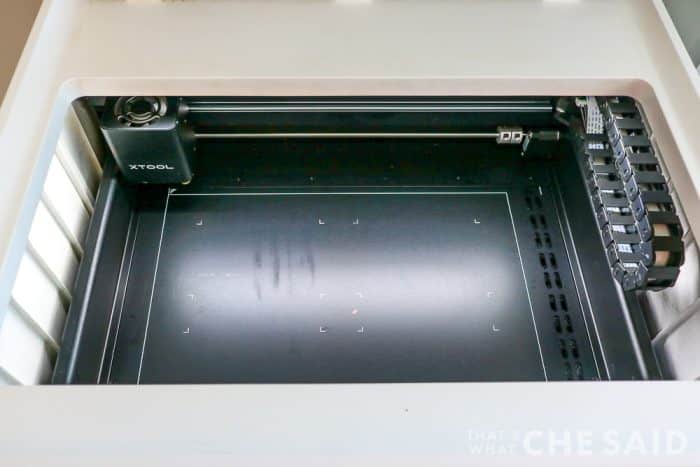
When you lift the lid of the machine you will find the laser module and the x, y, and z movement tracks.
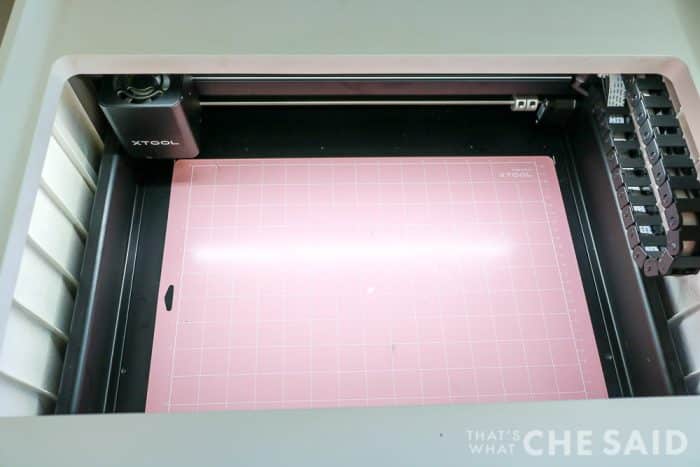
When using the blade (more on the blade below, you adhere the mat right to the base of the machine.
Both models are capable of:
- Flat engraving
- Flat cutting
- Rotary engraving (with added rotary accessory)
- Blade cutting
The laser spot has a 0.08mm diameter and a carving precision of 0.01mm. The xTool also has a 16-pixel high-resolution camera, 500dpi image resolution, real-time preview, auto-focus adjustment, and an ai system with AI camera information. This is great for lining up your projects, batch processing, and using scrap pieces of material.
Design within the control software called xTool Creative Space (XCS). This is a free program to use! (more on XCS below). You may find the download for this software here.
The most notable difference between the 5W and 10W models are the speed of the machines and the maximum material thickness the laser can cut in a single pass. As you would expect, the 10W is both faster and can cut thicker materials being it has a stronger laser. The 5W can cut up to 4mm thickness while the 10W can cut up to 10mm in a single pass.
USAGE STATS: The xTool does create a hum but it is actually quieter functioning than my Cricut or Silhouette when running. There are some smells, most notable from cutting acrylic or engraving wood. Proper ventilation made both bearable and barely a concern.
M1 Safety Features
The xtool M1 carries a Class I (FDA Certified) Safety Rating. It has a Blue Light filtering lid to protect your eyes from the laser beams and an auto-stop if the lid is lifted during processing or the front button is pushed. The blue light filtering lid allows for visual processing and the software also will show project progress.
When cutting with the blade, the lid also must be closed in order to operate.
You cannot start the machine from the software. To start the machine you must physically push the button on the front of the machine which places you in direct supervision of the laser while it is cutting.
There is a built-in fan with an exhaust pipe to blow away discharge smoke, dust, and spark however this does need to be vented to the outdoors so keep that in mind when deciding where to operate the xTool.
If you need to place the laser box in an area with no outside ventilation, a smoke purifier can be used as an added accessory. I have also added this inline fan to my exhaust line in order to help with smells. Always use the laser cutter in a well-ventilated area or with a smoke purifier.
Included In the Box
When you unbox your M1 you will find the following items inside the box. I opted to use the machine and get to know it before I shared about it and therefore did not make an unboxing post or video.
It’s important to note that the M1 comes assembled and took less than 5 minutes to get up and running! No tools were needed! I will say that the user manual is the most very basic of basics. It contains a bit about setup and then not much more on the actual operation. I am hoping that my tutorials can help with this aspect! Be sure to join my xTool email list for more tutorials and project ideas!
HERE IS WHAT YOU GET IN YOUR BOX:
- M1 Laser Box (complete with lid, laser module, base plate)
- Power Cord
- USB Cord
- Vent hose and clamp
- Vent hose attachment and 4 screws (threaded screws, no tools needed)
- 10 Prism Risers
- Blade Housing
- Package of (5) 45-degree replacement blades
- 4 Cutting Mats (2 Light Grip – Blue and 2 Fabric Mats – Pink)
- Basic Materials Package (PU Leather, Vinyl, 3mm basswood, metal bone dog tag)
I have the deluxe material package and RA2 Pro Bundle. Included is:
- RA2 Pro Rotary Tool
- Deluxe Material Bundle
xTool Creative Space (XCS)
xTool Creative Space is xTool’s graphic design software. This design program tells the xTool laser and blade what to cut/engrave/score.
At first glance, the interface has a similar feel to Cricut Design Space or Silhouette Studio. I did find the functionality to be a bit clunky and therefore would recommend doing the actual design in a separate program, such as Adobe Illustrator or Inkscape, and importing your design into XCS. I am hoping with some updates there can be some changes/additions to the software to allow further creative design.
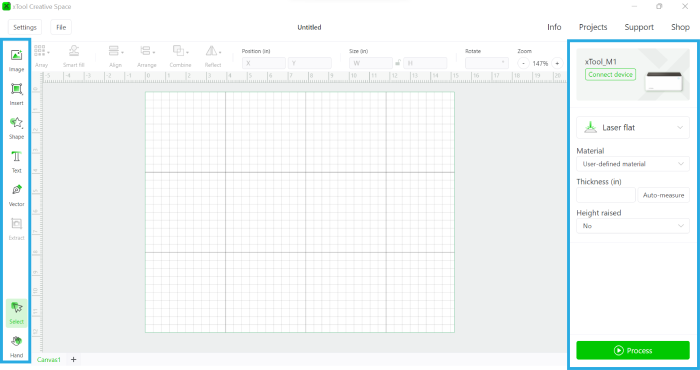
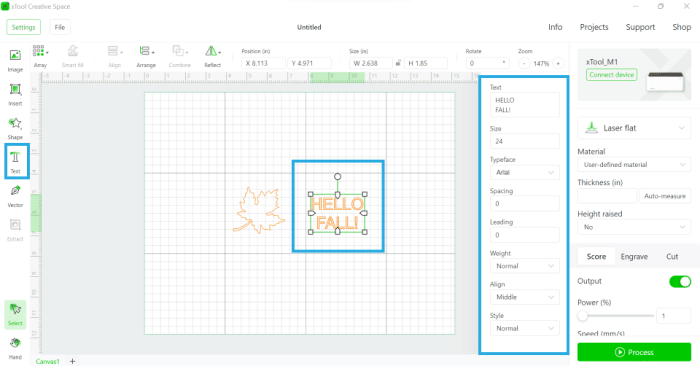
For basic shapes and basic text, XCS is just fine! You can find your shape, insert image and text tools on the left side of the canvas and then you can find your cut, engrave, score, and material settings on the right side of the screen.
As you click on tools on the left sidebar, such as the text tool, you can see additional menus will open allowing further adjustments.
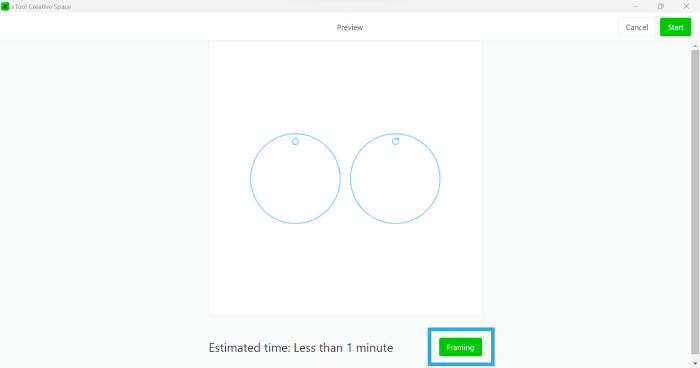
One notable feature of XCS is the framing option! When you are ready to process your design, you will see a Framing button in the bottom corner of the screen. When you select this button on the software and then push the button on your machine, the laser module will show a faint light and “frame” the area it is going to be processing! This helps save material waste and ensures you are lined up and cutting/engraving/scoring where you want to be!
XCS also has image extraction feature so you can upload a png or jpg file and remove the background in order to engrave the file. You can find more on file types and how to upload to XCS here.
I am looking forward to making an in-depth post and video on using xTool Creative Space. Be sure to join my xTool email list to get first access!
What Materials Can be Used with the M1 Hybrid?
Because this machine has both a blade and a laser, there is a wide range of materials that can be used to create gifts, home decor or items to sell!
Below find information on when to use each cutting vs. engraving feature and some materials and settings, tips, and tricks! They are broken down by output: blade, laser, score and engrave.
Processing time depends on the material being cut, how complex the project is and the output selected.
You can find xTool M1 materials on xtool.com or on Amazon!
Blade Cutting & Materials List:
The blade-cutting machine is very similar to a Cricut or Silhouette.
BLADES: The blade and its abilities are comparable to a Cricut or Silhouette machine’s fine-tip blade. The machine comes with (5) 45-degree blades. 60-degree blades are an option to purchase.
WHICH BLADE TO USE WITH THE XTOOL M1?
If you are working with materials up to 5 or 6 mil, the 45-degree blade will work great!
The 60-degree blade is good for materials that are thicker than 6mil.
BLADE MATS: As mentioned in the “What’s in the Box” section, there are 2 LightGrip mats and 2 Fabric mats in your box. The blue LightGgrip mat is great for general use: cardstock, vinyl, iron-on, sticker paper, kraft paper, etc., and the pink FabricGrip mat is to be used for PU leather and transparent frosted PVC sheets.
The two blade mats are sticky on both sides so that when the mat is placed in the bed of the machine, it does not move around while cutting!
MATERIALS: This is not a complete list as I have not fully tested all the materials that I have cut on my Cricut and Silhouette machines over the last 10+ years but here are the ones to get you started!
- Cardstock
- Iron-on Vinyl
- Adhesive Vinyl
- PU leather
- Acetate
Check out these material settings from xTool. This page will be updated regularly!
I will be linking these to more in-depth tutorials on each material as I finish them! Be sure to sign up for my xTool emails so you don’t miss one! There are several where I found I had to adjust the settings in order to get the best cut! I will include these changes in my posts!
Why the blade and not the laser?
The laser can leave scorched or burned edges. The blade leaves clean cuts on your material. Choose the blade when working with more delicate materials like iron-on, adhesive vinyl, PU leather, and thin filmed acetate.
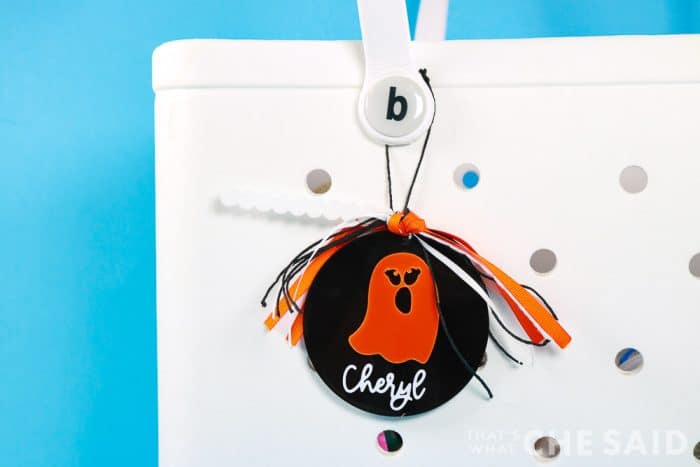
Here is an adorable Bogg Bag Tag that I created with 2 different colors of Acrylic and some adhesive vinyl. Here I used both the laser and the blade for this project. As you can see the xTool had no issues cutting the adhesive vinyl, even the small areas inside the loops of the letters of my name.
NOTE: I had some issues with the blade not cutting in the same location as the live view showed. I did some reading and realized you are supposed to calibrate the blade. Once I ran the calibration software and restarted XCS, the blade cut in the same location as the file was placed on the live view.
The MAJOR thing to point out is that in order to calibrate the blade, I had to download separate calibration software and this software is only offered for windows computers. Mac users are out of luck and that is no Bueno in my opinion!
Another thing is that after a few days, I had to run the calibration software AGAIN. This is pretty frustrating. This is definitely not something I have to do with my Cricut or Silhouette.
Laser Cutting Materials
Again, I have not tested all the possible materials yet, but here is what I have tested so far and how they worked! Stay tuned for detailed tutorials on each of these materials and I will link them below as I finish the posts!
- Basswood
- Draftboard
- Walnut
- Maple
- Cherry
- Some Acrylic: Black, Yellow, Orange, Green.
It is important to remove the blade housing from the laser module before cutting with the laser.
Also, use the prism risers under your material.
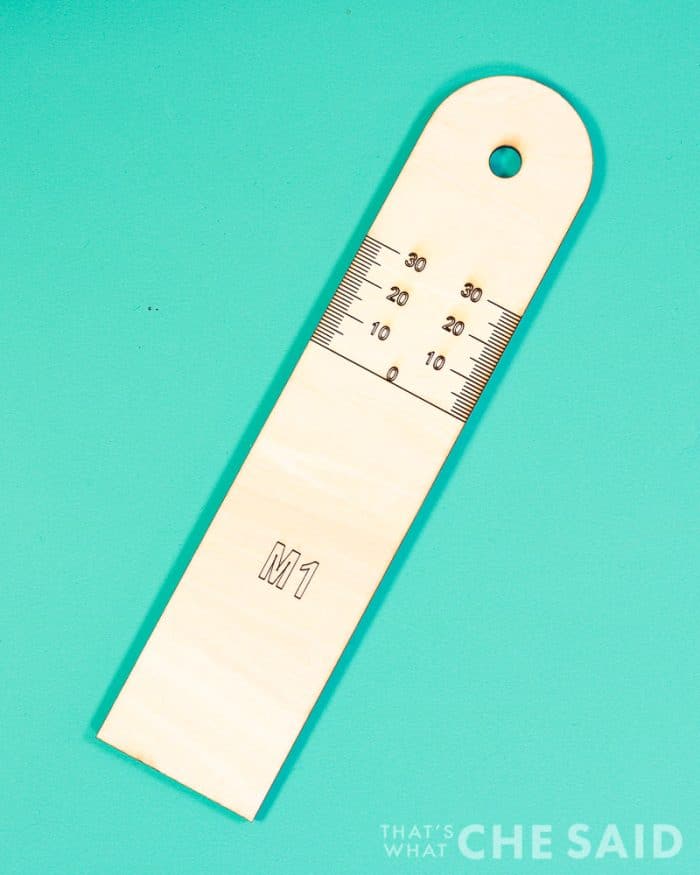
BASSWOOD: I easily cut and scored this M1 Ruler. (this helps with focus measurements for the laser if it cannot auto-focus)
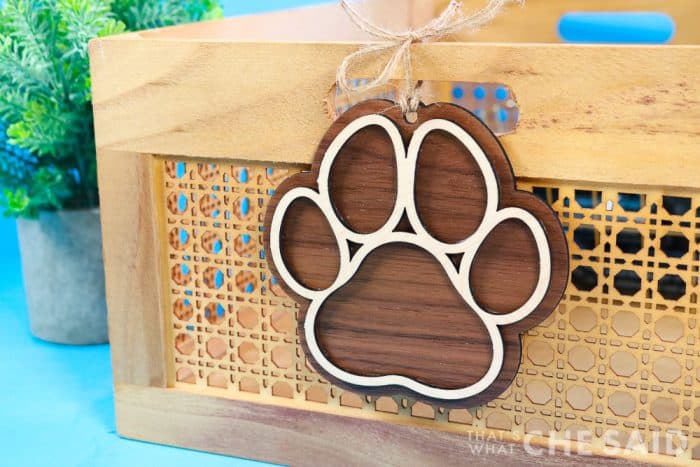
WALNUT & MAPLE: Here you can see an adorable paw print tag I created for my dog’s bin in my drop zone! The back is cut from walnut and the front piece is cut from Maple hardwood. This tag can also be used as an ornament and you could personalize it with an engraved or scored name. Detailed tutorial coming soon!
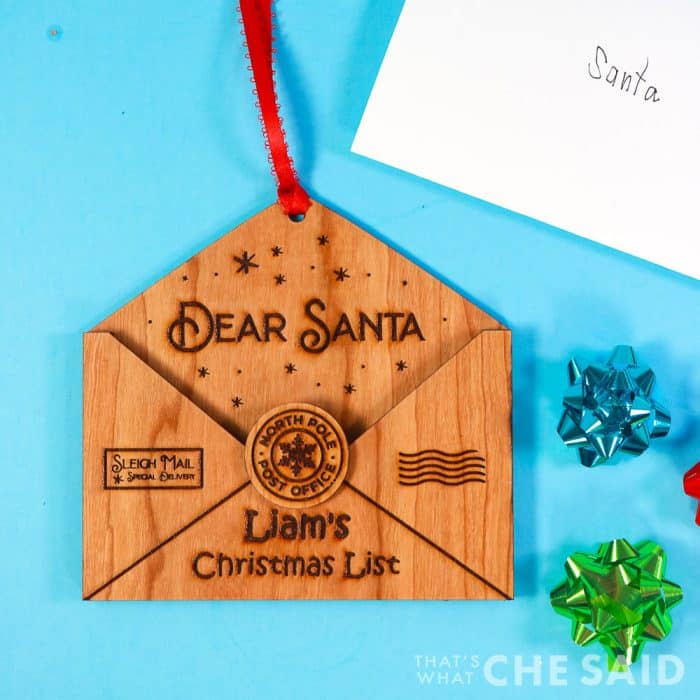
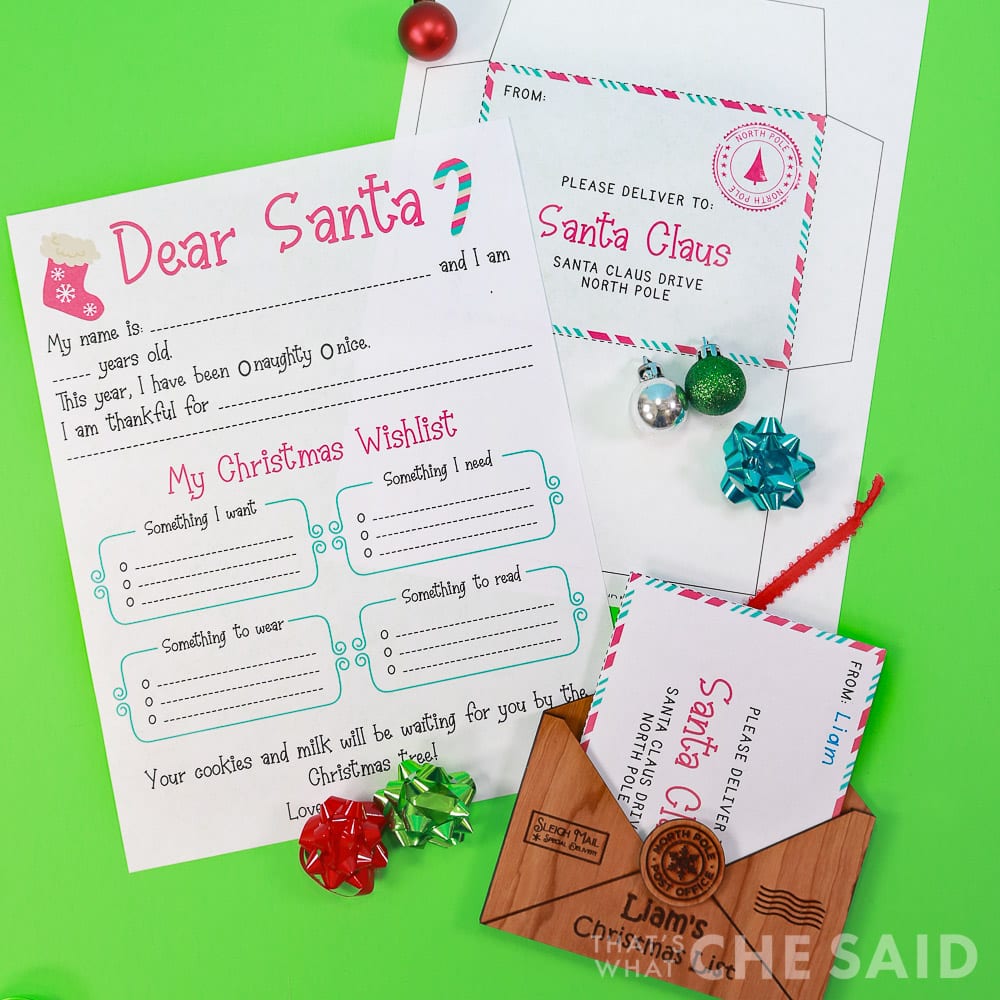
CHERRY: This super cute and fun Santa’s Letter ornament was easily cut and engraved using Cherry wood! How cute is this for your littles?
ACRYLIC: I cut these amazing spider teardrop earrings from black acrylic with ease, even with the segmenting details on the spider’s legs! Also, note the tag above that I made with acrylic and adhesive vinyl! Here is the tutorial for these Acrylic Spider Earrings and a free Halloween Earrings SVG!
Engraving materials
Check back often as I will be constantly updating this list! Bookmark it if needed!
- Basswood
- Draftboard
- Walnut – this did not engrave great
- Cherry
- Maple
- Acrylic
- Leather
- Cutting Boards
- Slate Coasters
- Cork
It is important to remove the blade housing from the laser module before engraving with the laser.
There is no need for use of the prism risers while engraving.
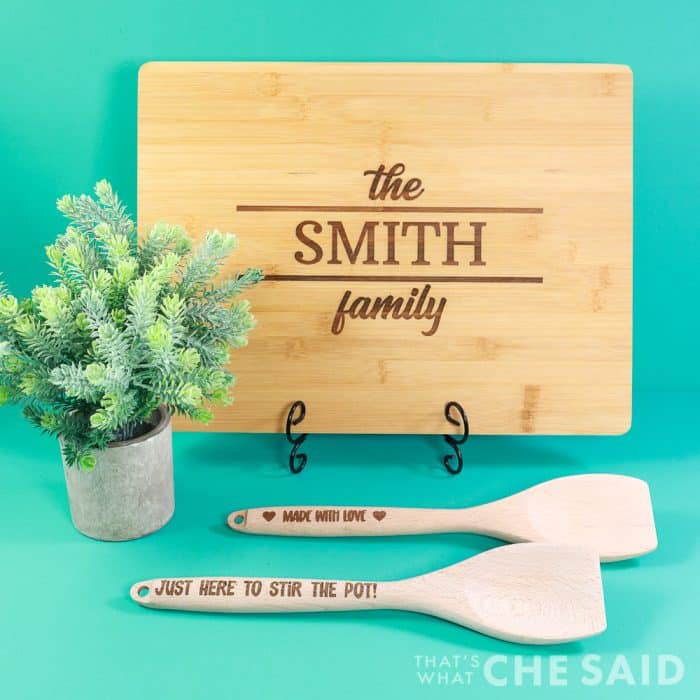
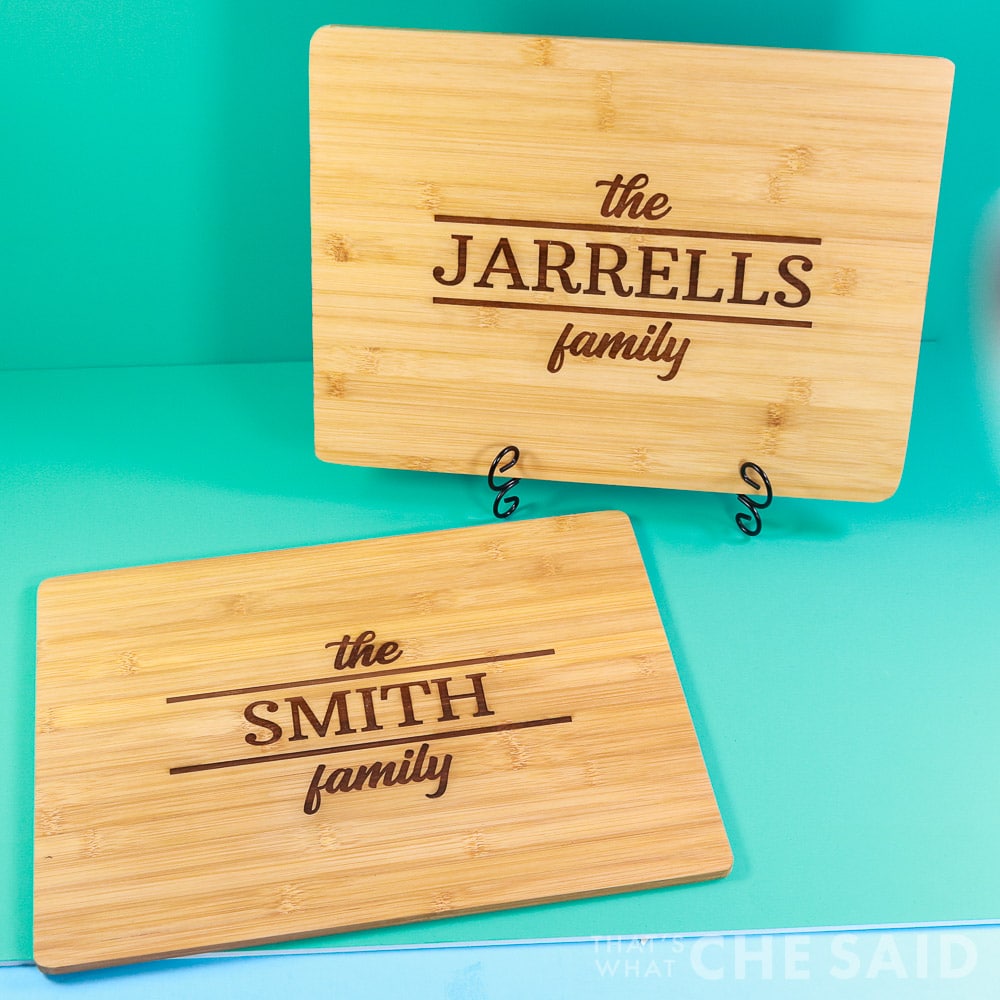
You can see in the laser cutting section that basswood and cherry are engraved amazingly. The laser engraver option knocked out these engraved bamboo cutting boards and they are absolutely beautiful! I am so excited about these!
I can’t wait to try slate coasters next! If you want to see how they turn out, be sure you are on my xTool email list!
xTool M1 Accessories
I mentioned above that you can find a smoke purifier as an accessory for the xTool M1. The smoke purifier acts as a more powerful exhaust fan and filter and is used when you cannot vent outdoors. Other functionality accessories include air assist (reduces scorch marks on wood cutting and engraving) along with the riser base and honeycomb tray. The riser base encloses your laser box when you remove the base plate to process larger or taller items. It helps keep the smoke and exhaust inside the box to vent. The honeycomb replaces the triangle prisms, both are used to allow airflow around your material to reduce scorch marks and burns.
The most notable feature-based accessory is the Rotary Attachment. The RA2 Pro Rotary Tool for engraving cylindrical objects! I was lucky enough to receive an RA2 Pro and will be testing it out shortly and will update this post with a link. The RA2 Pro has a roller system for engraving cylinders along with a chuck, sphere, and ring rotary system that can engrave rings, tumblers, rolling pins, baseballs, and more! Neither the Glowforge nor a Cricut/Silhouette can handle curved and cylindrical objects so I feel like this just opens a new ballpark!
ADDITIONAL SUPPLIES NEEDED:
There are a few more supplies you will need that will help with operation and maintenance of the M1
- Household fire extinguisher – Safety First!
- Rubbing Alcohol
- Q-tips
- Masking Tape
xTool M1 Compared to Cricut/Silhouette
I have used my Cricut/Silhouette machines (and love them) for over 10 years. I am well aware that neither of these machines has a laser so how do you compare, right? What I am discussing is if the xTool M1 can take your crafting to the next level or not and the answer is yes!
Even though the Cricut Maker has an adaptive tool system (knife blade, engraving tip, scoring wheel, and wave cutter), the xTool laser can cut a vastly larger breadth of materials. Not only the ability to cut them but much faster and more efficiently. Same with the engraving. The xTool can do both more easily, and accurately with the live view camera and more efficiently on time and number of passes than if using the Cricut engraving tip.
The larger work area is a plus as the ability to add accessories in order to rotary engrave. There is not currently any way to rotary engrave on a Cricut or Silhouette machine.
The Cricut & Silhouette win in regards to scoring cardstock though. If you are heavy in paper crafts, there is no way to score the paper for crisp folds. You would need to make a serrated cut line and we all know this is different than a score. You can score using the laser on wood or acrylic.
I also feel the Cricut & Silhouette machines also win in terms of blade cutting. I do not love that I have to run the blade calibration every few days to ensure that the placement of the cuts matches the placement of the camera live view on the xTool. Who has time for that?
I really hope in future updates that this can be addressed and rectified.
Do I feel this machine gives you more options in terms of craft projects and items to sell? YES! I also think the price point of the less expensive laser puts this 3-in-1 machine at the forefront for those starting out or those who cannot afford the much pricier CO2 lasers in addition to a cutting machine.
Where to Purchase an xTool M1
You may find the xTool M1 on both xTool.com as well as Amazon! You can find everything in my Amazon Storefront including materials I have tried and tested!
xTool M1 Projects
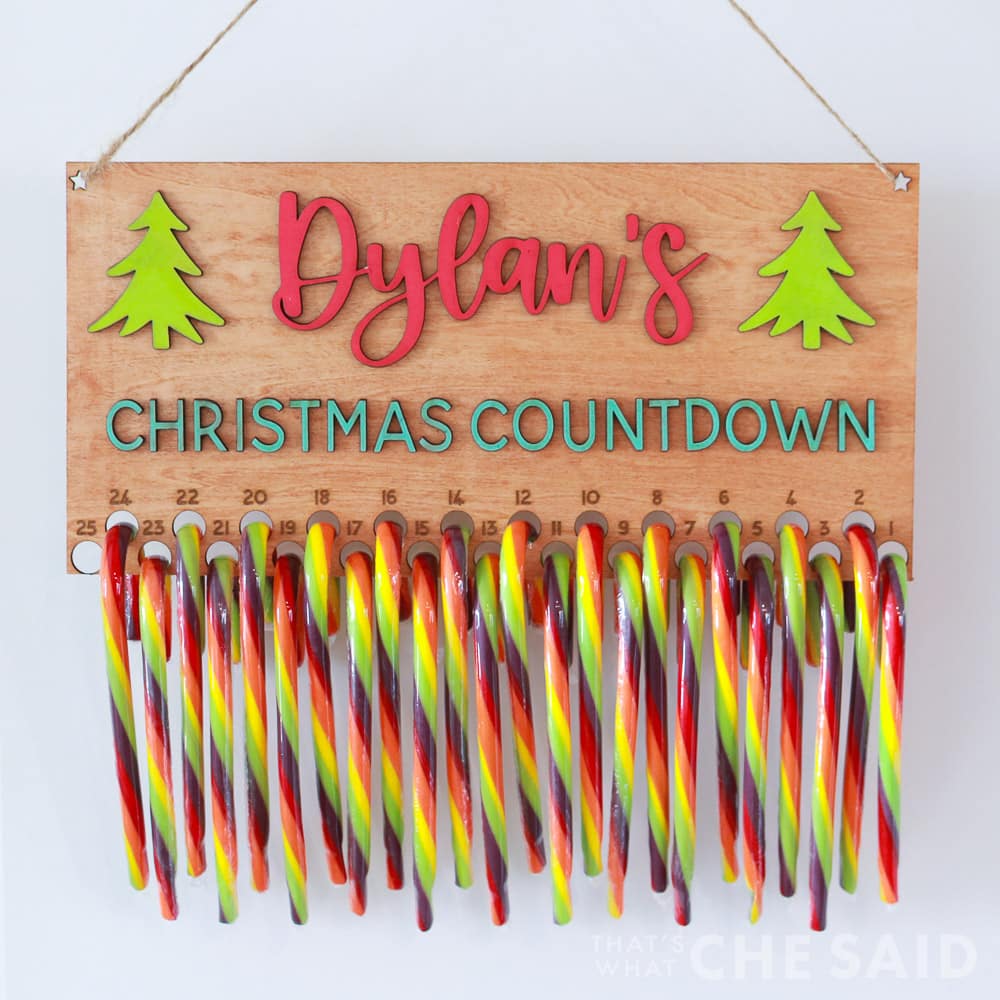
All project tutorials will be added here as they are completed! This machine is a great way to make projects to sell as well!







Leave A Reply!