The newest addition to my craft repertoire has arrived and I am so thrilled to give you my honest review of the xtool P2 55W CO2 Laser Cutter. Do you need it in your craft room as well? Let’s find out! We will discuss the machine itself, what you can do with it, and discuss if you should consider adding this CO2 laser to your craft machine family!
xTool is probably not a new name for you if you have been around here for a while. You may remember my review of the xTool M1 Hybrid laser/Blade Cutter. The M1 machine is a diode laser and a definite step up from your Cricut or Silhouette electronic cutting machine. I feel the P2 is a step up from the M1 in terms of capabilities and the additional materials you can cut and engrave.
So now what about this CO2 laser cutter we are talking about? Let’s get to it! The xTool 55W P2 CO2 Laser Cutter is an investment so how do you know it is right for you? Here are some things to consider when making the decision to purchase for yourself.
TOPICS COVERED IN THIS REVIEW POST
- What is the xTool P2 CO2 Laser Cutter?
- What are the specifications and capabilities of the Xtool P2 55W CO2 Laser Cutter?
- What’s in the box?
- What software is compatible with the Xtool P2 Laser Cutter?
- What safety features does the Xtool P2 Laser Cutter offer?
- Is training or technical support available for the Xtool P2 Laser Cutter?
- Does the Xtool P2 Laser Cutter come with a warranty?
- Accessories
- What Materials Can Be Used with the xTool P2 CO2 Laser?
- How to Operate an xTool P2 CO2 Laser Cutter
- What is the pricing and availability of the Xtool P2 Laser Cutter?
- Brief M1 vs P2 Comparison
- Final Personal Thoughts
- P2 Project Ideas
What Is the xTool P2 CO2 Laser Cutter?
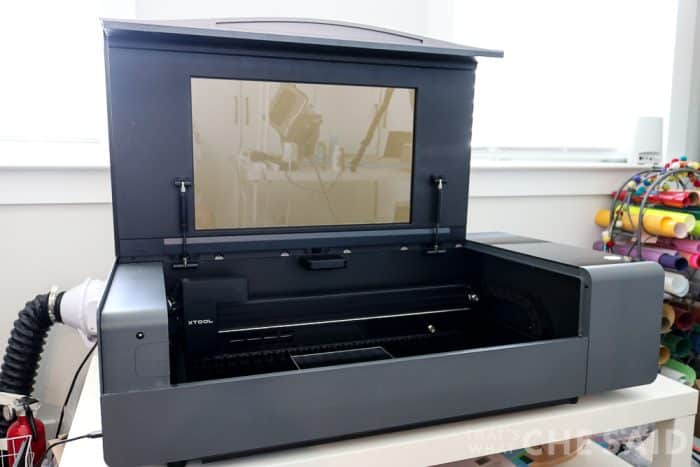
The P2 55W CO2 laser is xTool brand’s powerful smart desktop CO2 laser. The laser is fully enclosed and powerful enough for professional use and user-friendly enough for a hobbyist.
The P2 laser cutter is a Carbon Dioxide (CO2) laser. CO2 laser works by exciting CO2 molecules to generate a coherent beam of light at a specific frequency (typically between 9,300 and 10,600 nm). CO2 lasers are the highest-power continuous wave lasers.
The laser allows for precise cutting, scoring, and engraving of many materials.
What are the specifications and capabilities of the Xtool P2 55W CO2 Laser Cutter?
Understanding the machine’s cutting abilities, engraving abilities, cutting area, and selection of materials will give you an idea of what types of projects you can accomplish with this type of laser cutter and better help you make a decision if it is right for you!
P2 CO2 Laser Cutter Specifications
The laser is shipped in excellent packaging. My UPS guy dropped mine off the dolly in my front yard (facepalm) and it was not harmed at all.
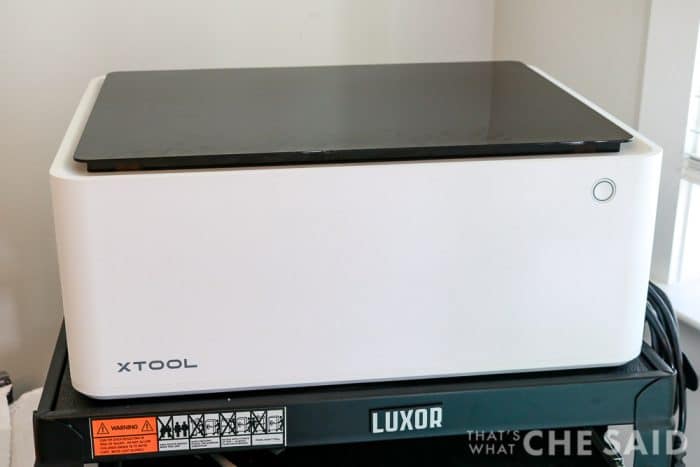
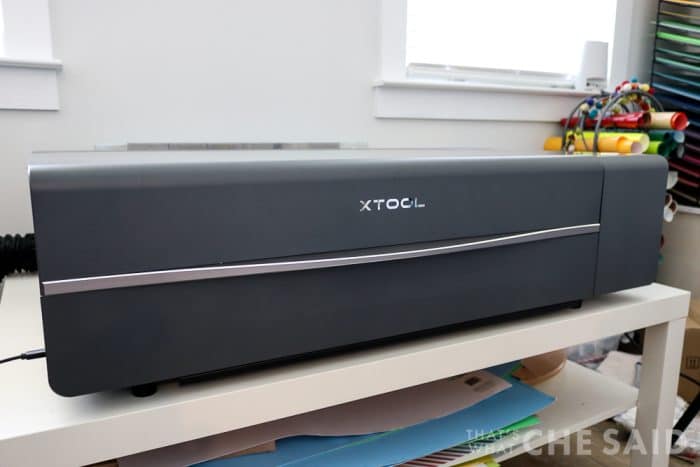
The machine itself is 39.4″×25.1″×10.6″ (1000×639×268mm) and weighs roughly 100 lbs (45kg). I had my husband help me lift it out of the box and onto my work table and we did that easily. You will need to account for the larger footprint in your work area.
The machine comes pre-assembled, minus needing to fill the glass laser tube with water and/or a water/antifreeze mixture depending on where you live. The antifreeze is included with the machine and xTool provides you with all the needed tools and directions in order to complete this task.
The only other assembly is to clamp the 3-inch hose onto the exhaust port on the back of the machine. In my opinion, xTool provided a much better “getting started guide” with this machine. It shows all the parts of the machine and is clear and concise.
| Product Info | Product Output |
|---|---|
| Power | 55W |
| Max Engraving Speed | 600mm/s |
| Processing Precision | 0.01mm |
| Z-Axis Movement | 3″ (75mm) |
| Lifespan | 6000~8000h |
| Laser Spot | 0.15×0.2mm |
P2 Work Area
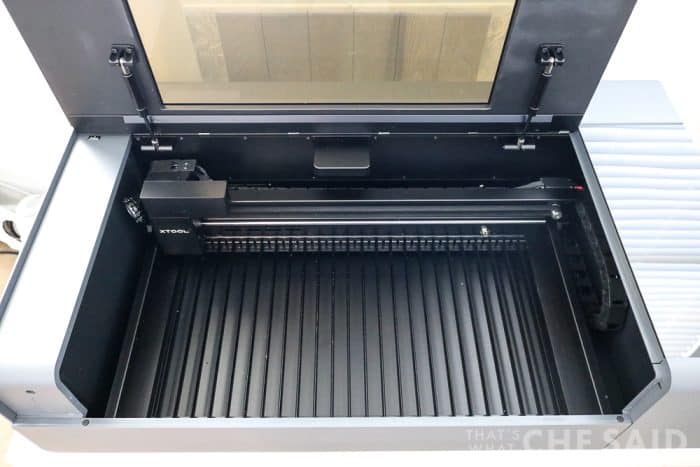
The bed size of the P2 is 26.7″x14.1″ with a processing area of 23.6″ x 12.1″. Maximum workpiece height (how tall your project can be) with the tray is 2.5″ and it is 2.7″ without the tray. If you add the riser base, the maximum work height is 8.5″. The riser base is an accessory that will be discussed later!
AI Camera
The xTool P2 has dual 16MP cameras. A panoramic camera provides a live preview as well as a close-range camera. The vision precision is 0.3mm allowing you to engrave on a toothpick! (see video on xTool’s site). The cameras are 1000 dpi and autofocus. These features allow you to easily move your designs to the precise location you want to cut or engrave on your material.
Dual Focal Measurements
The P2 allows for both auto-measure and manual focal point measurements. These measurements are necessary to tell the machine how tall your item is. It tells the laser module how far the laser needs to extend from the module in order to successfully cut or engrave your item based on different heights.
Built In Accessories
I mentioned the riser base above as an additional accessory however there are some accessories that are built-in to the xTool P2 Laser. These accessories are the 1.4L water cooling system (discussed above), air assist to help with char and burn marks during cutting and engraving, slats for a bed to allow airflow over and under to reduce 2nd burn, and a 145CFM exhaust fan to help with smells and fumes.
P2 Laser Cutter Capabilities
Fast Cutting and Engraving Times
The P2 has amazing cutting and engraving speeds compared to other machines. The P2 boasts a 600 mm/s maximum engraving speed and 6x faster cutting speed compared to a 20W diode laser! Cut Basswood at 35mm/s and acrylic at 25mm/s. These speeds are excellent if you are using the machine for a small business!
In addition to cutting and engraving, which we will discuss further, the xTool P2 CO2 laser cutter has some other amazing capabilities.
Automatic Pass-Through
The xTool P2 has a pass-through ability. What does this mean for you? It means you can create projects larger than the processing area (noted above) within the bed size. It means you can cut and engrave extra-length materials such as large wall signs and names (think nursery names) as well as front door signs and so much more. They offer a conveyor accessory to make this a breeze!
Curved Surface Engraving
Use the smart 3D modeling capabilities of the camera and XCS to be able to engrave on curved surfaces. The program constructs 3D models of your project base and knows how to follow those models to engrave on surfaces that are not flat. This is AMAZING! I hope to do a full tutorial on this in the future!
Batch Engraving
I am SO EXCITED about this feature. In the past, when batching projects, it would require you to create a jig of sorts. The new technology recognizes shapes through the camera and now will fill the design on each in the perfect placement! Hello, efficiency!
What’s included in the box?
- P2 Laser Machine
- Power Adapter & Cord
- USB-C Cable
- Exhaust Pipe
- Exhaust Pipe Clamp
- User Manual & Quick Start Guide
- Small Tools for Assembly and Calibration
- Antifreeze
- Funnel
- Basswood sheets
- Clear Acrylic sheets
In addition to the above, you will also need filtered water and a measuring cup. The getting started guide has a chart for you to add the anti-freeze and water to the cooling tube. Follow those directions.
What Software is Compatible with the xTool P2 CO2 Laser?
The P2 machine is compatible with both XCS (xTool Creative Space) as well as LightBurn.
XCS is free software and I used the same thing with my xTool M1 machine. LightBurn is a paid program.
You can download XCS and play around with it even not having a machine. The camera views will not work but you can see it has operating similarities to Cricut Design Space and Silhouette Studio software.
Check out my post here on How to Upload Files such as SVGs into XCS.
What Safety Features Does the xTool P2 CO2 Laser Cutter Have?
Lasers are not something to take lightly and safety should be noted not only for yourself but for any children and pets in your home. Understanding the safety features of the machine will help you decide if this machine is right for you!
- Enclosed Design: With a laser box feature the smoke and exhaust is kept within the laser box. This laser box also keeps hands away from the laser itself.
- Automatic Lock: The hinged door of the machine will automatically lock during processing. This is great with kids and pets so that the lid is not accidentally opened exposing it to the exhaust and laser.
- Emergency Stop: There is a red emergency stop pushbutton located on the right side of the machine for quick shutdown in case of emergency.
- Hydraulic Support on Lid: The hydraulic support holds the lid at a 70-degree angle open and has a slow-steady close so it will not fall on your head or fingers.
- Multiple-Warning System: Alerts for over-temperature of the motherboard, cooling system, lack of cooling water, and more to guarantee the proper functioning of the machine.
- Fire Safety Compatible. xTool sells an accessory that is the fire safety set. It will detect a flame and trigger an alarm and extinguish the fire if one occurs.
You can read more about Safety here.
Is Training or Technical Support Available for the Xtool P2 Laser Cutter?
Training for the P2
Laser cutters can have a learning curve, so inquire about the availability of training resources or technical support from the manufacturer or authorized dealers. Understanding the level of assistance provided can be crucial, especially if you’re new to laser cutting.
As with any new toy, you will need to learn how to use it! It won’t do you any good sitting in the box or on a table because you are not confident in operating it.
You can find training resources in several places. xTool itself has a “Learn” tab on its main navigation bar on its website. They have how-to tutorials and a YouTube channel.
You may also find tutorials right here on my site! You can sign up for my xTool-related emails and get new tutorials and project ideas sent straight to your inbox. This will include my blog posts and new YouTube videos!
You can also find many tutorials on YouTube as well as getting information from xTool’s Facebook page. Here is the Facebook group for the P2!
Technical Support
I haven’t had to contact xTool techincal support for anything but they do have a “Support‘ tab on their website that contains contact information, Help Center, an xTool Community, and Material Settings amongst other information.
Does the P2 Come With a Warranty?
The P2 machine comes with a limited warranty. You can read the details of what is covered here.
You do have the ability to order xTool Care for the P2. You will need to purchase this when you purchase the machine or within 1 month of purchase. Note purchase date, not 1 month after the delivery date.
xTool Care provides coverage for nearly 90% of machine failures, 2-way free shipping, 12h quick response to software and hardware problems, 1-on-1 service, and 12 months effective warranty after the standard warranty expires.
Accessories for the P2
I have touched on available accessories above but here is the complete list. You do not need to order any accessories in order to use the xTool P2 out of the box.
- Riser Base: this is a platform that lifts the laser taller. This is needed if using thicker materials as well as with the RA2 Rotary Attachment.
- Smoke Purifier – This is helpful if you are using the P2 in a non -ventilated environment. If you cannot exhaust the machine to the outdoors this is your option. You will need to regularly replace the filters.
- RA2 Rotary Attachment – Engrave on tumblers, balls, round surfaces, glasses, and more. The rotary engraving diameter with the riser base is 1-180 mm and 3-50mm without the riser base. The RA2 is also functional on the M1 machine so if you had one for that machine, you do not need another for the P2.
- Conveyor System – Autofeed conveyor helps when using the passthrough feature to meter your substrate in and out of the P2
- Fire Safety Set – As discussed above, the fire safety set will detect a flame and trigger an alarm and extinguish the fire if one occurs.
What Materials are Compatible with the P2 Laser Cutter?
This is certainly not a complete list but I am going to list some of the most popular materials for crafters and small business owners. This list will be ever growing and you can find the official list of materials on xTool’s site here.
What Materials Can the P2 Laser Cut?
You can check out all Materials here.
Here is a sampling (but not limited to) of the items that can be cut with the laser on the xTool P2.
- Plywood
- Draftboard
- Basswood
- Pine
- Cherry
- Walnut
- Acrylic (including clear, blue, and white!)
- Corrugated Paper
- Leather
- Kraft Paper
What Materials Can the P2 Laser Engrave & Score?
Here is a sampling (but not limited to) of the items that can be engraved and scored with the laser on the xTool P2.
- Plywood
- Draftboard
- Basswood
- Pine
- Cherry
- Walnut
- Cardboard
- Cork
- Jewelry
- Acrylic (including clear, blue, and white!)
- Corrugated Paper
- Leather
- Kraft Paper
- Fiberboard
- Slate and Rock Coaster
- Clear Glass
- Mirrors
- Silicone
How to Operate an xTool P2 Laser Cutter
You will find detailed instructions and projects on my site but here is a brief overview of how to operate the xTool P2 CO2 Laser.
- Turn on the P2 machine
- Open XCS and connect to the P2 Machine.
- Place your blank in the bed of the P2
- In XCS, click “auto-measure” to measure the focal distance. The camera view will adjust.
- Import your design or create your design.
- Select your material.
- Set your output for the design (Score, Engrave, Cut)
- Click Process.
- Click Start and then Press the button on the P2.
How Much Does an xTool P2 Laser Cutter Cost?
Currently, the xTool P2 CO2 Laser Cutter is $4599.00. There is a limited stock that is shipping in 1-3 business days for the US. When those run out they will be running preorders again for the next batch.
The current price is $400 off the regular price of $4999.00
How Does the P2 compare to the M1?
I will do a more in-depth comparison but for starters here are my thoughts. The comparison is for a crafter, not between machines since the M1 is a diode laser and the P2 is a CO2 laser.
I love my M1 machine. Love, love, love. However, there are some limitations such as it cannot cut all colors of acrylic (clear, white, blue, some reds, pinks, some purples). It also is a 10W diode laser so cutting thicker materials took many passes and was slow, running the risk of scorching or burn marks on the edges.
The M1 does have the blade option, however, I never had great success with that and stuck to my Cricut or Silhouette for blade cutting. The M1 is compact, and a great addition for those who want to do more than what their Cricut or Silhouette is capable of, but who are sticking to this as a hobby.
The P2 can handle all acrylics, including clear, and thicknesses up to 20mm. It is faster than the M1 so if you are looking to use this machine for a small business, this is a huge benefit. The larger size means larger projects as well.
If I were putting things in order it would be Cricut/Silhouette < xTool M1 < xtool P2. All three are investments so it is important to focus on what you want your endgame to be. Personal crafting, enjoying a hobby? I’d go with an M1. Small Business, testing the crafting limits, need speed and more size? I’d go for the P2.
Brief M1 vs P2 Comparison
Comparing the two lasers is like comparing apples to oranges because they are two different laser types, however, if you are coming from a Cricut or Silhouette and would like to know which you should move on to, here is a quick comparison!
| Cricut/Silhouette | xTool M1 | xTool P2 | |
|---|---|---|---|
| Processing Area | 11.5×23.5″ – Cricut 12″x24″ – Silhouette | 12″x15″ | 23.6″x12.1″ |
| Cuts Iron-On and Vinyl with blade | X | X | |
| Cuts Acrylic (Yellow, Orange, Green, Black, some Red) | X | X | |
| Cuts Acrylic (Clear, White, Blue, Purple, Pink, Glitter, Patterned) | X | ||
| Cuts and Engraves Basswood/Balsa Wood up to 2.4mm | X | X | X |
| Cuts and Engraves Wood 3mm to 6mm | X | X | |
| Cuts and Engraves Wood Single Pass up to 20mm | X | ||
| Enhanced Speed (great for small business use) | X | ||
| Cuts over 100 materials | X | X | X |
| Engrave Cylindrical Objects (with attachment) | X | X | |
| Engraves on Curved Surfaces | X | ||
| Camera View | X | X | |
| Large Project Capability | X | X |
Stay tuned for a much more in-depth comparison. I will link it here when it is complete!
Cheryl’s Personal Thoughts
P2 Pros
I don’t have a Glowforge to compare but I am pretty good at doing research as well as have friends who own a GF and with that noted, if I had the choice between the two machines, I would go with the xTool P2. The ability to use the rotary tool with the riser base as well as the automatic conveyor and the increased power wattage and the curved surface engraving technology seal the deal for me.
I adore that the P2 CO2 laser cuter can cut ALL colors of acrylic. That was a huge limitation for me when using the M1.
I also love that with the increased power means cutting takes less passes and cuts and engraves faster. I feel if I were using this machine for a business, I would be set with the P2.
I am really happy with this machine and do 100% recommend it even with the few cons below.
P2 Cons
xTool is constantly making updates to the XCS software which is amazing. I do find that the preset material settings for the P2 need tweaking. The preset materials settings for the M1 are on point but I find myself having to add more power, or reducing the speed on the P2 to achieve the same results so until xTool adjusts these settings know you will need to play around with them, or get them here on my site because I will share all I have tested! (They are constantly adding and testing settings)
When powered on there is a faint hum. When working, the fan is louder than I expected. I need to run the machine during waking hours as I think it would annoy my family, lol.
The working light inside the machine leaves much to be desired. If you are working with anything black or dark colored I have to use washi tape on the edges because you cannot see the material against the black slats and black crumb tray.
xTool P2 Projects
Here are a few projects I whipped up while I was testing settings and finding out exactly what this awesome machine can do! Be sure to check out my FULL list of xTool Projects, because what can be done on the M1 can also be done on the P2 (and faster at that!)
Don’t Miss Out!
Get more xTool Tutorials, Project and Roundups straight to your inbox!
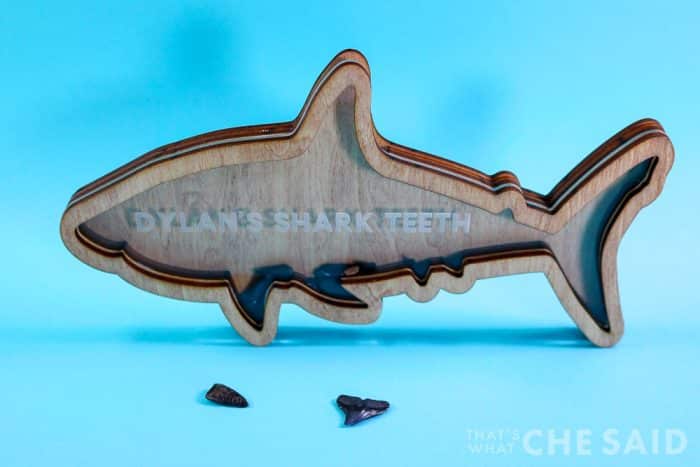
Shark Tooth Bank
I utilized the cut and engrave feature on clear acrylic (yay!) paired with cut plywood to create this fun way to collect shark teeth for a beach trip. You can do the same idea for a money bank or shell box! Clear acrylic was not able to be cut on the M1 (diode laser) so I am so thrilled that the P2 has this capability!
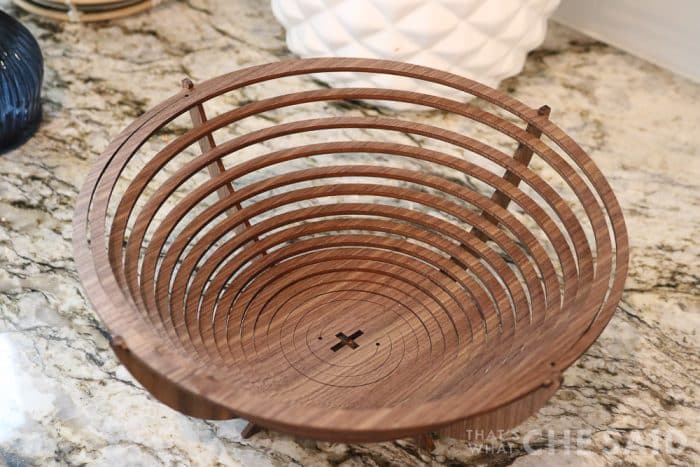
Wooden Bowl
Yep, you read that correctly. I was easily able to cut through 6mm Walnut in one pass to create this fun 3D bowl. I made this bowl on the M1 also and it took several passes, the P2 cut through in one pass and at a fraction of the time the M1 took!
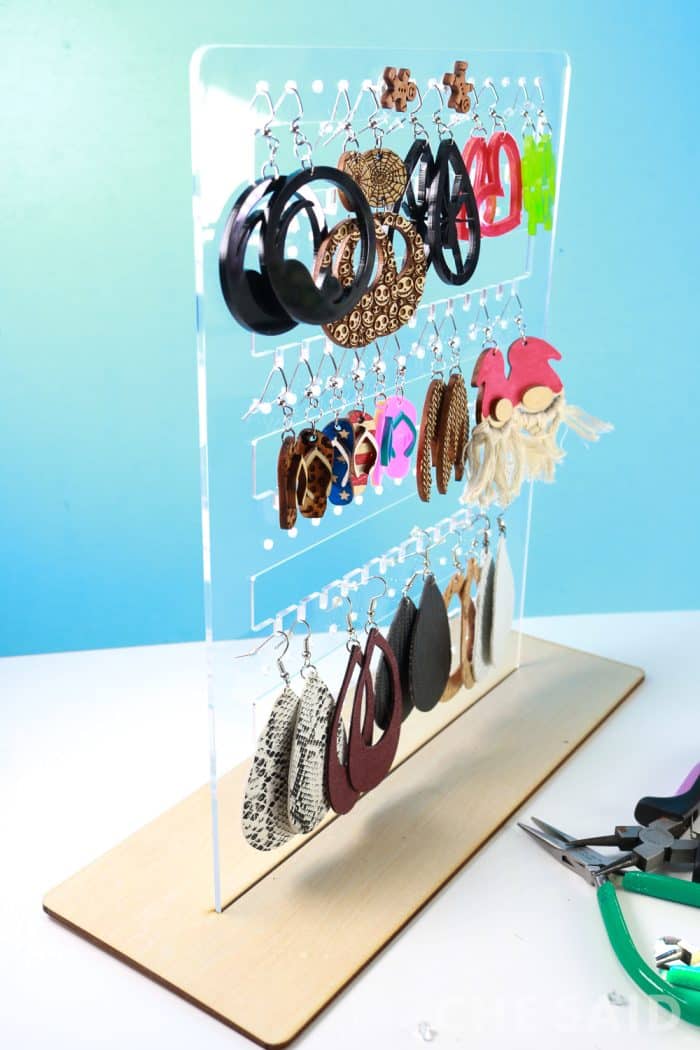
Clear Acrylic Earring Stand and Earrings
Not only did I cut this earring stand from clear acrylic, but I made each pair using the P2. Engraved and cut wooden earrings, leather, cork, black, red, green, translucent pink and blue acrylics! The flip flops kills me! I love them






Leave A Reply!