So, I have yet to decorate a nursery. That’s right, TWO babies down and ZERO nursery designs under my belt. When Michael was born we had a 3 bedroom house in Illinois, and just set up shop in one of the bedrooms. The one we used as an office to be exact and the only baby related things we did to change the room in there was add a crib, changing table and dresser. All of which we got in a box from Wal-mart…don’t get me started. When Ryan was born we lived in Minnesota, again in a 3 bedroom house. However this house was a tri-level so 1 bedroom was in the lowest level and 2 bedrooms in the 3rd level. There was no way we were moving Micheal down to the lower level bedroom so we just scooched in a crib in Michael’s room and Ryan set up camp there. The walls were already painted blue when we moved in and that was that!
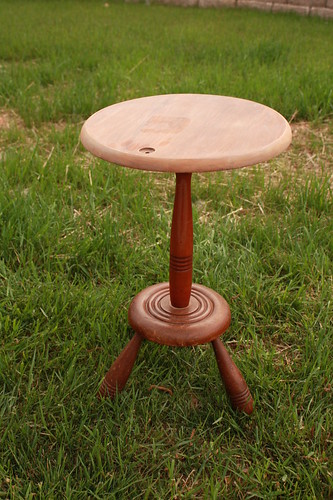
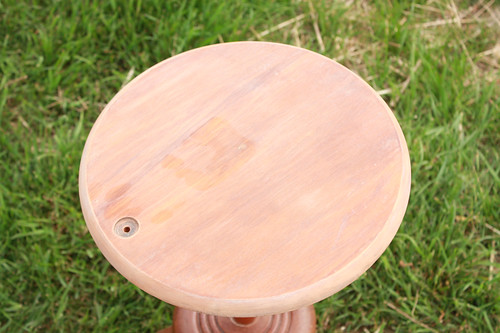
Now we are renting a brand new townhouse. Renting…so no painting stripes, adding molding, installing a tree shelving unit or any of that really fun room design stuff for me still. I WANT TO DECORATE A NURSERY DAMMIT! I want to go all Sarah Richardson on the thing! I decided that I would decorate Ryan a room that is as best as I can decorate while renting. I can’t paint the walls or do anything permanent so I will focus on accessories! They will need to be budget friendly design elements as I am trying my best to continue to STAY AT HOME and not go back to my ALL MALE PROFESSION! Insert my thrift store table! I needed a small table for next to the glider/rocker we have. I found this cute, quirky one at a resale shop. (I started sanding it before I thought to snap a picture so the top is already sanded)
In its previous life it was one of those 70’s lamp/table combos. It had a hole in the table top where you could clearly see where the cord and lamp base attached.
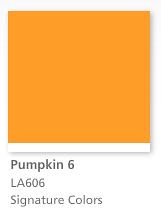
I started by sanding the entire thing with 80 grit (course) sand paper to get off the solid coat of poly that haphazardly was sloshed all over it. I then wiped down the table to get rid of all the dust and was sure to clean the hole in the table well. I let it dry completely and then filled the hole with wood filler, filling it slightly higher than the table top so that I could sand again. I let dry overnight because it was such a deep hole. The next morning I sanded the table top again with 150 (fine) grit sand paper and again wiped clean with a damp cloth. I decided on a bright orange table to go with my lime green room-darkening curtains I got for a STEAL at Target! I went to Lowe’s and just bought one of those new “sample” sizes they have of Valspar Pumpkin #6.
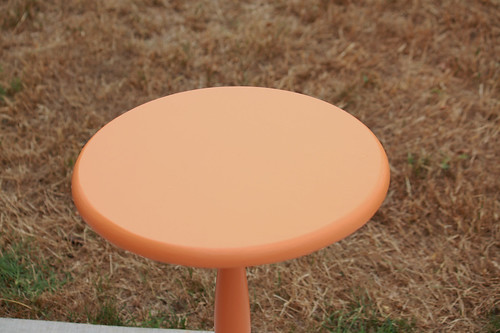
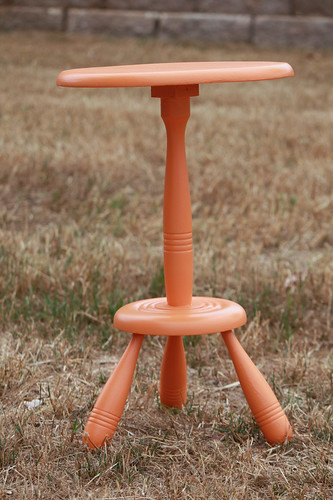
I came home and painted about 3 coats. You can no longer tell where the hole was and I think the bright orange color makes the quirky design of the legs even more fabulous!
It works perfectly in Ryan’s soon to be awesomely decorated nursery! (He is one year old now…is it still called a nursery or just a room?) Best part of the entire project??? The table was only $3! Yep! Three dollars! Uno, dos, tres amigos! That makes me love it even more!!!!
(Notice the grass is green in the before pictures and burnt to a dried crisp in the finished product? Yeah…it took me a while to finish this small project because the weather here has been about 2 degrees shy of the face of the sun.)


Comments & Reviews
Mark Massey says
If you had wanted to keep the natural wood look, you could have saved any of your sanded wood dust and mixed it into the filler putty to give a more ‘natural’ look. Paint covers a multitude of problems.
Cheryl says
I’ll remember that next time we want to keep the wood! Great idea! For this table the moment I saw it I knew it had to be bright orange! ;)