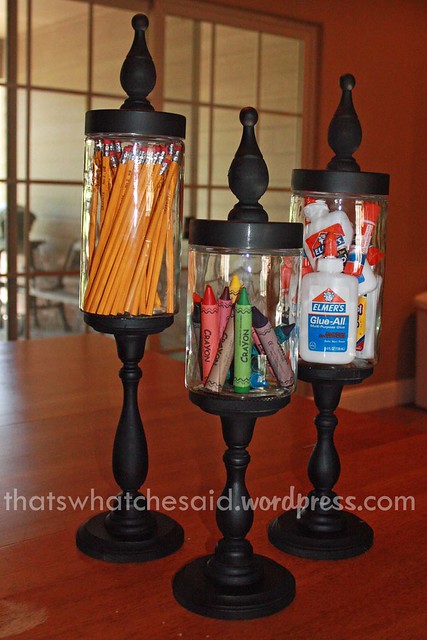
I’ll just dive right in! I love Apothecary jars. Love, Love, LOVE them! Here is my take on making your own! Really easy to do, just time consuming because you have to wait for things to dry.
Items Needed to Make Mine:
- (3) Glass Jars
- (3) unfinished wooden Candle Sticks
- (3) 4″ unfinished wooden plaques
- (3) 3″ unfinished wooden plaques
- (3) unfinished wooden finials
- STRONG glue or Epoxy
- Spraypaint
1. Start out by removing all the price tags. This will take you forever! Goo Gone may also be your friend right now! Hobby Lobby is laughing at me right now because their damn SKU tags stick like mad to that damn unfinished wood! (Yes, I am bitter)
2. Glue the TOP of your base plaque to the BOTTOM of your candlestick. Let Dry. (tick, tick, tick)
3. Take your finial and glue it to the lid of your jar. Let dry. (tick, tick, tick, tick)
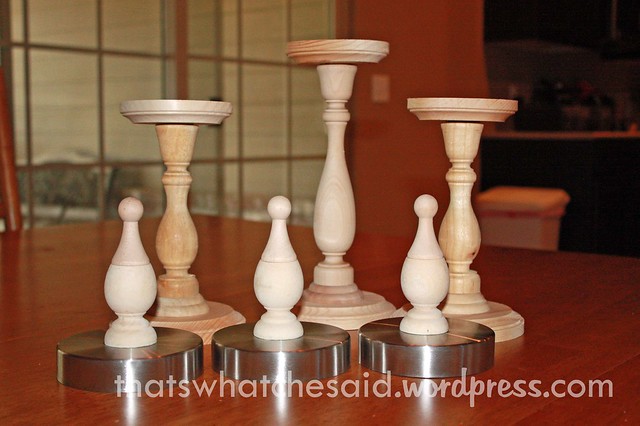
4. Take Base/Candlestick in Step 2 and glue TOP of candle stick to TOP of plaque, so that the Plaque’s larger side is facing up. You now have the base for your apothacary jars. Let dry (tick, toc, tick, toc, tick, toc)
You then have these guys:
5. Spray paint the finished bases and the lids. Work in light even coats and let first coat dry before reapplying. (seriously more waiting) Be sure to spray the top of the base well because your clear glass jar will sit on top and you won’t want to see unfinished wood there.
6. Glue the BOTTOM of your jars onto the TOP of the bases. Let dry. (Might as well make a drink at this point..you have to do more waiting!)
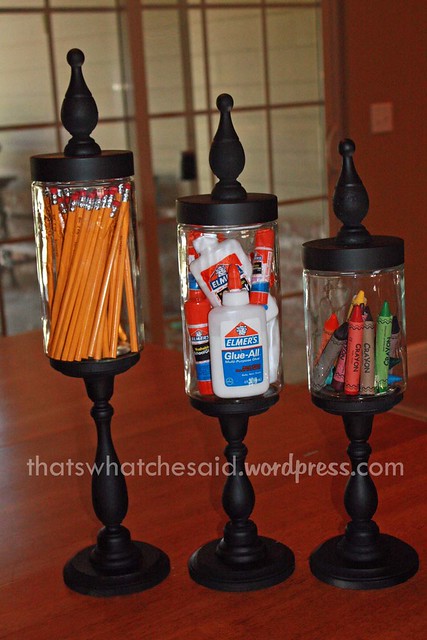
7. Finally the best part! Fill the jars!!! Since it is almost September, and to me, September is Back to School Month…I choose to fill mine with Pencils, Jumbo Crayons and Gluesticks and bottles!
You will see these little darlings again with their bellies full with different things for the different holidays! I already have plans for Halloween, Turkey Day and Christmas!! Can’t wait!
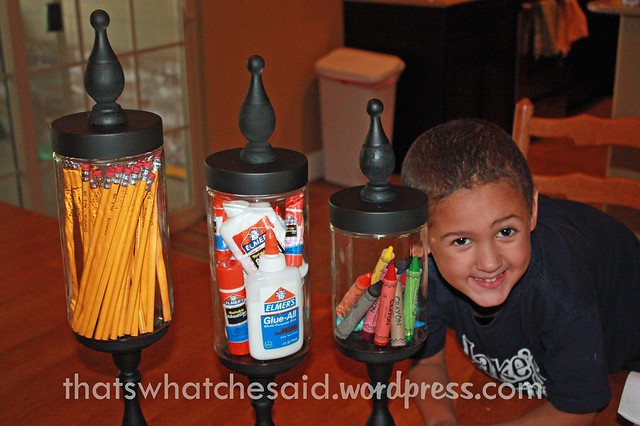
Oh and someone wanted some creative credit for the contents of the jars…
I love them! I hope you love yours as much also!
My Project Notes:
For the jars: I found mine at Hobby Lobby. You can do all the same size or mix and match. I decided with (2) medium size and (1) small size. The large size was just too tall. You can also use regular household jars (pickles, salsa, etc) I just preferred the width of the lids on these from Hobby Lobby
For the Candle Sticks: Heights are your preference again. You can go different heights or same. I did kind of the opposite of the jars and did (2) small and (1) large.
For the Plaques: These I found in the unfinished wood section of HL. They are to make plaques with. You will need a set of 3 to be your base of your candle stick and a set of 3 to be the base for your glass jar. Your size may differ from mine depending on the jars you use.
For the Finials: Your choice. I only had one choice at HL and these are it! They too are foudn in the unfinished wood section.1.
For the Glue: I used 9001. It reminded me of Rubber Cement and took forever to dry. It was nice because I could center the candle sticks on the plaques but I am impatient and did I mention it took FOR-EV-ER to dry?
For the Spraypaint: Choose a color already in your supply or one that matches your decor. Your choice. I went with both of the above and chose black. I had it and it matched!
Be sure to check out all of my DIY Apothecary Jars for each season! I also urge you to sign up for my posts to be delivered to your inbox! You don’t have to come to me, I’ll come to you…because I like you like that ;-)


Comments & Reviews
Laura @ Laura's Crafty Life says
These turned out cute! I have some I made (without lids) that are completely clear from Dollar Tree materials.
Cheryl says
That was my original intention Laura, to do all glass, but I couldn’t find what I was looking for exactly at Hobby Lobby for some reason (and in my price range). Our dollar store was hit by the tornado. I can’t wait for it’s return!!
kimberly says
I love how you filled them, very creative!
Kimberly @ The brown eyes have it
Cheryl says
Thanks Kimberly! I was hoping to fill them for each season! Let’s see if I do that, or if the pencils and glue are still in there at Christmas ;-)
Dee Burns says
Che, these turned out so good. You are one talented girl. I think they would look amazing with Flameless candles in them. I have these candles all through my house. They are on timers and come on and go off automatically. Thanks for the inspiration…again.
Dee B
Cheryl says
Thanks Dee! The flameless candles are a GREAT idea!
Ann says
These are so cute, great job! I would love to have you share them at my party, Restyled Sundays
Ann
Cheryl says
Thanks Ann! I love your blog! I linked up! Appreciate the invitation!
The Gunny Sack (@TheGunnySack) says
These are fabulous! I love their large size…I mean you can fit glue bottles in them! I want to invite you to join my brand, spankin new link party!
Cheryl says
Thanks so much! I headed over and linked up! I appreciate the invite! Thanks for stopping over!
Nicole says
Um, hello, I’m obsessed with this idea! Way to make something kid friendly and fun into an actually decorative feature of your home! Very cute and fun!
Cheryl says
Thanks Nicole! I am totally with you…I keep looking at what else I can turn into these jars :) Check back with me, I have fantastic ideas to fill them for the holidays :) Thanks for stopping over!
Miss Kitty says
Hi Cheryl! Thank you so much for this great tutorial on how to make apothecary jars. Your look wonderful. Can’t wait to see all the neat things that will be in them in the coming months. I saw your post over at “Glitter”.
Cheryl says
Thank you very much! I appreciate you stopping over! Come back again soon!
The Gunny Sack (@TheGunnySack) says
Thanks for linking up at my party. I feel like the new kid at school…worried no one would play with me so thanks for playing!
Cheryl says
No problem, Thanks for inviting me! I will play anytime! (your comment cracked me up by the way! I totally understand!)
Desiree Campbell says
Visiting your blog tonight… Thank you so much for linking to the “So you think you can blog” party.
I love this jars… great job!
Cheryl says
Thanks Desiree! “So you think you can blog” is a fabulous idea! I am super excited to read and discover new blogs through it!
Rachel @ Lines across my face says
I love these! I am featuring them on my facebook page today. Thanks for sharing.
http://www.facebook.com/pages/Lines-Across-My-Face/197428556982169
Rachel
Cheryl says
Thanks Rachel! I follow you on FB so I will check it out! Have a great day!
Jamie says
New to your blog; came over from today’s creative blog! love how these turned out. And I had to laugh at your response above about whether the pencils will still be in there at Christmas! That is so my house!
:)
Jamie
Cheryl says
Welcome Jamie! Thanks for stopping by, glad to have you! Yes, I have the best intentions, but sometimes things just never get done! (Mostly because i forget about them!) Hopefully since i announced that I have ideas to fill them on the blog, I will hold to it! Come back again soon!
Erica @ Doodles and Doilies says
Now way! That is great. I want to make some now. Thanks for sharing! I hope you will link this to my Delight Me party over at Doodles & Doilies.
Cheryl says
Thanks Erica. I will be sure to head on over! Please share a picture of yours (you can on my fb page) if you make them! I would love to see how they turned out!
karen says
Great take on apothacary jars! Come and link this with WorkShop Wednesday. I would love to feature it next week!
Cheryl says
Thanks for the invite Karen! I will head over! :)
Heather A. says
I have to say, I had to come check out your post when I saw the name of your blog. *snicker* love it! And the jars are very cute! I’ll have to follow so that I can poke around and see what other cool things you have here when I have more time (t-minus 10 minutes and counting before it’s time to get the kids ready for school). Heather @SimplyCottageLove
Cheryl says
Thanks Heather! I do hope you come back and look around! I appreciate you following along! I love friends!
Kristin says
Love these! Great job!Stopping by from {someday crafts}
Cheryl says
Thanks Kristen! I hope to see you again! Have a great day!
Susan @ Second Chances by Susan says
Great project…I just pinned them!
Cheryl says
Thanks so much Susan! You have mad skills yourself. I LOVE your Thrift Store Mirror you refinished. It looks amazing!
Lindsay says
I LOVE this! The height of the jars is one of my favorite things about them! Great job!
I would love to have you share this @ my link party, Show & Share–
http://southernlovely.blogspot.com/2011/08/show-share-3.html
Cheryl says
Thanks Lindsay for the invite! We were on vacation for the holiday weekend so I missed your party this week :( But I will be sure to be there next week! Thanks so much! I love your blog!
kathy says
What a clever idea and not only are they functional but fairly economical compared .
They will look great with something spooky for halloween. Dropping by for the first time, thanks for sharing. Kathy
Cheryl says
Thanks Kathy! They were super easy, the glue drying was the only part that took long! Thanks for stopping by and I hope to see you again!
Erin of HomeSavvyAtoZ.com says
These are awesome apothecary jars. I cannot believe they are DIY! Thank you so much for linking your post up at Savvy HomeMade Monday!
Cheryl says
Thanks for hosting Erin! Have a great day!
Ginger says
Featuring YOU over on my blog tonight. These were the top viewed link at my {wow me} wednesday party last week. :) Thanks so much for linking them up! Hope to see you back tonight.
Ginger@gingersnapcrafts.blogspot.com
http://gingersnapcrafts.blogspot.com/2011/09/wow-me-wednesday-15.html
Cheryl says
Yay!!! Thanks so much Ginger! I love visiting your blog each day!!! You made my night!!!