Today we are taking a look at How to Use the Slice Tool in Cricut Design Space. Why and when you would want to use it and a Step by Step Photo Tutorial plus Screencast Video to help make you a Slice Tool master!
If you are just getting started with your Cricut Machine or Cricut Design Space I invite you to check out my Cricut Page! There are Getting Started with your Cricut Explore posts, getting started with your Cricut Maker, and tons of posts on materials such as Vinyl and iron-on!
How to Use the Slice Tool Video
Follow me on YouTube for more Cricut & Craft videos!
When to use the Slice Tool in Cricut Design Space?
That is a great question you ask! Most commonly, I use it when I am layering specialty iron-on. Specialty Iron-on (glitter, holographic, patterned) is not meant to be layered on top of itself but sometimes you need more than 1 color!
Slicing allows all of your colors of iron-on to be applied directly to the fabric surface to give a layered look without actually being layered. This solves the problem of layering specialty iron-on as well as creates increased longevity of your project after washing!
It’s also helpful when working with multi-layered designs. If your design is intricate and has several layers or colors you may not want your layers to actually add height to your project. This is what happens when you add a few layers of cardstock or adhesive vinyl. This can help give all the visual appeal of the layered design without actually layering!
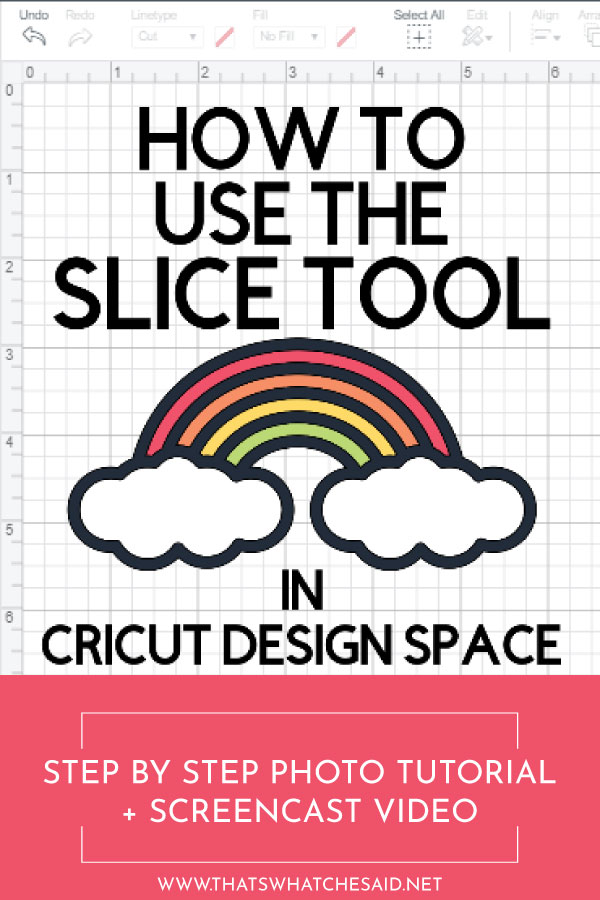
I am going to use the rainbow design that I used in my pencil pouch projects for my How to Layer Iron On post.
How to use the Slice Tool in Cricut Design Space
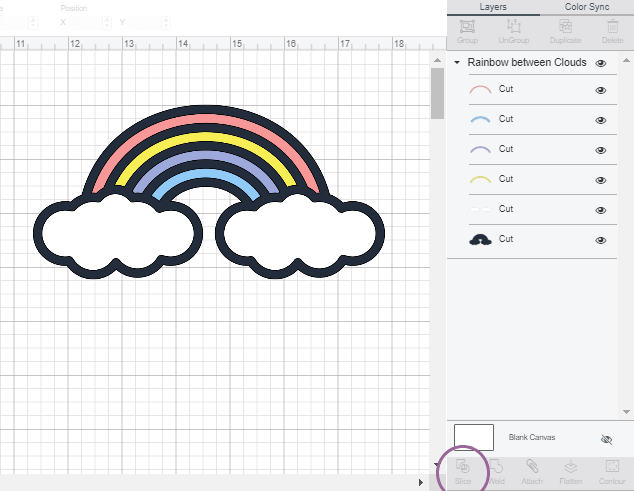
As you can see here there is a solid black back layer and then colored rainbow and cloud layers. When the whole design is selected you can also see that the slice tool is grayed out along the bottom right corner.
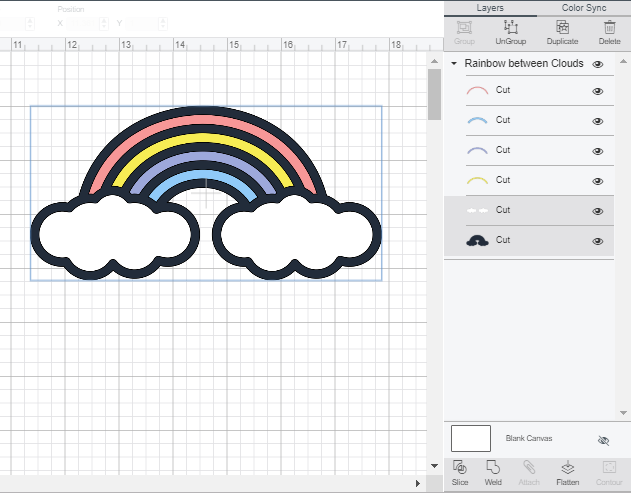
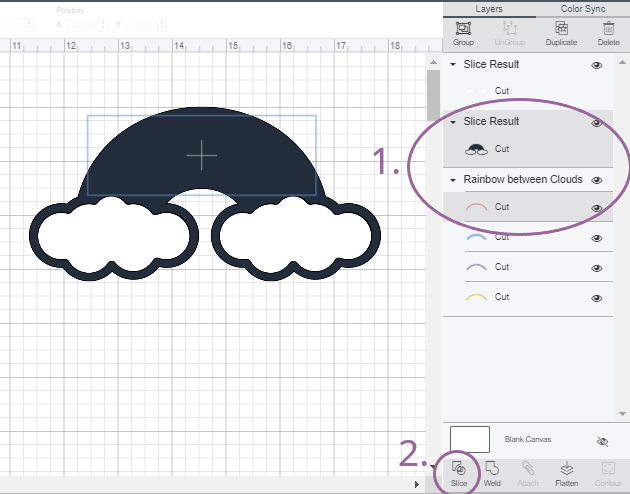
Select the black back layer + 1 of the top layers (doesn’t matter which because you will do this process for all the top layers!) I started with the clouds.
Now you can see that the slice tool is active and we can use it! Click the slice tool when you have the 2 layers selected!
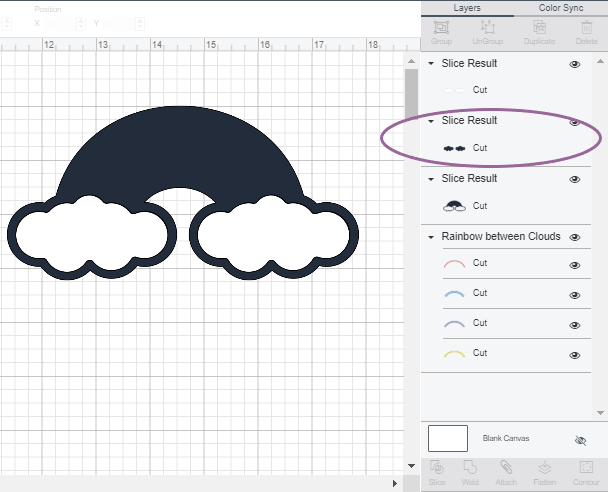
In the layers panel, you will now see the layers labeled as “slice results”. The 2 layers have now become three. The original back black layer, the original cloud layer, and now the “sliced” result of where the black and white layers overlapped. Here that 3rd layer is the black clouds.
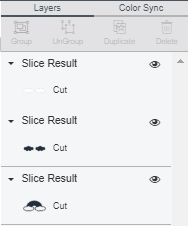
Delete the result that is of the overlapping areas. In this case the black clouds layer.
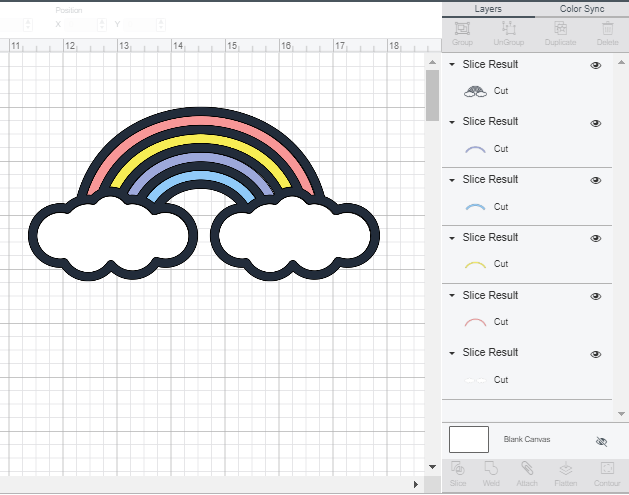
Repeat for all remaining layers. 1. Select the black back piece with a different colored layer and then 2. Slice.
You will be left with what looks like your original design.
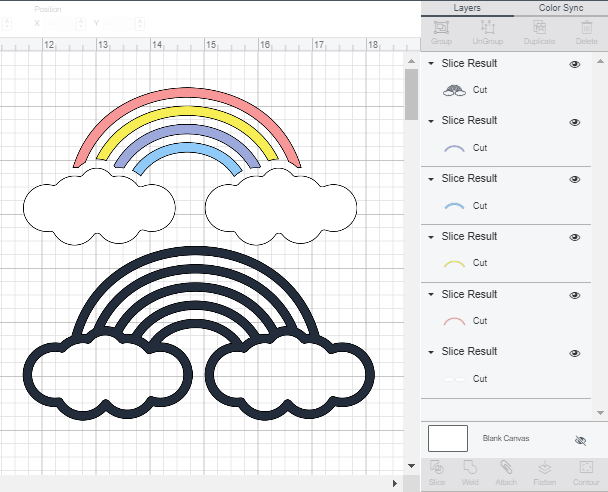
When in fact what used to be that solid back layer is now a cut out of your top layers!
More Cricut How-To Tutorials You May Like:
- How to Curve Text in Cricut Design Space
- How to Upload SVG’s to Cricut Design Space
- How to use the Slice Tool in Cricut Design Space
- How to Use the Ungroup, Weld and Duplicate Tools in Cricut Design Space
- How to Use the Print then Cut Feature
- How to Create a Monogram in Cricut Design Space
- How to Combine Mats in Cricut Design Space



Leave A Reply!