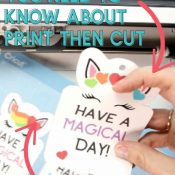


The Cricut can do many fun things including a print and cut feature! In this post, I will walk you through how to use print then cut features using Cricut Design Space! You print something on your home computer and then you can cut the design out on your Cricut machine! Awesome right?!
If you are new to Cricut Design Space or to your Cricut Machine you might want to check out my post on Getting Started with Your Cricut Explore or Cricut Maker-Your Questions Answered. Print then cut is not available on the Cricut Joy cutting machine.
There are several ways to utilize the Print Then Cut feature so I will be breaking them out into sections! You can click on any of these links below to jump to that specific section or you can read through them all and become the Print then Cut master! :)
What’s included in this post:
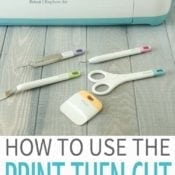
- Tools Needed to use Print then Cut
- First Things to Do with Print then Cut
- Print Then Cut with Uploaded Images – .jpg
- Print Then Cut with Uploaded Images – .png + Video
- Print Then Cut with Design Space Images
- Print Then Cut with Text
- Notes about Print then Cut
- Print Then Cut Tips & Tricks
- FAQ’s about using Print then Cut
- Projects using Print Then Cut
Follow me on YouTube for more Cricut & Craft videos!
This post may contain links to Amazon Associate and other affiliates.
As an Amazon affiliate, I earn a small commission from these links at no additional cost to you.
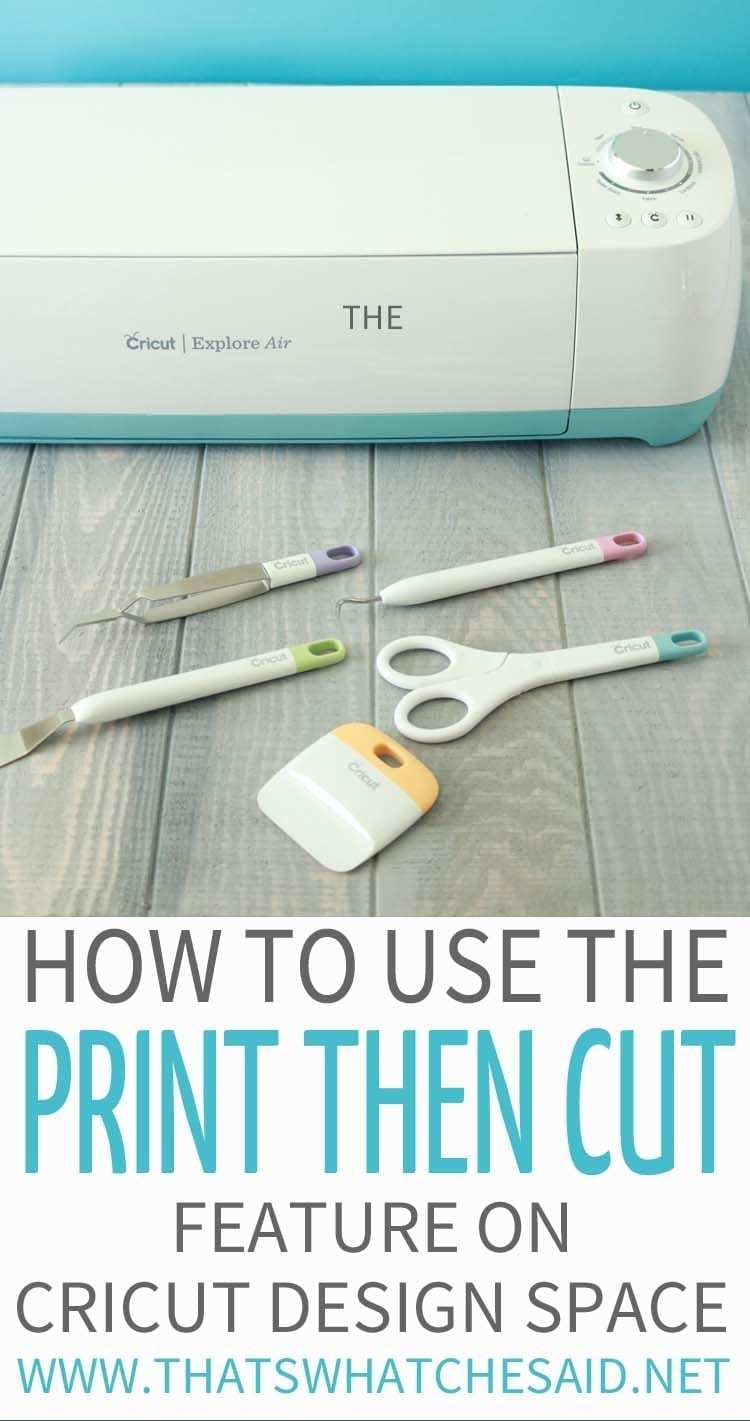
Tools Needed to Use Print then Cut
- Cricut Maker or Cricut Explore (any explore family machine)
- LiteGrip Mat (Blue)
- Home Printer. I like both my HP Envy 5540 and my Canon TS9521C All-In-One (it can print 12 x 12!)
- White Cardstock or Sticker Paper
- Spatula Tool
How to Use Print Then Cut Feature Using Cricut Design Space:
The first thing that needs to be done before anything is to Calibrate your Machine for Print then Cut. It’s quick don’t worry!
How to Use Print then Cut with Uploaded Images – .jpg
Have a JPEG image you want to upload to Design Space and have your Cricut cut? No problem!
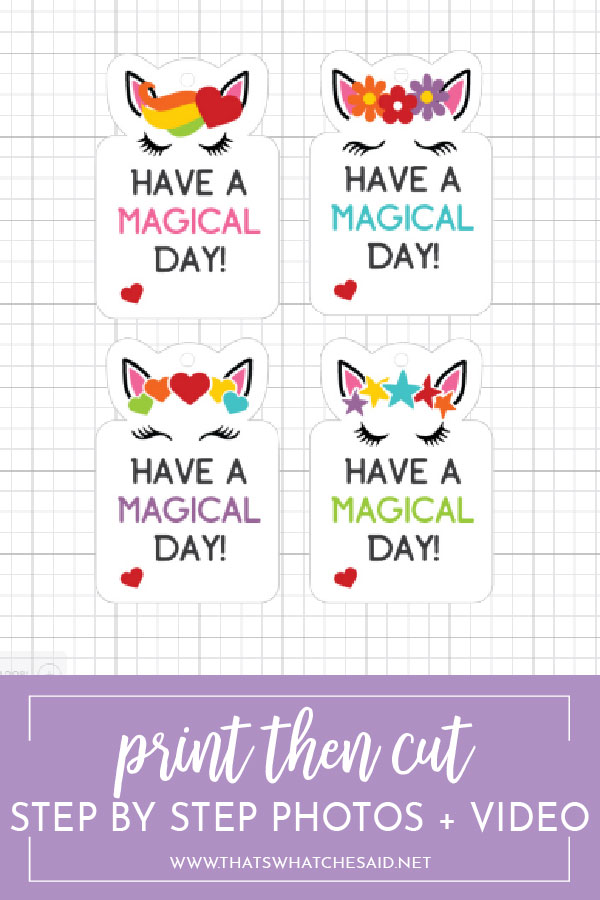
I will demonstrate how to use the print then cut feature using an uploaded image with these Unicorn Printable Valentine Cards. They are so cute but if you are a parent and have to make 30 of them for a class party you are thinking how awful it will be to cut all of those out by hand! Have no fear, you can use your Cricut machine to do the hard work for you!
First, you will open Design Space. If you do not have a Design Space account you can get one here. It is free :)
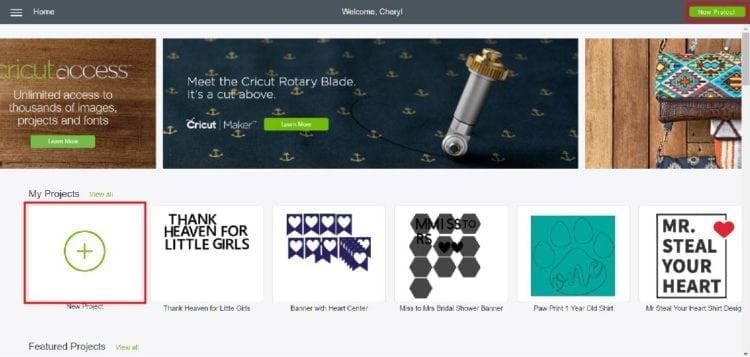
1. Click on New Project. You may do so by selecting the Green Box in the Upper Right corner or the + in My Projects.
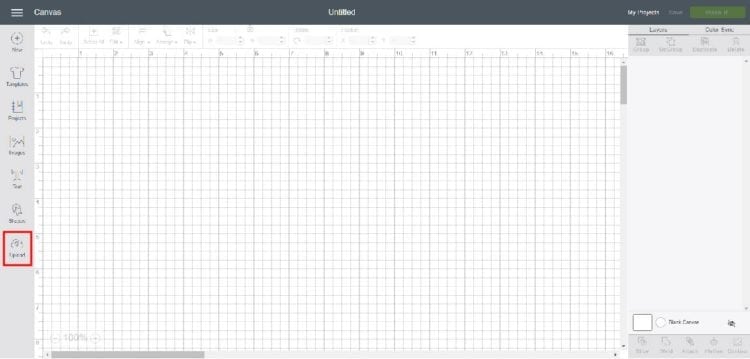
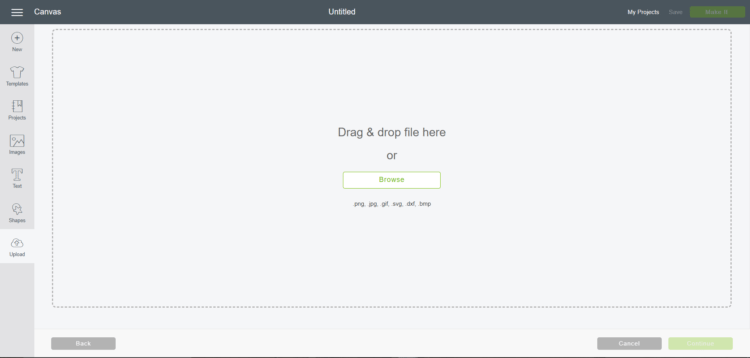
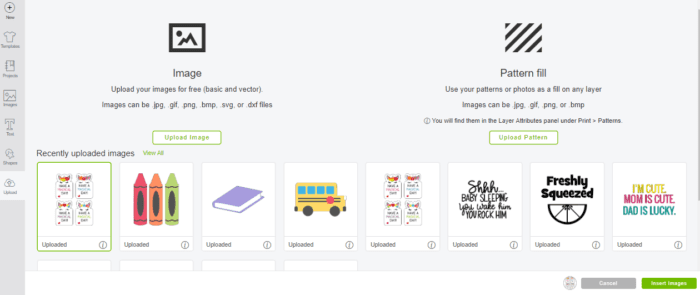
2. Upload your .jpg by clicking the Upload button on the left side panel. This will then open the next screen where you can select Upload Image.
3. Select Browse and locate your .jpg file on your computer. Click Open.
4. You will then select your Image Type based on your design. (I 95% of the time choose Complex) Then click Continue in the bottom right.

Next screen is the Select and Erase and will look like this with your .jpg front and center.
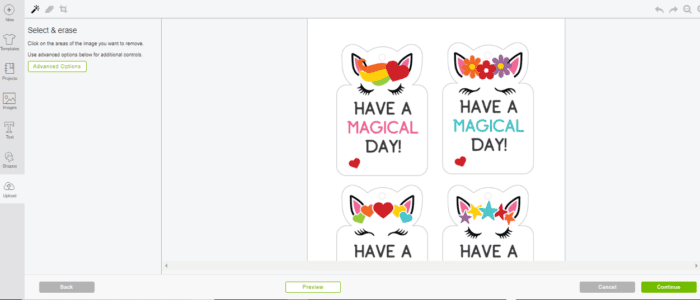
5. This is where we tell your Cricut where to cut. Using your mouse select the areas around the image that you want to “erase”. Mine then looked like this. You can see the transparent background where we removed the image. Click Continue.

6. This will show you what the cut file will look like. If you need to make any adjustments, choose Back. If it is correct, then select Save as Print then Cut image. Add appropriate tags (this helps when searching for this again!) and then hit Save in the lower right corner.

7. Finally, you can select your print then cut image and insert it into your project canvas using the Insert Images button in the bottom right.
8. I then resized my image. (No larger than 9.25″ x 6.75″) Note that the Line type will be Cut and the Fill will be PRINT. This is exactly what we want. Click Make It in the upper right corner of your screen.

9. Now you are ready to print then cut! The Mat Screen will show you how to put your printed design onto your mat. Do not be alarmed by the black border. Your Cricut will read those lines and know where to cut! Click Continue in the lower right.

10. Connect your machine at the very top. (Any machine, Explore or above works!) Select Send to Printer and choose your printer and print.

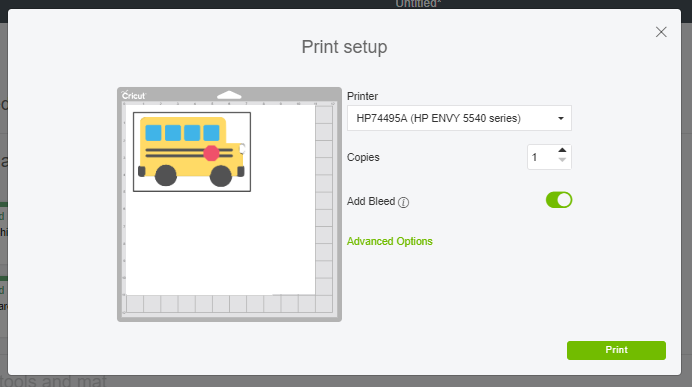
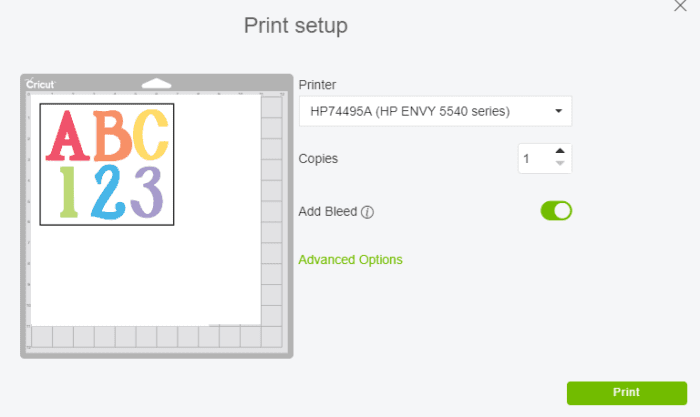
11. A printer dialog box will open and allow you to find your home printer and select the number of copies. I normally keep that bleed turned on. That ensures you don’t get a white border around your design. Click Print

Your image will print to your home printer. I like to print on Cardstock.

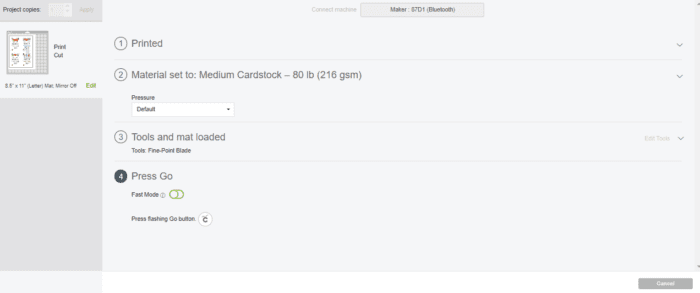
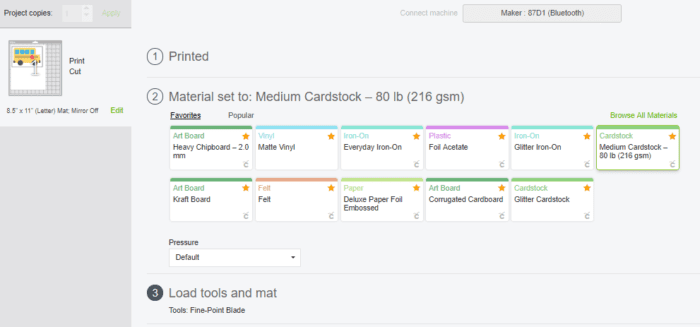
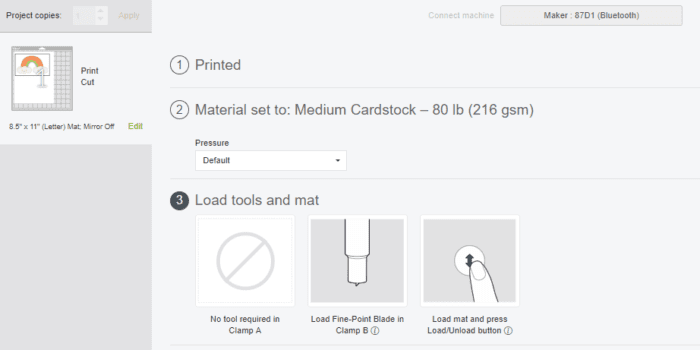
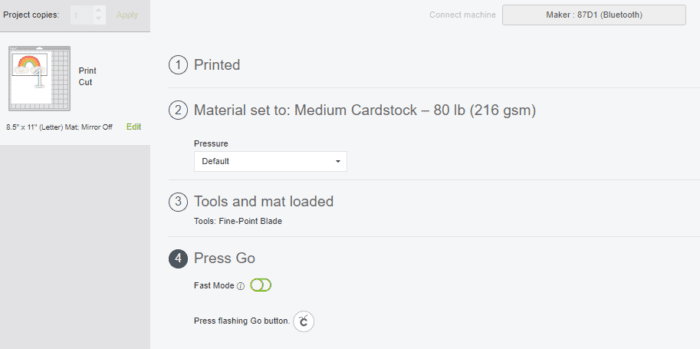
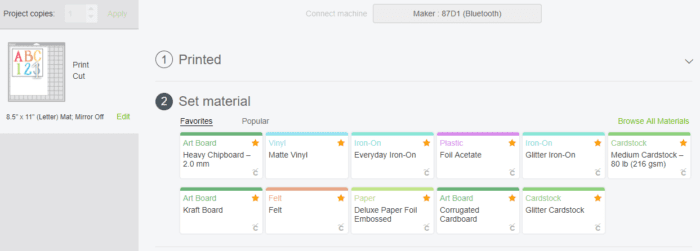
Now we will select our material. I am using Cardstock for this project.

Next, we are ready to load our mat into our machine! Apply your printed image to your Cricut Mat. (I like to use the Blue LightGrip Mat for Cardstock) and load into your machine as you would when you cut anything else.


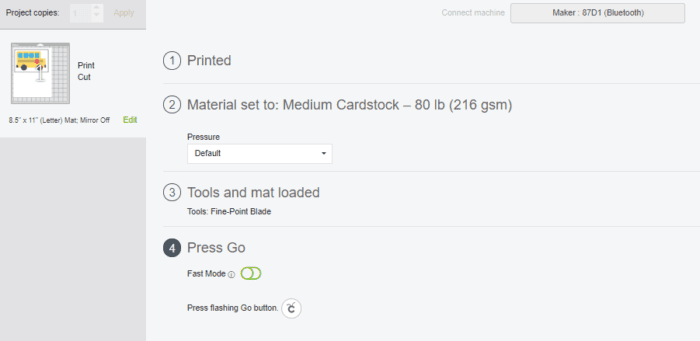
Press Go (the flashing Cricut “C”)!
Your machine will read the black lines on all 4 sides. If using the Maker, the carriage will move far right to “detect tool” (making sure you have the fine point blade in) and then it will start cutting your designs! Remove from the machine when finished.
Carefully peel away the excess cardstock and voila!
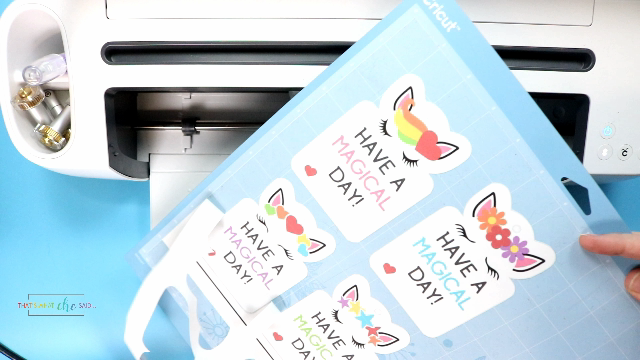
Project Complete!

BACK TO TOP OF POST – CLICK HERE
How to use Print then Cut Feature in Cricut Design Space – .png:
PNG files are a bit quicker to use than JPG files because normally PNG files are on transparent backgrounds. If your PNG file does not have a transparent background, follow the instructions for the JPG files.
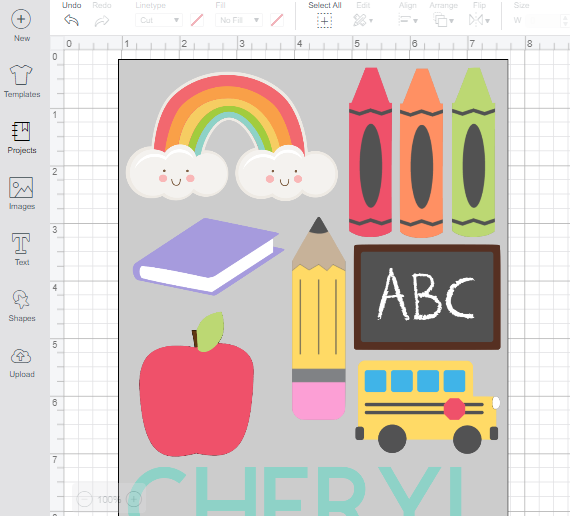
For this technique, I am going to use my School Days Clip Art.
First, you will open Design Space. If you do not have a Design Space account you can get one here. It is free :)
1. Click on New Project. You may do so by selecting the Green Box in the Upper Right corner or the + in My Projects.
2. Upload your .png by clicking the Upload button on the left side panel. This will then open the next screen where you can select Upload Image.
3. Select Browse and locate your .png file on your computer. Click Open.
4. You can see below we have a transparent background because you can see the checkerboard pattern. Select the Image Type based on your design. (I 95% of the time choose Complex) Then click Continue in the bottom right.

5. Next screen is the Select and Erase and will look like this with your .png front and center. Since our background is already transparent we have nothing to do here, click Continue.

6. This will show you what the cut file will look like. If you need to make any adjustments, choose Back. If it is correct, then select Save as Print then Cut image. Add appropriate tags (this helps when searching for this again!) and then hit Save in the lower right corner.

7. Finally, you can select your print then cut image and insert it into your project canvas using the Insert Images button in the bottom right.

8. I then resized my image. (No larger than 9.25″ x 6.75″) Notice that the Linetype is Cut and the Fill is PRINT. This is exactly what we want. Click Make It in the upper right corner of your screen.

9. Now you are ready to print then cut! The Mat Screen will show you how to put your printed design onto your mat. Do not be alarmed by the black border. Your Cricut will read those lines and know where to cut! Click Continue in the lower right.
10. Connect your machine at the very top. (Any machine, Explore or above works!) Select Send to Printer and choose your printer and print.
11. A printer dialog box will open and allow you to find your home printer and select the number of copies. I normally keep that bleed turned on. That ensures you don’t get a white border around your design. Click Print
Your image will print to your home printer. I like to print on Cardstock.
Now we will select our material. I am using Cardstock for this project.
Next, we are ready to load our mat into our machine! Apply your printed image to your Cricut Mat. (I like to use the Blue LightGrip Mat for Cardstock) and load into your machine as you would when you cut anything else.

Press Go (the flashing Cricut “C”)!
Your machine will read the black lines on all 4 sides. If using the Maker, the carriage will move far right to “detect tool” (making sure you have the fine point blade in) and then it will start cutting your designs! Remove from the machine when finished.
Carefully peel away the excess cardstock and voila! Project Complete!
Follow me on YouTube for more Cricut & Craft videos!
BACK TO TOP OF POST – CLICK HERE
How to use Print then Cut Feature with Cricut Design Space Images:
Cricut Design Space has a huge library of images that can be used to cut on your machine. Did you know you can also use these images as Print then Cut images? You sure can and I am showing you how!
Before we get into the details of this awesome feature, let’s talk a minute about Cricut Access! Cricut Access is a subscription service that allows you access to 60,000+ image and over 370 fonts! The green “a” denotes an image or font that is included in Cricut Access.
You can also purchase images and fonts on an as needed basis!
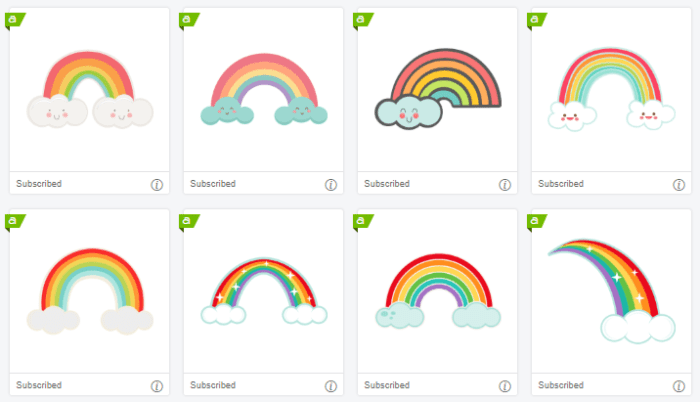
I am going to use one of these fun and happy rainbows in Cricut Access for my tutorial today!
First, you will open Design Space. If you do not have a Design Space account you can get one here. It is free :)
1. Click on New Project. You may do so by selecting the Green Box in the Upper Right corner or the + in My Projects.
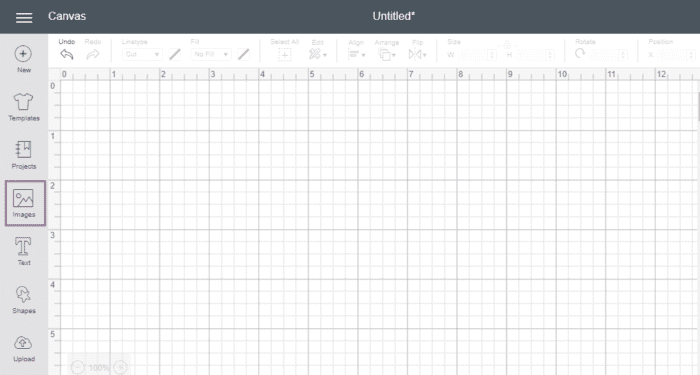
2. To get started click on the Images Icon in the left toolbar.
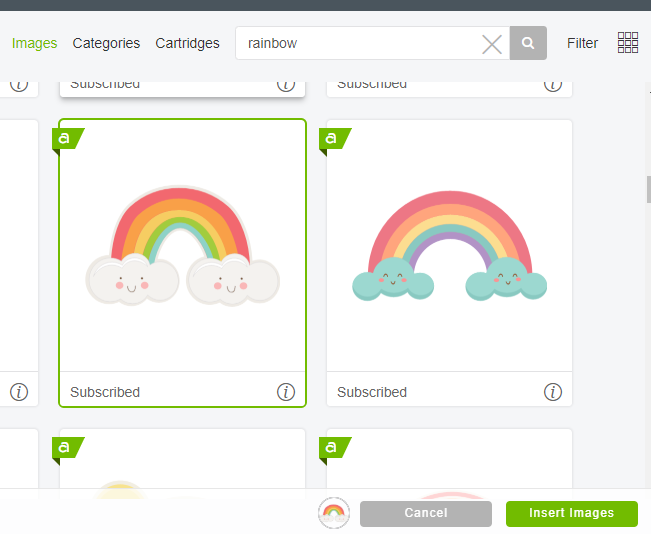
3. Browse through Cricut Design Space for your perfect image! You can search by Images, Categories or Cartridges. As well as using the search bar and there is a Printables filter as well. (printables are ready to go as a printable image you don’t need to convert these.
Select your image and click Insert Images.
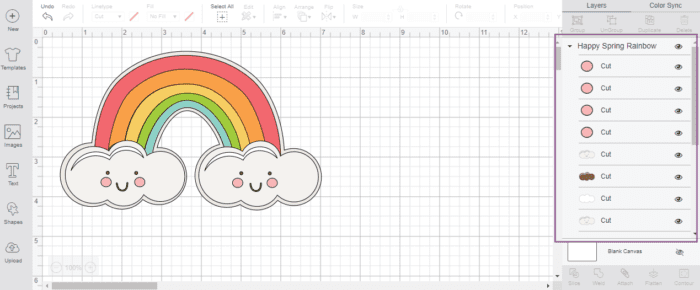
4. Here you will see the design inserted onto our canvas as a cut file, denoted by all the cut layers in the layers panel on the right.
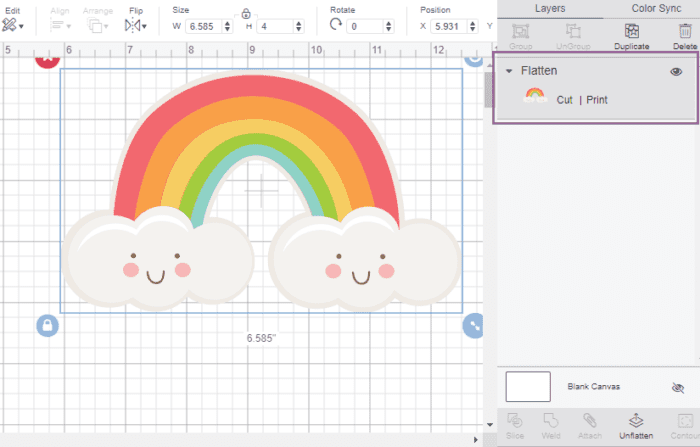
5. To switch this to print then cut, simply select all the layers. Do this by individually selecting them in the layers panel, or draw a big box around your entire image to select all. Then we will click the Flatten tool at the bottom of the layers panel.

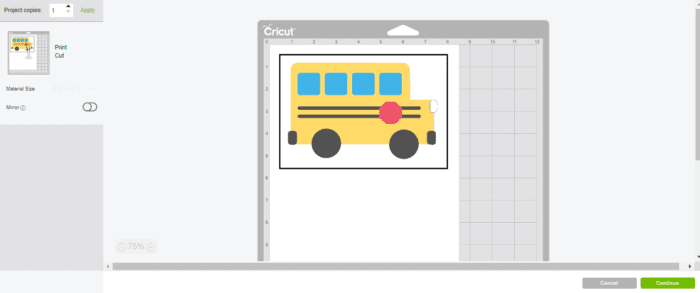
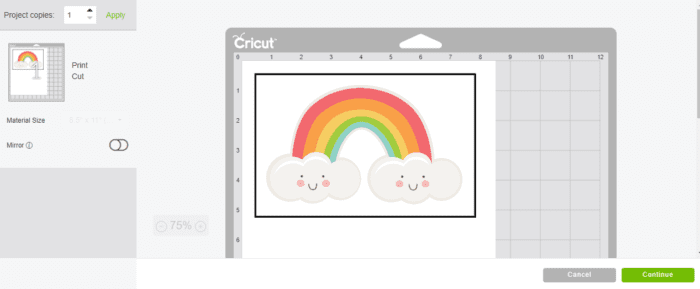
6. Now you can see that we have converted it into a Print Then Cut Image because all the cut layers in the layers panel have turned into one Cut | Print layer. Resize as needed. The maximum size for print then cut is 6.75″ x 9.25″. Click Make It in the upper right corner.
7. Next is the Mat Screen. This shows us how to place the print on our mat. Do not be alarmed by the black border. The Cricut will read those black lines to determine where to cut. Click Continue.
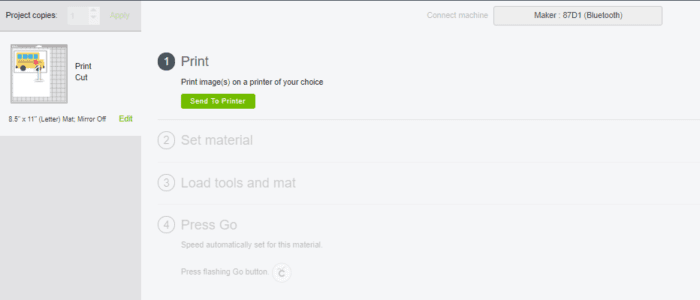
8. Next, you will connect your machine at the top of the screen. Any machine that is an Explore or above will work with Print then Cut. Next click Send to Printer.
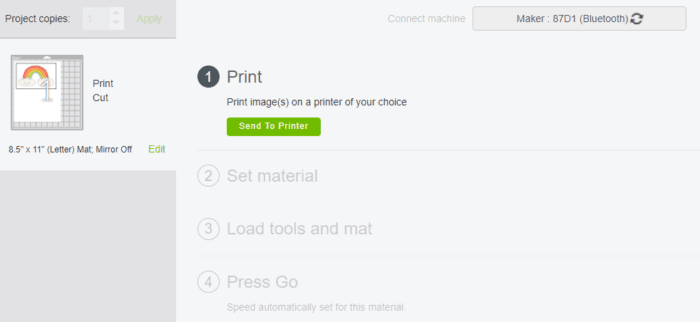
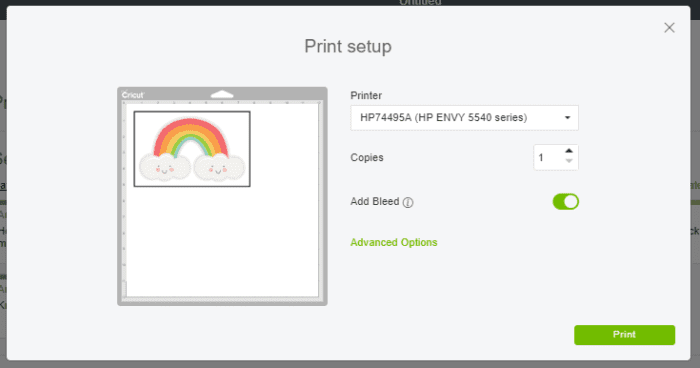
9. A Printer Pop Out screen will appear and allow you to connect your home printer and select the number of copies you need. I keep the Blurr on so that I don’t get white borders on my designs. Click Print and the design will print on your home printer.
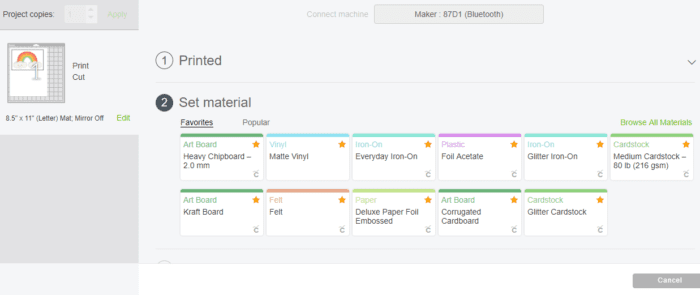
10. Next, you will choose your material.
11. Now it’s time to load your mat. Place the printed design on your mat and load into your machine.
12. Now you can cut by pressing the flashing Cricut “C” on your machine.
The sensor on our machine will read the black lines on all 4 sides. If using the Maker, the carriage will move far right to “detect tool” (making sure you have the fine point blade in) and then it will start cutting your designs! Remove from the machine when finished.
Carefully peel away the excess material and voila! Project Complete!
Follow me on YouTube for more Cricut & Craft videos!

How to use Print then Cut Feature with Text:
Let’s say you need to print off some big letters or numbers for your child’s school project. You could also cut them from colored cardstock but let’s say they told you about this at 9 pm the night before it’s due. Print then cut to the rescue! I will show you how!
First, you will open Design Space. If you do not have a Design Space account you can get one here. It is free :)
1. Click on New Project. You may do so by selecting the Green Box in the Upper Right corner or the + in My Projects.
2. To get started click on the Text Icon in the left toolbar.
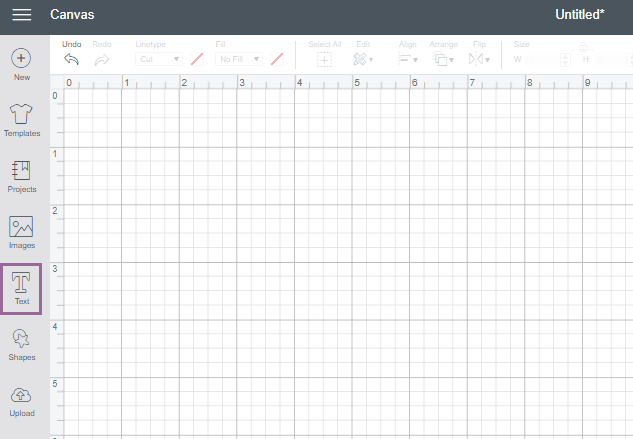
3. Write your text in the text box. Then use the Text toolbar on top to adjust the font, size, letter spacing, print color, etc.
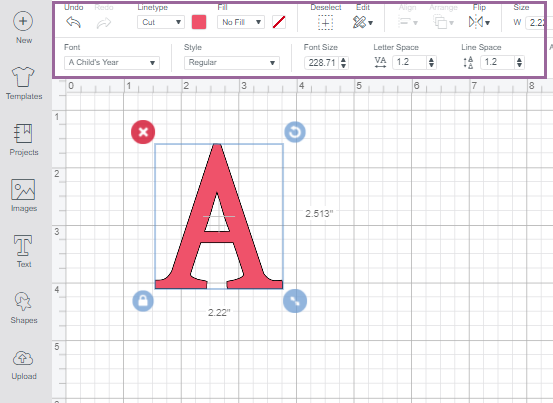
4. There are now 2 ways to turn text into a cut then print image. If you are working with a single layer, you will need to change the FILL from “no fill” to “print”.
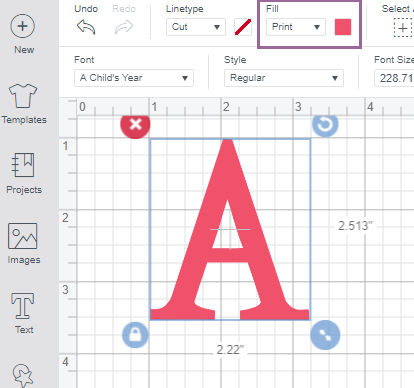
If you are working with more than one layer, you can do the same thing we did above for each layer or you can select all the layers and use the Flatten tool at the bottom of the layers panel.
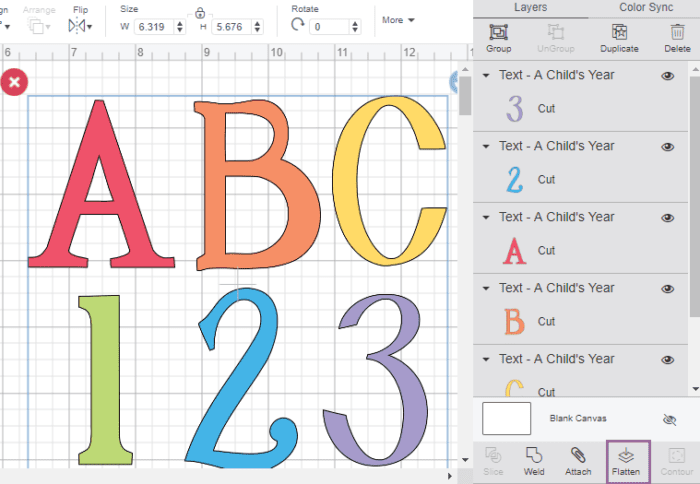
That will turn them from cut layers into print then cut layers. Click Make It in the upper right corner.

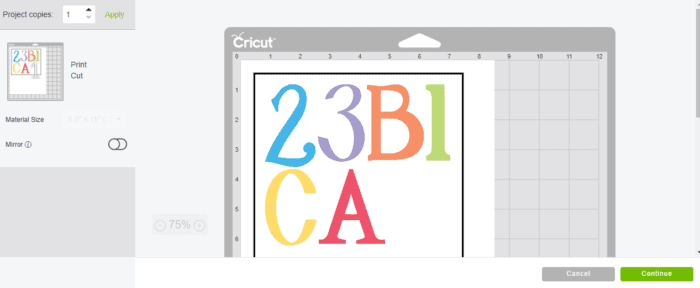
5. Next is the Mat Screen. This shows us how to place the print on our mat. Do not be alarmed by the black border. The Cricut will read those black lines to determine where to cut. Click Continue.
6. Next, you will connect your machine at the top of the screen. Any machine that is an Explore or above will work with Print then Cut. Next click Send to Printer.
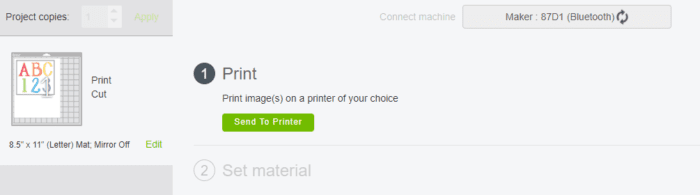
9. A Printer Pop Out screen will appear and allow you to connect your home printer and select the number of copies you need. I keep the Blurr on so that I don’t get white borders on my designs. Click Print and the design will print on your home printer.
10. Next, you will choose your material.
11. Now it’s time to load your mat. Place the printed design on your mat and load into your machine.
12. Now you can cut by pressing the flashing Cricut “C” on your machine.
The sensor on our machine will read the black lines on all 4 sides. If using the Maker, the carriage will move far right to “detect tool” (making sure you have the fine point blade in) and then it will start cutting your designs! Remove from the machine when finished.
Carefully peel away the excess material and voila! Project Complete!
BACK TO TOP OF POST – CLICK HERE
Notes about Print then Cut Feature using Cricut Design Space:
- When on the print set up screen you have the option to turn Bleed on or off. Bleed extends the ink slightly beyond the border of the image to eliminate a white margin once the image is cut.
- Default material size for Print Then Cut is 8 ½ x 11″
- Maximum print size for Print Then Cut is 9.25″ x 6.75″ for all browsers.
- If you have multiple mats, it will have you print 1 mat and cut 1, then print mat 2 and cut mat 2. It will not print all your copies and then cut all of your copies.
- If you think your calibration is off on your machine, check out Cori’s post on how to troubleshoot the calibration.
Tips on Using Print then Cut Feature using Cricut Design Space:
If you want to fill your page with print then cut images for example if you were making planner stickers, create a 6.75 x 9.25″ rectangle, click arrange and send the rectangle to back. Now you can use that rectangle as a guide to fill the area.
I like to use a color other than white for my rectangle because as you can see from the rainbow, some of the images have white borders and if I had a white background I run the risk of overlapping cut lines.
You can click Make It and let Cricut decide how to arrange your sheet or if you want it printed and cut as you have designed it, be sure to select all your images (excluding the rectangle) and click Attach before you click Make It.
BACK TO TOP OF POST – CLICK HERE
FAQ’s about Print then Cut Feature using Cricut Design Space:
Will the Cricut Print for a Print then Cut Project?
No. You will need a home printer to print. You Cricut will cut. The Cricut Machine does have the capability to draw. You can find out more about that here on my How to Use the Cricut Pens post.
What Materials Can you use with Print Then Cut?
Basically, any material you can feed through your printer. A few examples are Cardstock, Paper, Sticker Paper, Printable Adhesive Vinyl, Printable Iron on Vinyl, and vellum.
Can I use Colored Materials?
Colored materials such as colored cardstock are only recommended with the Cricut Maker as it has an enhanced sensor.
What Machines have the Print then Cut Feature?
Print then Cut tool is available on all machines from the Explore family (Explore, Explore Air, Explore Air 2) and the Cricut Maker machine.
Can I use the Print then Cut feature with Designs Printed somewhere other than my home computer?
No. You need to print from within Design Space.
BACK TO TOP OF POST – CLICK HERE
Projects using Print then Cut
More Cricut Tutorials You May Like:
- How to Upload SVG Files into Cricut Design Space
- Curve Text in Cricut Design Space
- Make a Monogram in Cricut Design Space
Don’t Miss Out!
Get new Cricut Tutorials, Product Announcements, Project Ideas, SVG Files and more straight to your inbox!


Comments & Reviews
Jenna says
Hi! I am only looking to print. Is there a way to remove the black border around the image before I print?
Cheryl Spangenberg says
Jenna, unfortunately there is not a way to remove that border. Are you using your own image or a design space image? If your own, I would just add it to a word doc and print from there.
Maggie says
Good explanations but I have one question. I want to cut shapes for applique. Can I cut fabric with print then cut?
Cheryl Spangenberg says
Hi Maggie, you can. Cricut discontinued their printable fabric, however, I know Silhouette and Avery have some. You would need to verify your printer can handle printing on those fabric sheets.
Corinne Isak says
I am trying to make baby onesie tags. I upload the image, then I want to put text inside the onesie and a cricut image of flowers. I make sure the text and image are ‘print’ and the onesie is ‘cut’. When I attach and flatten, everything prints fine to my printer, but then my maker wants to cut everything.. onesie outline and all text and image. What am I doing wrong?
Cheryl Spangenberg says
Hi Corinne! Don’t attach, only flatten! When you flatten you are telling CDS to print then cut around it. So if you flatten your words and then attach them to the baby onesie it will print and cut around everything. If you flatten your words to your onesie, without attaching, you will then tell CDS to print and cut out only the outline for the onesie! I actually make the same project you are talking about here: https://www.thatswhatchesaid.net/diy-baby-shower-favor-cricut/ No attaching, just flattening!
Jill Bartholomew says
hi I have a logo that is black and green but the letters are not joined. When I print then cut it cuts all of the letters out individually, could you please tell me if there is a way to print and cut this without having to put a white border around it.
Thanks in advance
Cheryl Spangenberg says
Hi Jill, did you flatten the logo?
Levada Tate says
I have a question that you may be able to help me with. Do you mind helping me?
Cheryl Spangenberg says
What is your question, Levada? I will do my best to help.