If you have an xTool laser you will be working with xTool Creative Space and will at some point want to use an SVG or image that you either made and designed yourself or purchased from Etsy, DesignBundles.net, or your favorite design site! If that’s the case I am going to show you how to upload SVG files into xTool Creative Space to use with your xTool Laser!
Pin How to Upload SVG Files to XCS
Pin It HereClick the button above to save to your board for later!
The process is very similar to Uploading an SVG into Cricut Design Space and Uploading SVG into Silhouette Studio to use with your Cricut or Silhouette cutting machines.
How to Upload Files to xTool Creative Space Video
Follow me on YouTube for more Cricut & Craft videos!
Frequently Asked Questions Regarding xTool Creative Space
XCS stands for xTool Creative Space and it is the software interface for an xTool laser. It is the design platform that basically tells your machine what to do and communicates with your machine while processing. You can find my full M1 Laser/Cutter overview here.
You can find the program here to download and it is available for windows and mac operating systems.
You can use XCS with a computer, tablet, or mobile device.
XCS supports common vector and bitmap formats, including SVG, DXF, PNG, JPG, and BMP files.
DOWNLOAD SVG FILE & SAVE IT TO THE DEVICE
This tutorial starts by assuming you have the file downloaded to your device. If you need help downloading a file to your computer you can check out this post here.
I like to create a folder on my computer specifically for files that I purchase and download so I can find them in an easy-to-locate place for upload to XCS or Cricut Design Space or Silhouette Studio.
How to Upload SVG files into xTool Creative Space
Time needed: 1 minute
Easily upload files into xTool Creative Space to use with an xTool Laser machine for projects.
- Install XCS
If you don’t already have it downloaded, the first step will be to install XCS on your device. Once installed, open the design software on your choice of technology. Today I am using the computer.
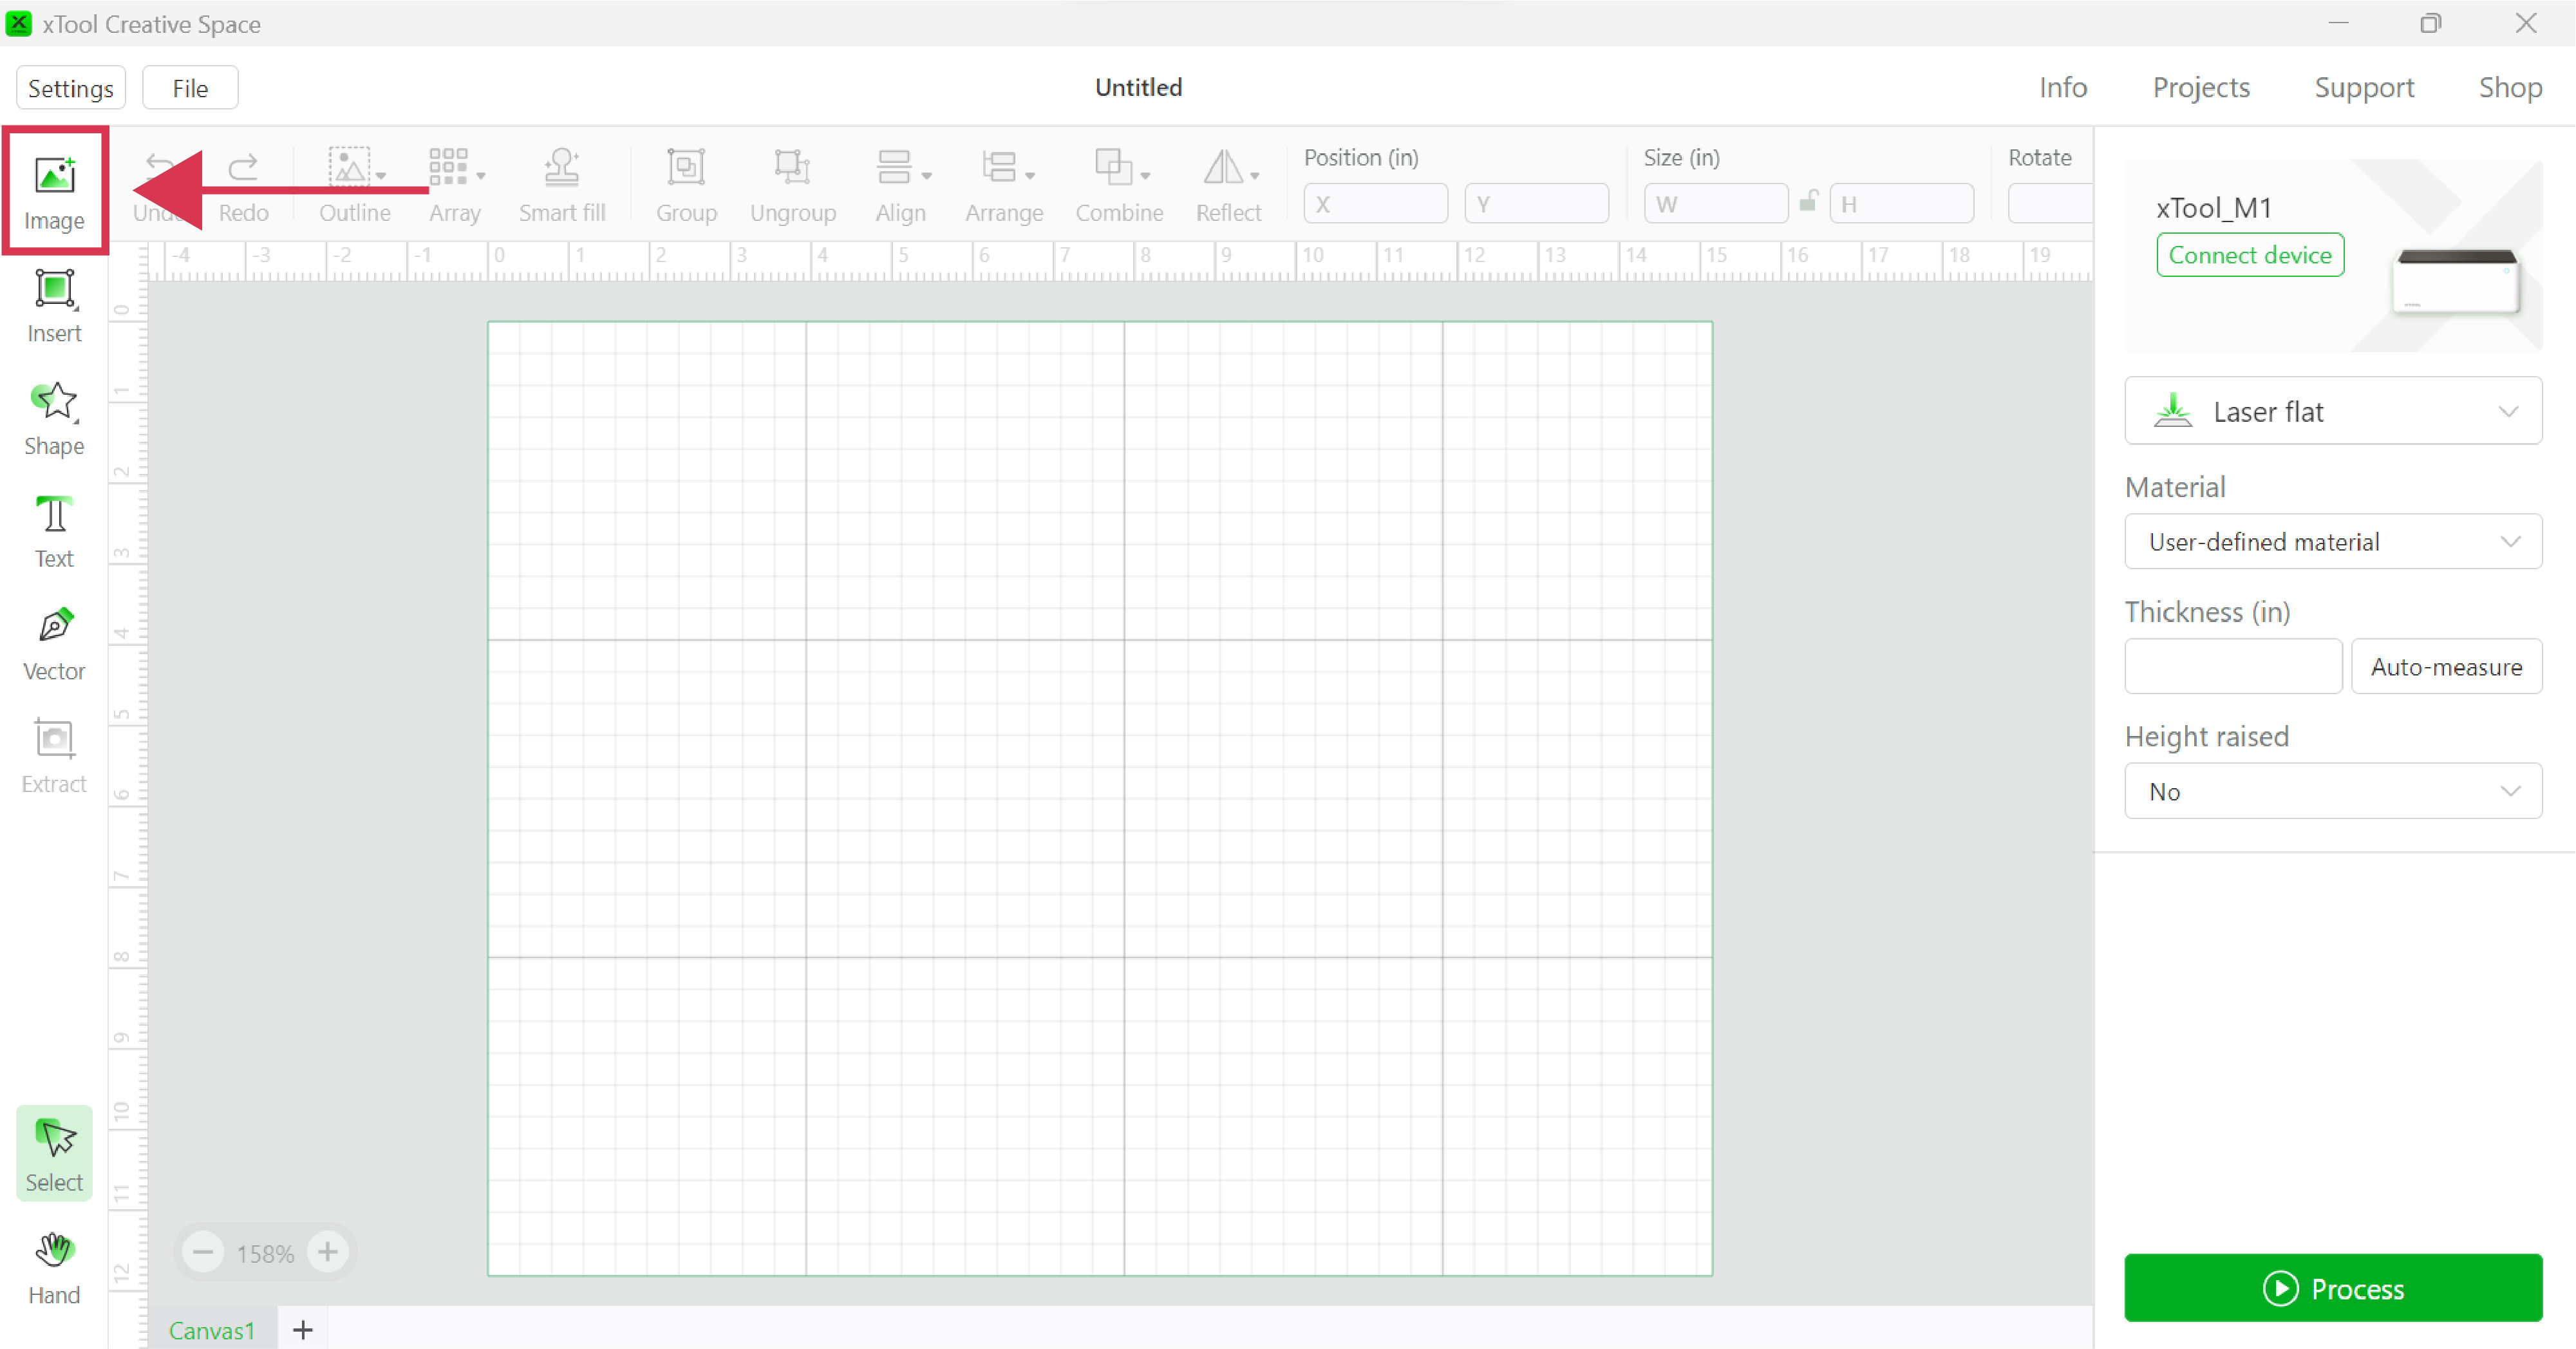
- Click IMAGE Tool
In the upper left-hand corner of the program, click the IMAGE tool. This will open a window on your computer where you can locate the saved file.
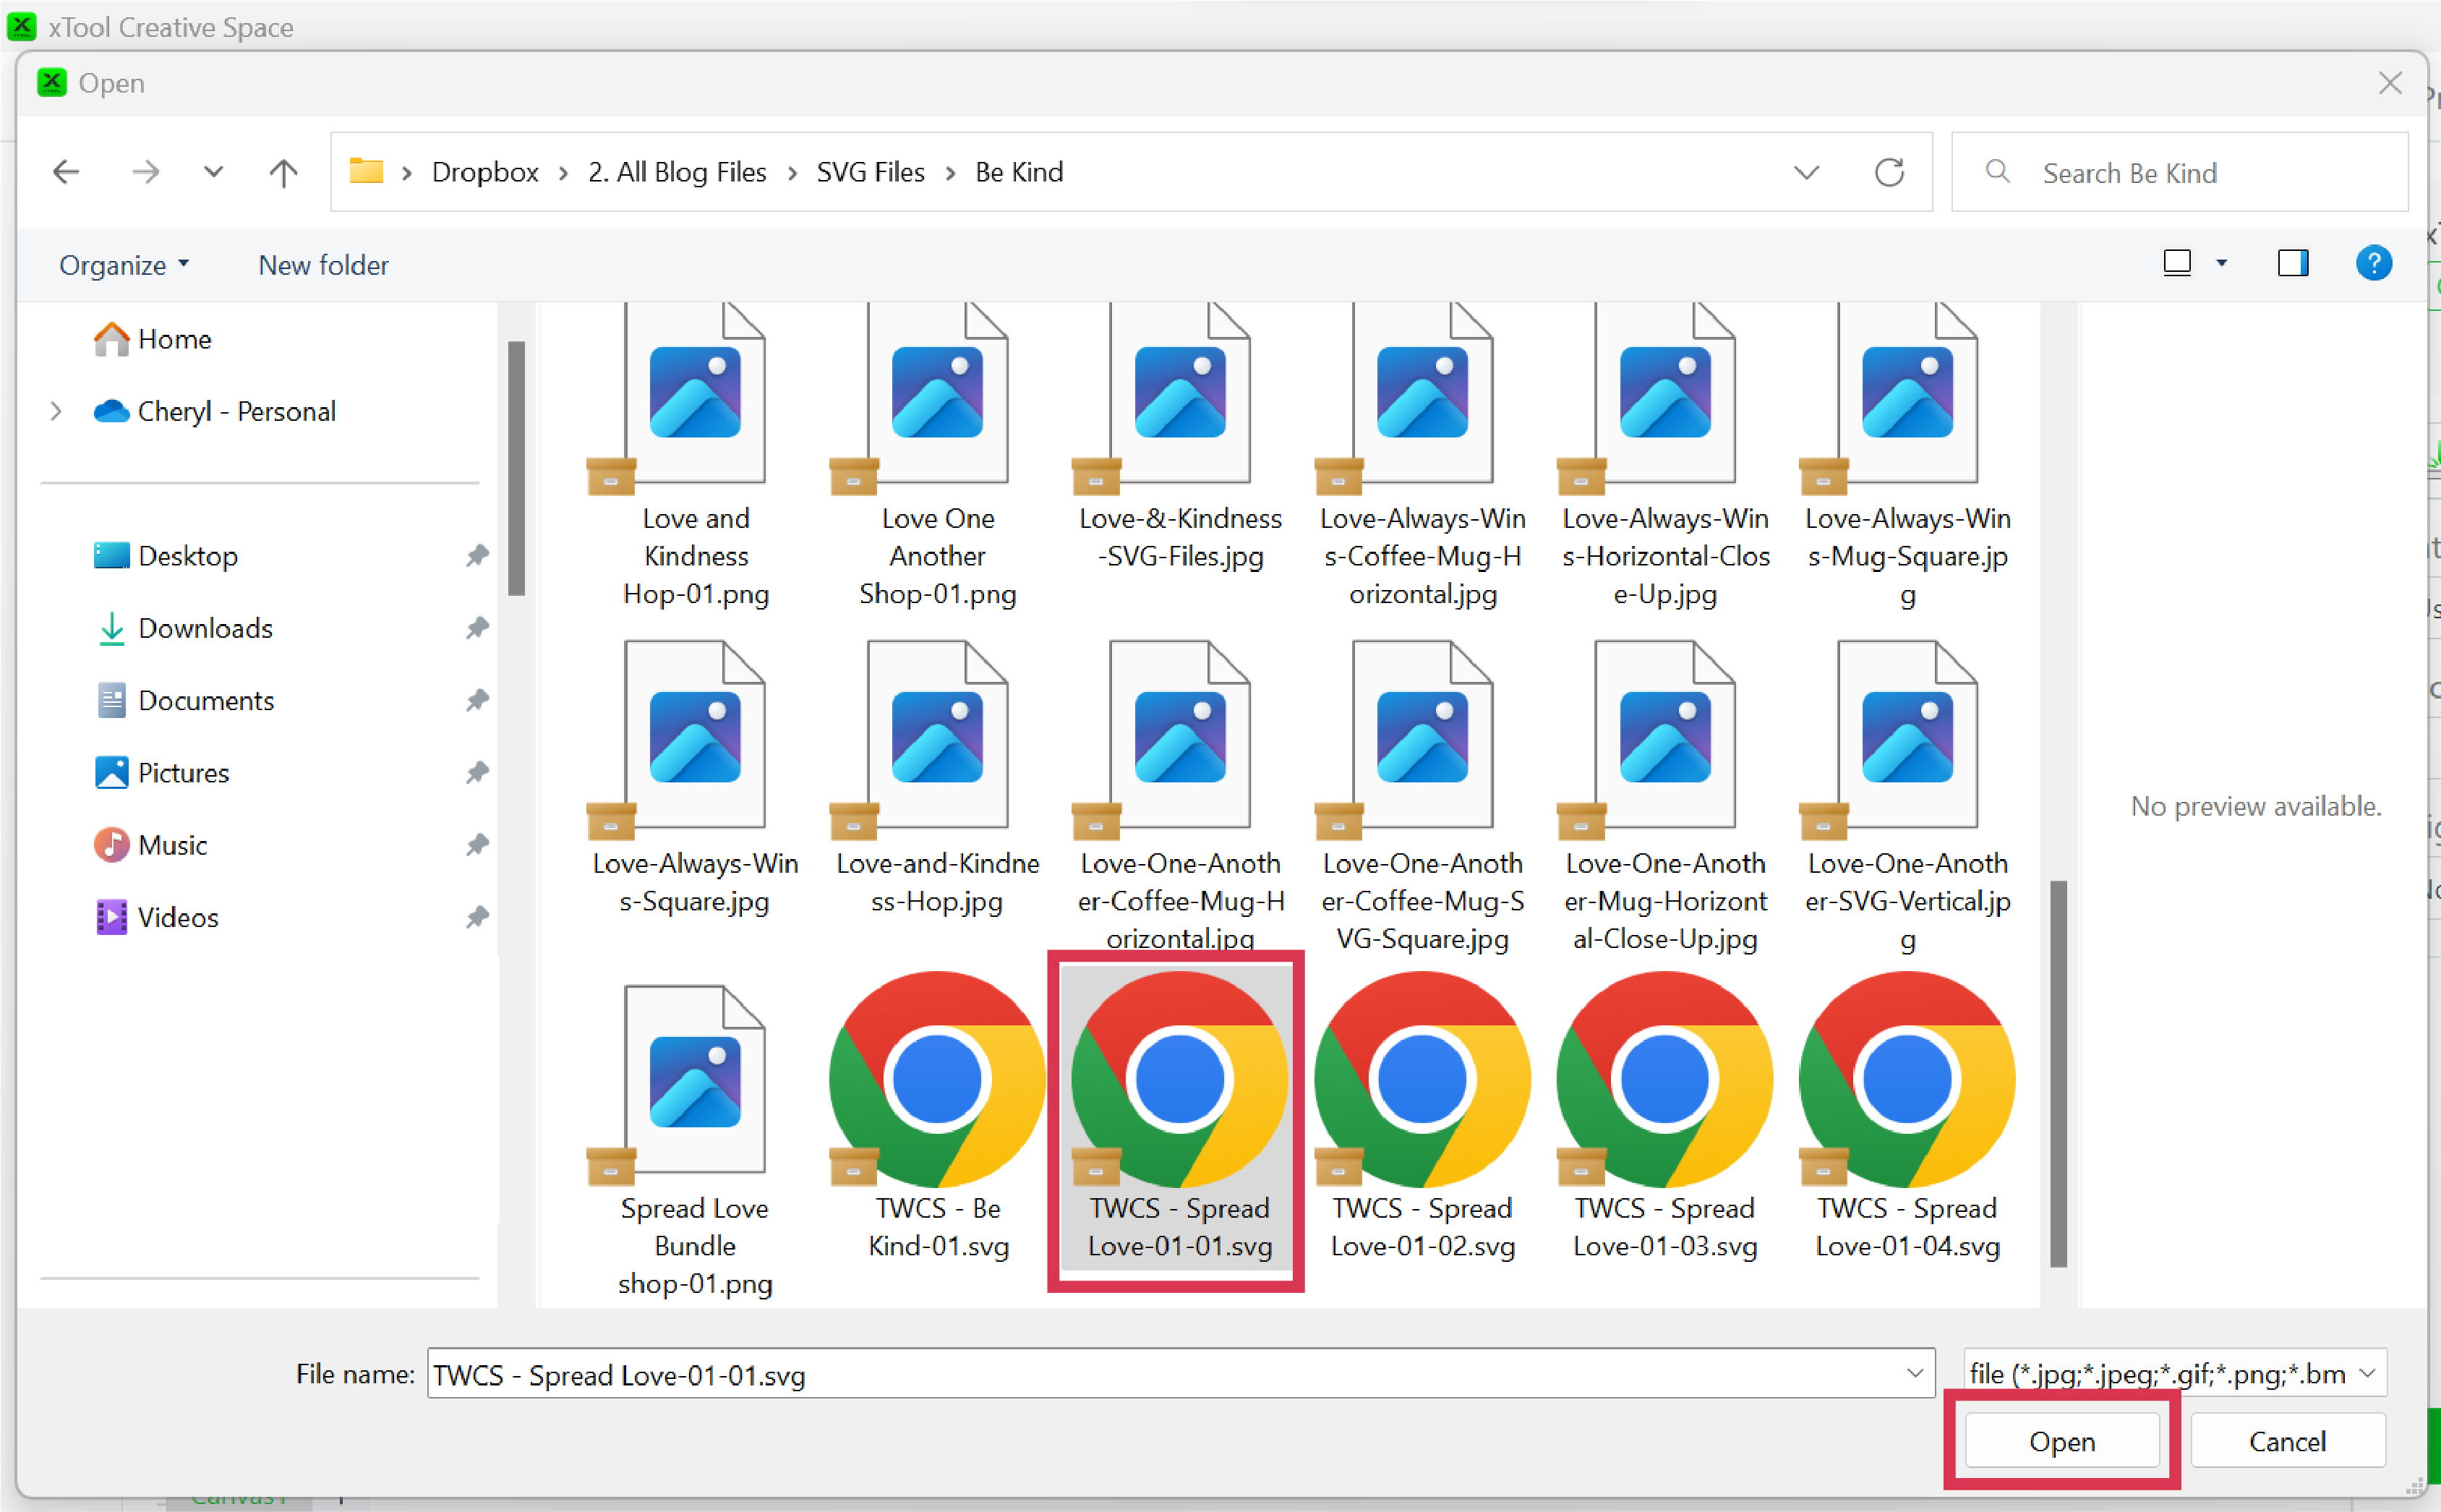
- Locate, Select the File, and Click OPEN
When the window opens after step 2, navigate to where you saved the file, select it and then click OPEN
- File Uploads to XCS
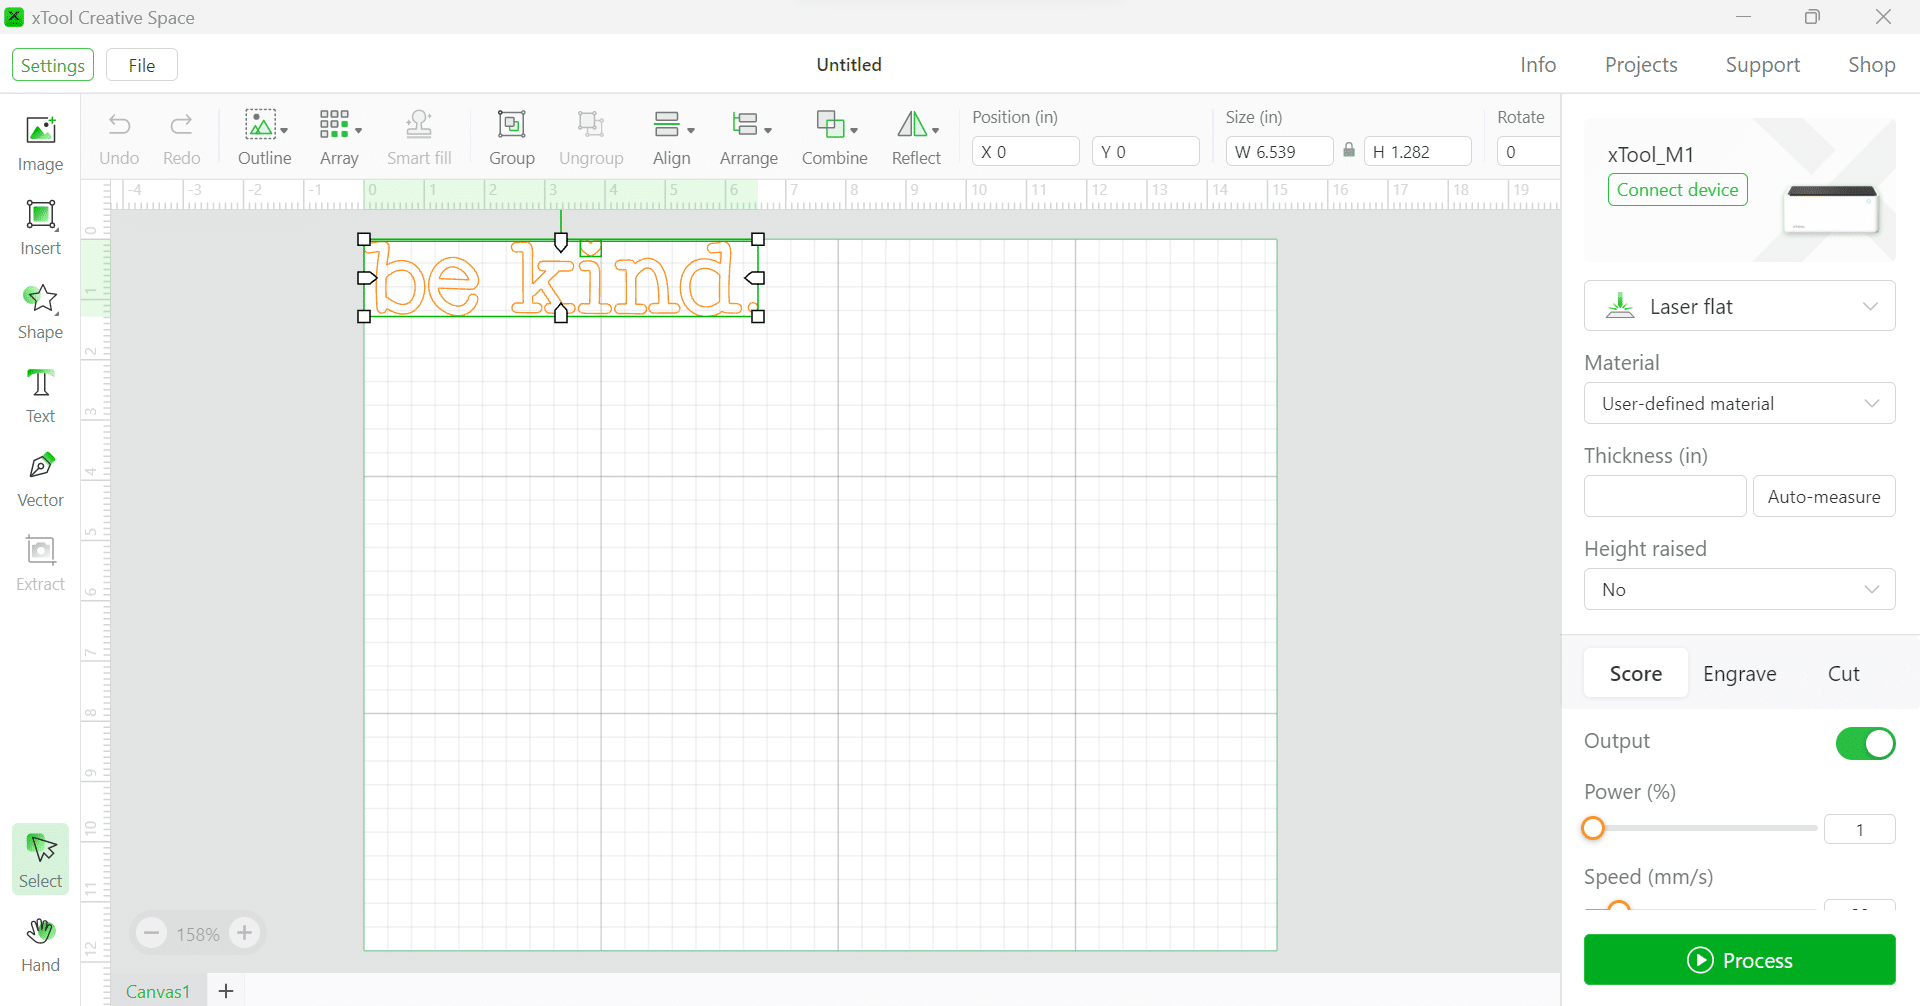
Once you click the open button, the file will be placed on the canvas of XCS and from here you can resize, manipulate and change the output of the design as needed for your project!
Notes on Uploaded File Types into xTool Creative Space
The process is so easy, right? A few things to note about the files when you upload them:
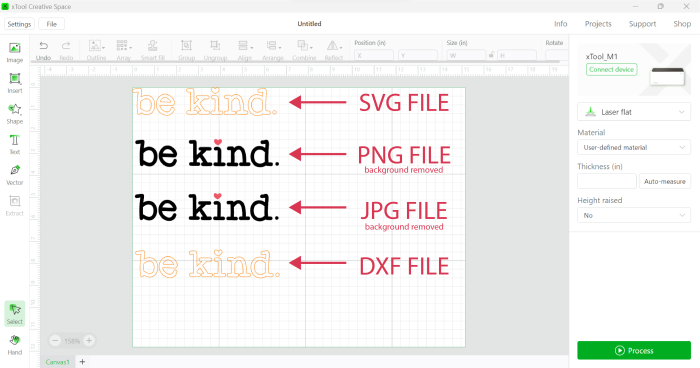
- SVG files: These will upload to the canvas as score output by default. You can keep it as a score or change it to engrave or cut outputs depending on your project.
- DXF files: These will upload to the canvas as score output by default. You can keep it as a score or change it to engrave or cut outputs depending on your project.
- PNG files: These will upload to the canvas as engraved by default and you cannot change them to any other output. You may need to edit the image to remove the background depending on how the file was provided. A tutorial coming soon on this!
- JPG or JPEG files: These will upload to the canvas as engraved by default and you cannot change them to any other output. You will need to edit the image to remove the background. A tutorial coming soon on this!
You can see there are two layers to our design. The black layer and the red heart layer. Here is how the 4 files upload the layers. This is important to note because you may need to combine some of the layers to get the correct output for your project.
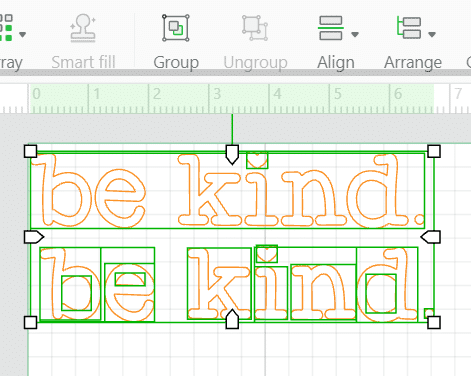
- SVG files will upload in the number of layers. So for this file, you can see two layers (two bounding boxes, one around the words, black layer, and one bounding box around the heart, red layer)
- DXF files will upload each individual component in its own bounding box.
- PNG files will upload as one layer. Both the black words and red heart are one single layer as you can see by one bounding box.
- JPG files will upload as one layer. Both the black words and red heart are one single layer as you can see by one bounding box.
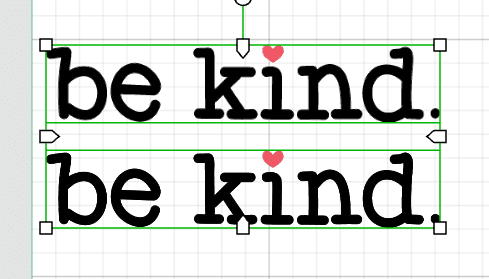
I hope this helps you see how the most versatile files are SVG and DXF files. The easiest to work with for beginners will be the SVG since it imports in layers and not individual components. You can cut, engrave and score these files.
If you use png or jpg files (think photographs) you will only be able to engrave!
If this post was helpful, please join my xTool email list so you can get more tutorials and projects delivered right to your inbox for free!
Don’t Miss Out!
Get more xTool Tutorials, Project and Roundups straight to your inbox!
MORE XTOOL PROJECTS






Comments & Reviews
Susie says
Thank you! You just saved me from crying lol
Cheryl Spangenberg says
Oh no, don’t cry! I am happy I could help! Let me know if you need anything else! I am happy to help!
Vester whitmore says
Thanks for the help!!!