Use your Cricut or Silhouette cutting machine to make these adorable Graduation Cap Cards for your grad to send to all those who celebrated with them on their awesome accomplishment! Or use them as a cute “Congratulations Grad!” card for your favorite graduate! This step-by-step tutorial will show you how to both cut on your Cricut machine and use the Cricut Pens for this fun project!
Follow me on YouTube for more Cricut & Craft videos!
Why send a boring thank you card when you can send an adorable one? As always I like lots of options and show you several ways you can use this Graduation Cap SVG file to make several different versions of a Graduation Thank You Card or a Graduation Card to gift to the graduate.
WHAT IS INCLUDED IN THIS POST?
- Video
- Supply List
- Helpful Tutorials
- Notes for all versions of card
- Double-Sided Grad Card Option How-to
- Single Color Grad Card Option How-to
- Graduation Cap SVG File
Supplies Needed for Graduation Cap Cards:
This post may contain links to Amazon Associate and other affiliates.
As an Amazon affiliate, I earn a small commission from these links at no additional cost to you.
- Graduation Cap SVG File
- Cricut Cutting Machine
- Cricut Spatula
- Cricut Pens (Black or your choice of Color)
- White Cardstock
- Colored Cardstock (school colors or black/grey)
- Tape Runner
- Fine Tip Glue Pen
- Envelopes
Tutorials you may find helpful during this Project:
This is a long post but I try to be as detailed as possible and provide screenshots so you can easily duplicate them! I have also included a screencast if you prefer to learn through video!
Video Tutorial
Note for all versions of the Thank You Card:
Files sometimes do not import into Cricut Design Space using the intended saved dimensions. You will need to double-check. To do this, decide what size envelope you would like to use. I chose 5 x 7. Draw a 5 x 7 rectangle in Design Space and resize your graduation cap to fit that rectangle. Rotating the cap ever so slightly will allow the largest size.
Double Sided Graduation Cap Thank You Note:
In the first version of these thank you cards we are going to make one side colored cardstock and then the backside will be white with the words “Thank You” written on the top and plenty of area for your grad to write their thanks.
We will use DUPLICATE and WELD tools in this version.
- Upload the Graduation Cap SVG file into Cricut Design Space. You can find that specific tutorial here. Size to your envelope as mentioned above.
- While all layers of the graduation cap are selected, head to the Layers Panel and select DUPLICATE. On one of the caps, select the button and the tassel layers and DELETE.
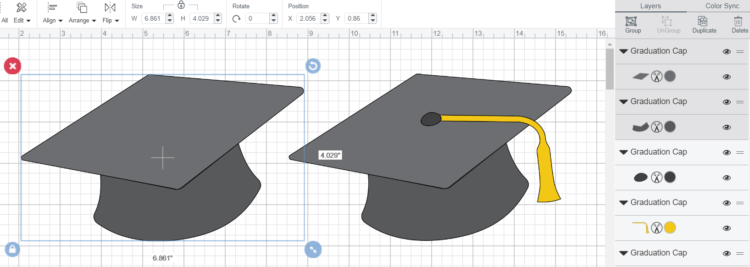
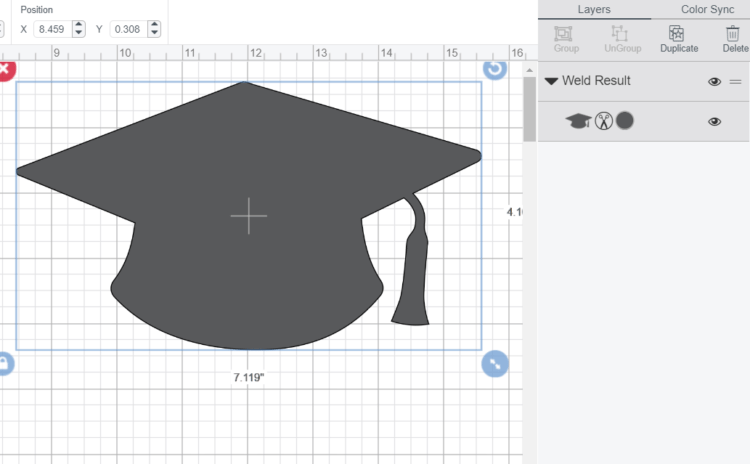
- With the remaining top and bottom of the cap selected, click WELD at the very bottom of the Layers Panel. This will make the top and bottom of the cap one piece. This will be our white backing to our Graduation Thank You Card. Cange the color of this welded layer by clicking on the colored circle in the layers panel and selecting white.
- Since the graduation cap is not exactly symmetrical we will need to MIRROR this white welded design so that when we use the pens, we have the correct side facing out. To do this, select the white welded cap, in the top toolbar, click the arrow under the FLIP tool and select FLIP HORIZONTALLY. If you would like your graduation cap to be one piece instead of two colors, follow the same directions as for the white piece!
- Next, we will add Thank You to the top of the graduation cap. I used Algebra Font You can find a detailed tutorial on how to do this along with font choices here.
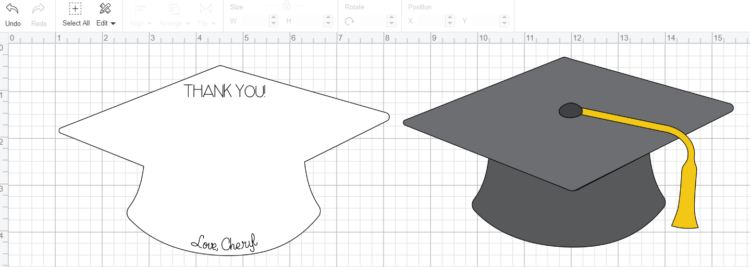
If you would like, you could also add a signature at the bottom! I used my How to Curve Text tutorial for this!Most important step here is to select the white graduation hat and the writing and click the ATTACH tool at the bottom of the Layers Panel. If you don’t do this, Design Space will just randomly write the words where it pleases versus where we want it! - Click MAKE IT in the upper right and follow the prompts on the Prepare Mat Screen and Cut Screen to write on and cut your pieces.
TIP: Select your entire design and click DUPLICATE as many times as you need. Cricut will space everything out on your mats for you!
Assembly of Double-Sided Graduation Cap Thank You:
Using the tape runner adhere your colored graduation cap top and bottom onto the blank side of the white cardstock. Using a tape runner will make sure you don’t get ripples in your cardstock that can appear from liquid glue. Trust me, you will get ripples if you glue paper together with wet glue!
Using the glue pen, add the tassel and tassel button to the graduation cap! You now have a fun Graduation Cap Thank You Card!
Single Color Cut Out Graduation Cap Thank You Card:
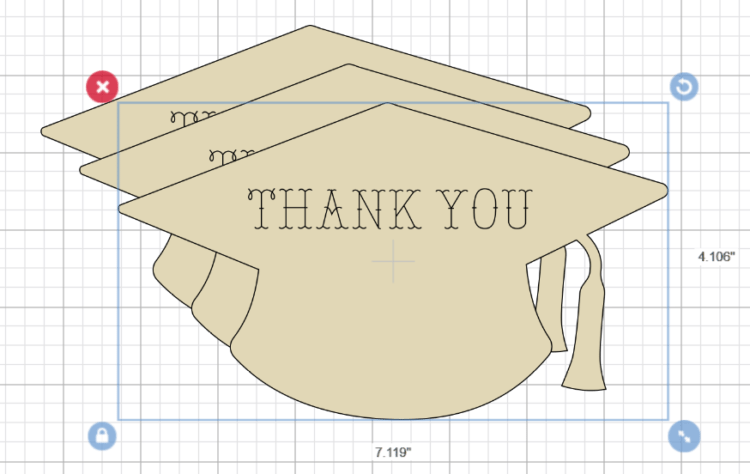
This is a less elaborate version. Basically, we will cut a single-layer silhouette of the Graduation Cap Thank You Card. You can use white or other light-colored cardstock so that you can see your writing!
- Upload the Graduation Cap SVG into Cricut Design Space (tutorial here).
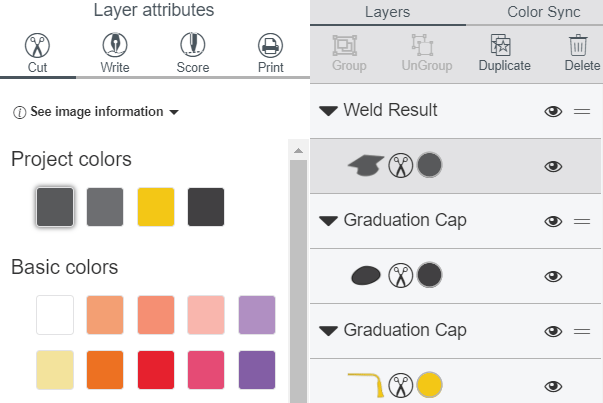
- While all layers of the graduation cap file is selected, click WELD at the bottom of the Layers Panel. This will combine all the objects of the design to one.
- You can write Thank You and signature as we did above or you can write a larger Thank You in the center as the front of the card and then use the back for writing thanks.
- Don’t forget to ATTACH your writing to your design.
In place of the words Thank You, you could also write Congratulations or Congrats Grad and make this a card to GIVE to a graduate! I like versatility in my projects! Don’t forget to see how I originally used this file in my Graduation Cap & Diploma Banner.
GET THE GRADUATION CAP FILE HERE
This file is no longer a FLASH FREEBIE. You may now find it in my shop. Please sign up for my emails so that you will never miss another Flash Freebie!








Comments & Reviews
Joyce says
Thanks for sharing Cheryl! Just in time for me to try and make for Nathaniel’s graduation next month!
Cheryl Spangenberg says
Yay! I can’t believe he is graduating already!
Julia says
This is exactly the shape I am looking for! However, now that the free download period is over, I cannot seem to find where to buy it. Please help!
Cheryl Spangenberg says
Hi Julia! There is a buy button now in place of the free download form. You may have to clear your cookies for it to show up! Let me know if you still cannot get it to show up for you! Thank you!!
Julia says
Thanks so much! I made the purchase and it is fabulous. Thanks for your help and prompt response!
Cheryl Spangenberg says
xo Julia!