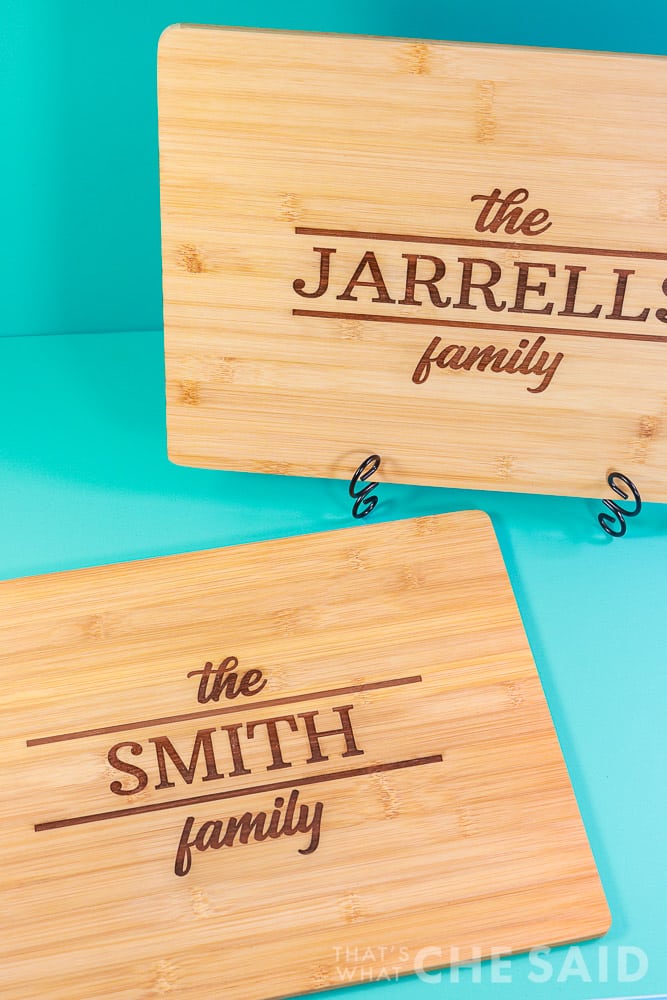
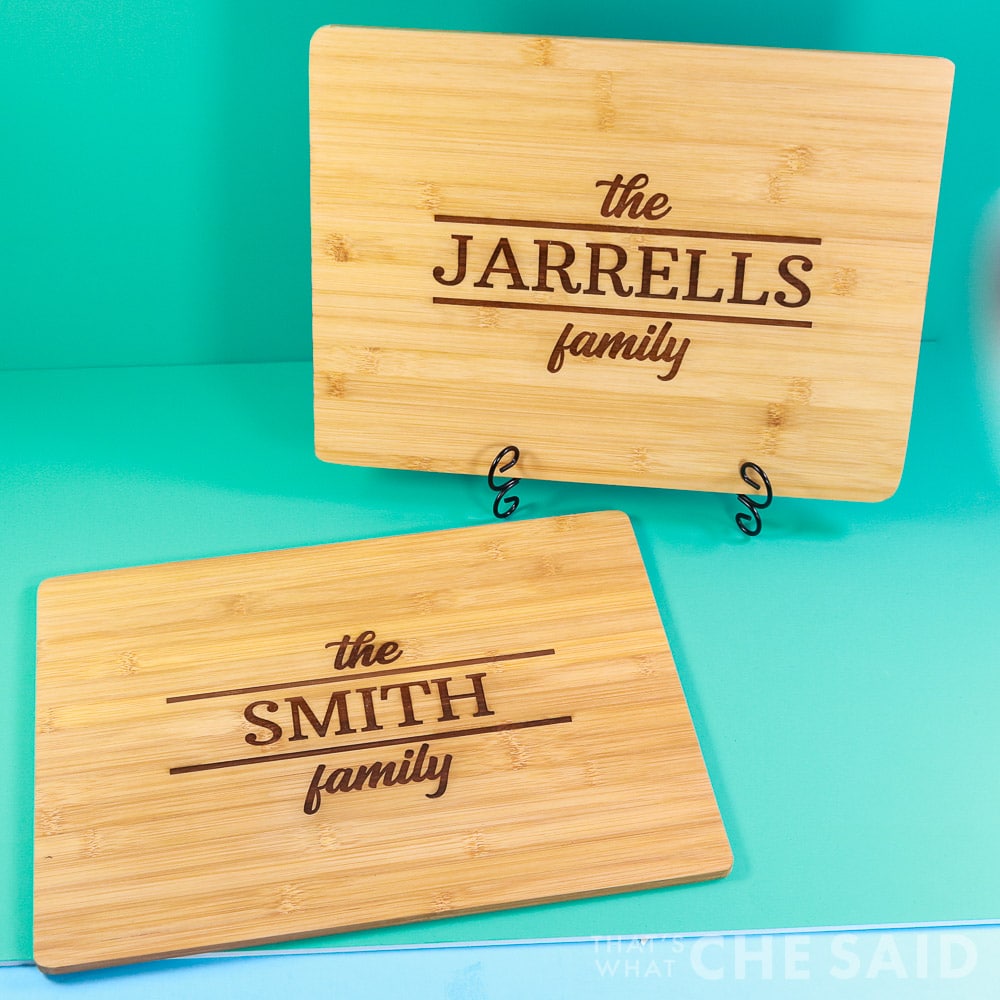
Today I will be using my xTool M1 Hybrid laser to teach you how to engrave a cutting board! There are so many different ways to personalize engraved cutting boards and these make thoughtful gifts for the cooks in your life, wedding gift, shower gifts, anniversary gift, Christmas gifts, neighbor gifts, and more! Prop them up and you have usable decor!
If you aren’t familiar with the xTool M1 Hybrid Laser Cutter/Engraver machine you can read my full M1 overview here.
Here is what we will talk about in this post

This post may contain links to Amazon Associate and other affiliates.
As an Amazon affiliate, I earn a small commission from these links at no additional cost to you.
Engraved Cutting Board Supplies
- xTool M1 Laser (xTool | Amazon)
- Cutting Board (I used Bamboo)
- Ruler
- SVG Design
- Rubbing Alcohol
- Paper Towels
- Q-Tips
Pin How to Engrave a Cutting Board
Pin It HereClick the button above to save to your board for later!
Which Cutting Board to Use?
You can engrave many different types of wooden cutting boards with the M1 machine. I have engraved both Bamboo and Acacia. I have added several I like to my Amazon Storefront! The M1 also has the capability to engrave walnut and maple cutting boards as well!
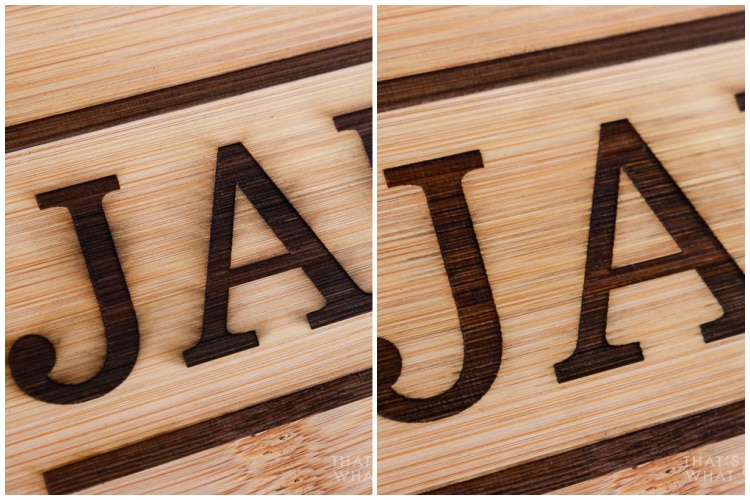
The thing to note about bamboo is that the differences in the parts of the board will yield lighter/darker engraving.
Currently, I am loving these $5 bamboo boards from the “Plus” section of Dollar Tree! You can also buy them in bulk by using the Catalog Quick Order and sku# 314104!
All in all, you can use any board size you prefer as long as you can get it in and out of the working area of the M1. If your board has larger dimensions than the working area, you will need to remove the base plate, use the risers and select “Open Plane” as opposed to “Laser Flat” as I do below. I will work on a dedicated post on how to create using larger-than-the-workspace blanks!
Where to Find Designs for Engraved Cutting Boards:
I am a huge lover of anything monogrammed! You may remember I taught How to Make a Monogram in Design Space and also shared my favorite 30 Free Monogram Fonts to use! I also showed how to make a Split Letter monogram using your favorite font in Silhouette Studio! Monogrammed cutting boards are popular and the perfect gift idea!
I also love to find designs at:
Today I am using a piece of a design from this Family Monogram Bundle from Designbundles.net and using family names.
Don’t Miss Out!
Get more xTool Tutorials, Project and Roundups straight to your inbox!
You can also use recipes in the handwriting of a family member, funny sayings, a last name, or anything you wish!
How to Laser Engrave a Cutting Board
Time needed: 45 minutes
Step by step tutorial on how to engrave a chopping board using the xTool M1 Hybrid laser/blade cutter. Get all my tips and tricks for a successful engraving!
- Turn on the M1 Machine
Flip the power switch on the back of the M1 Hybrid laser machine to the on position. It may take a minute for the unit to fully power on. If your laser is not fully powered up, it will not connect in step 2.
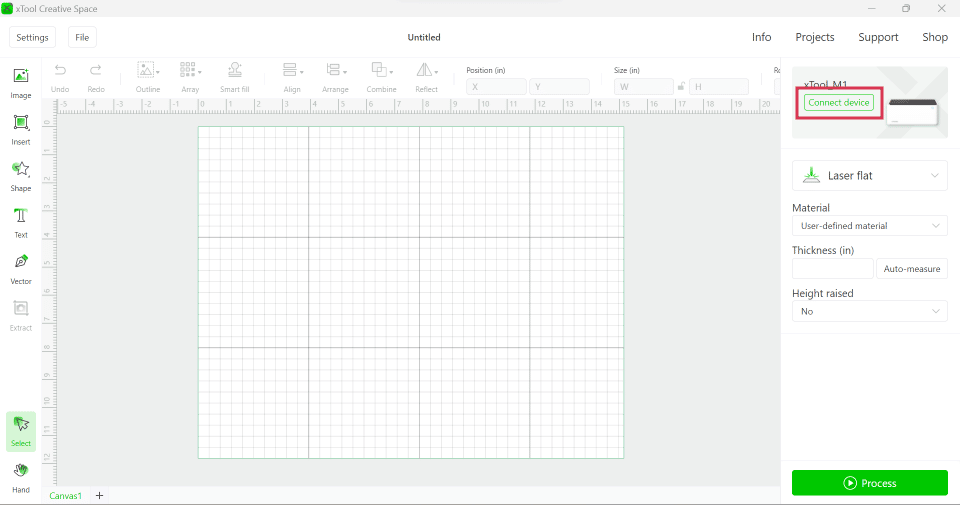
- Open xTool Creative Space (XCS) and Connect Laser
Start the XCS program on your computer and connect your laser either via USB cord or wi-fi. You can find detailed instructions on how to connect your machine here.
- Find the Center of the Cutting Board
Using a ruler or measuring tape, find the center of your cutting board and place a small pencil dot at the center mark. *See my tip below if you are making more than one board at a time! This will ensure you place your design at the center.
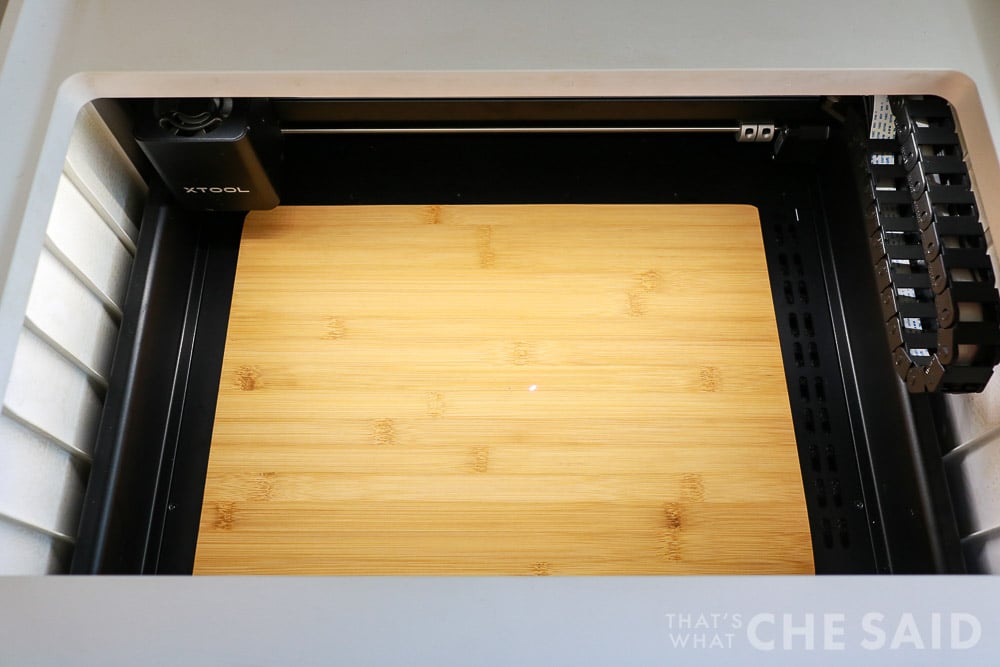
- Insert the Cutting Board & Verify Blade Housing is Removed
Lift the lid of the laser box and place the cutting board into the working area of the xTool M1. There is no need for the use of any prism risers. I like to line up my board from the top left. it doesn’t really matter where you line up the board because we have that pencil dot from step 3, however, be sure your board is under the red laser mark.
**Verify that the blade & blade housing has been removed from the laser module. Close the lid on the laser box. - Refresh Camera View
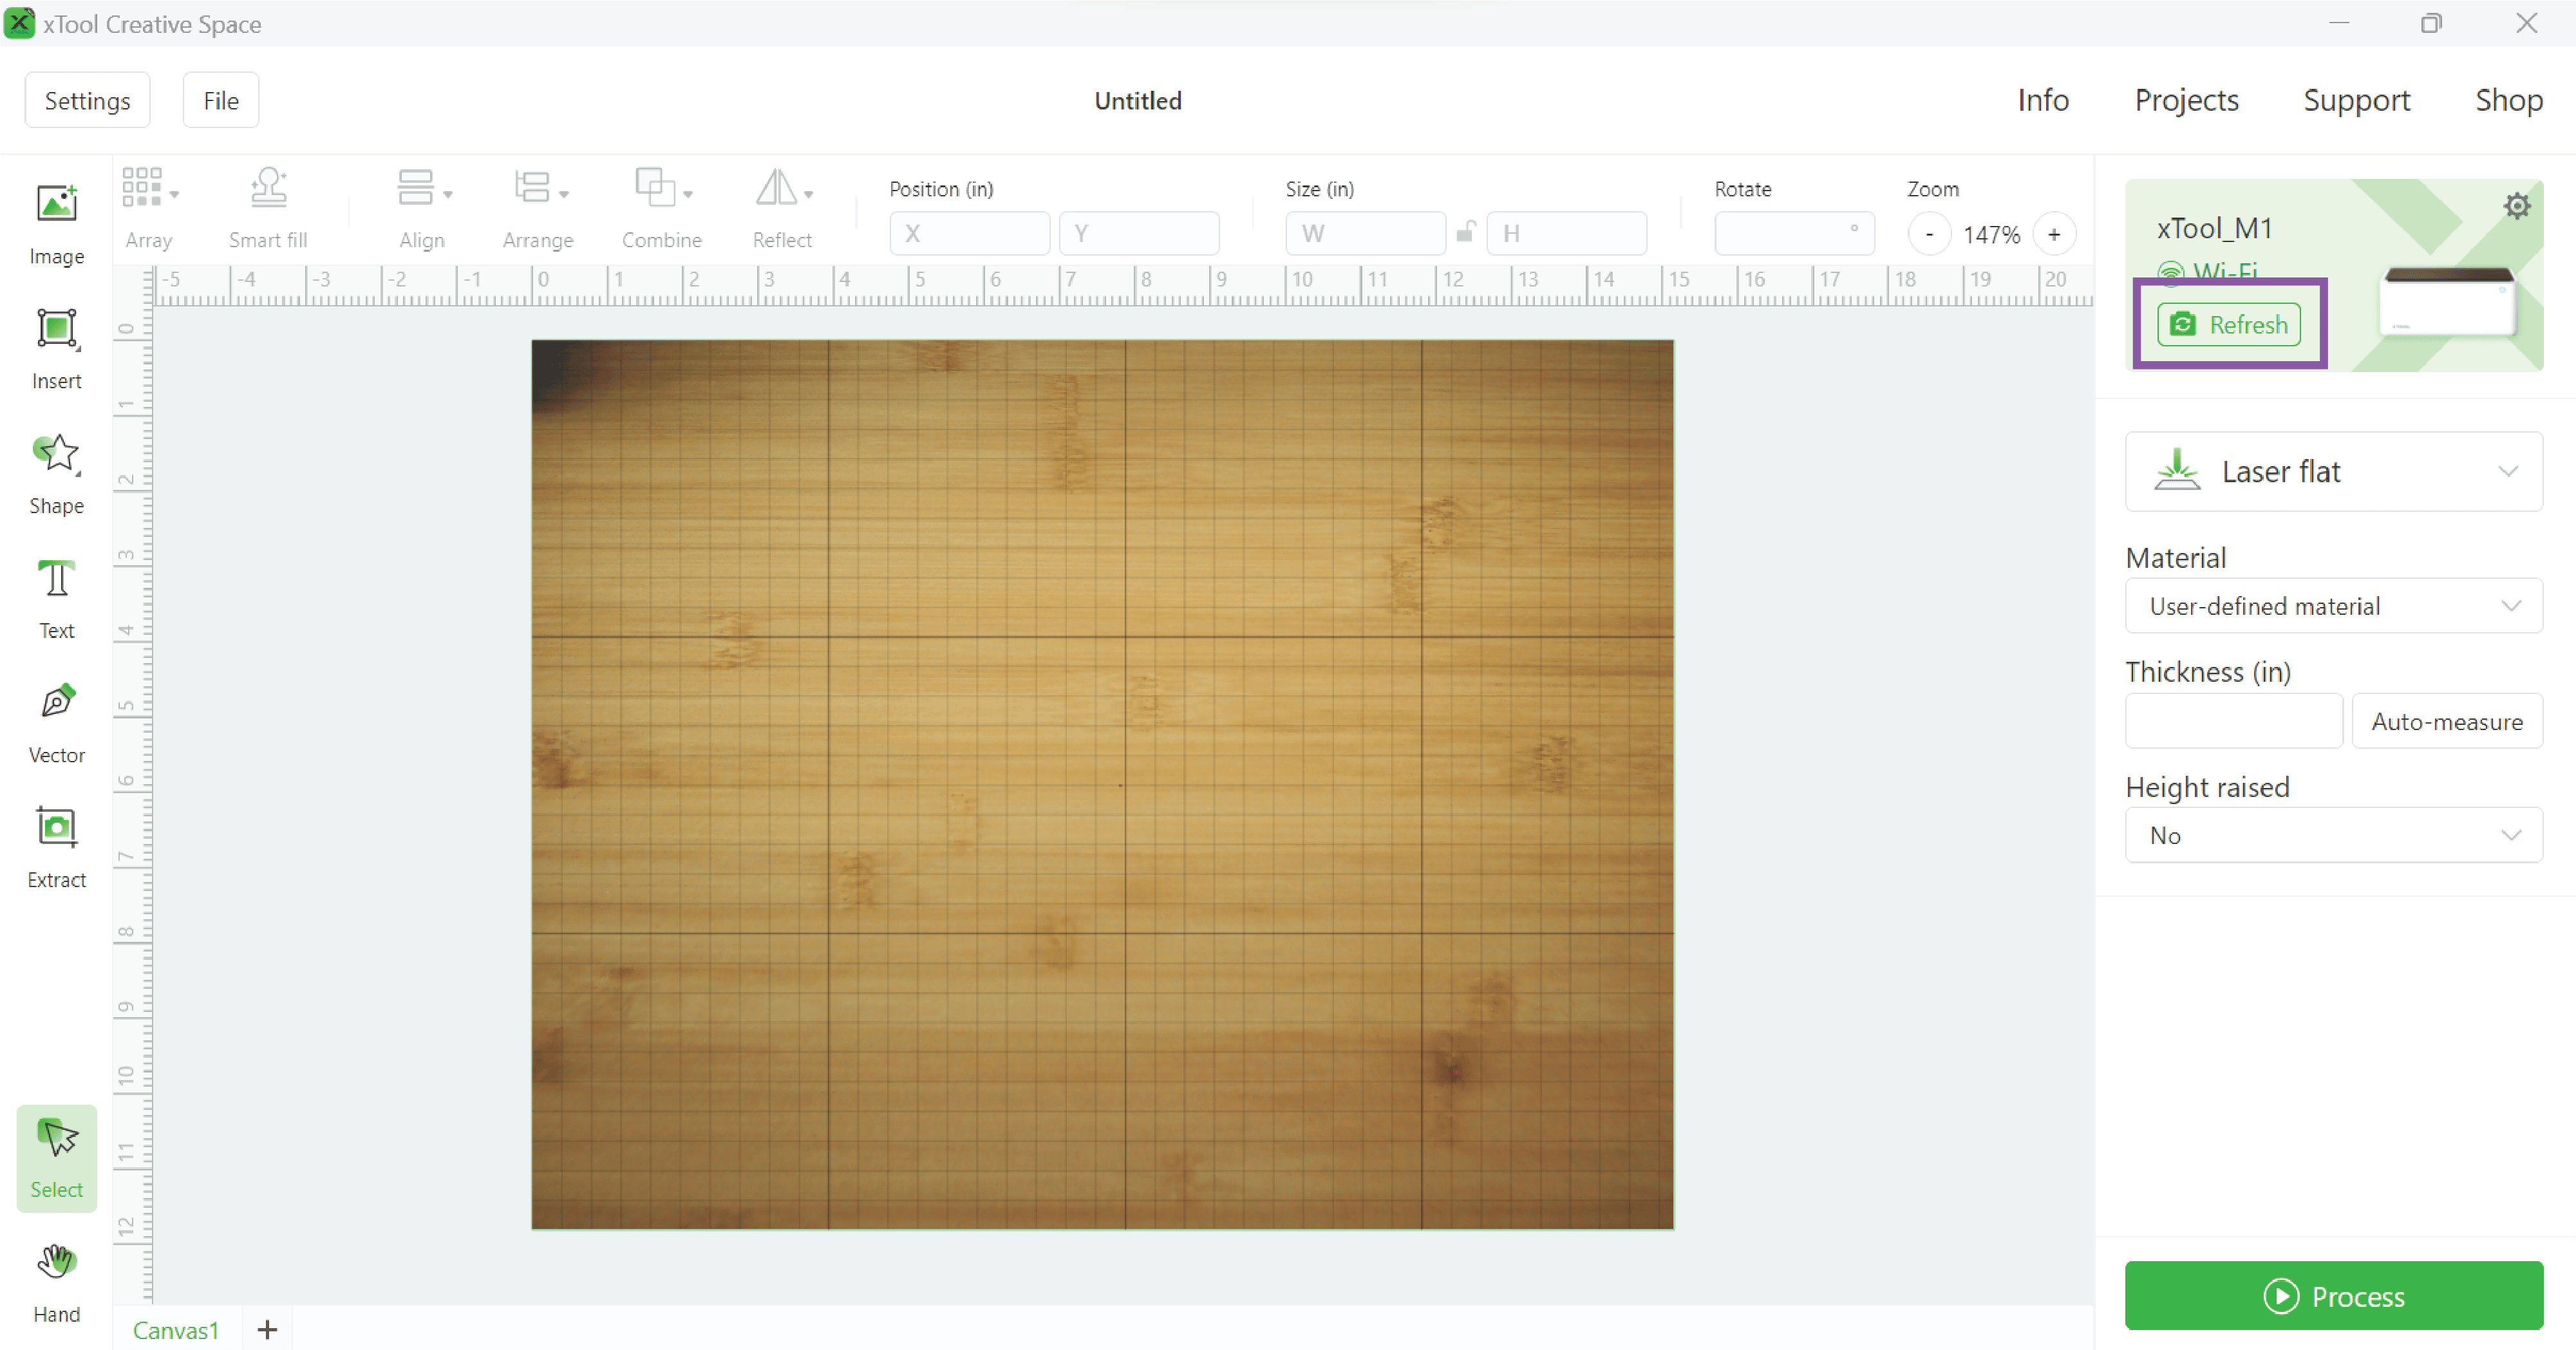
Hop back over to XCS and click the camera refresh button in the upper right-hand corner. This will give you an accurate view of your board inside your laser. **You can see now that our design area has gone from a white canvas to a view of the actual project inside the laser box.
- Adjust Settings
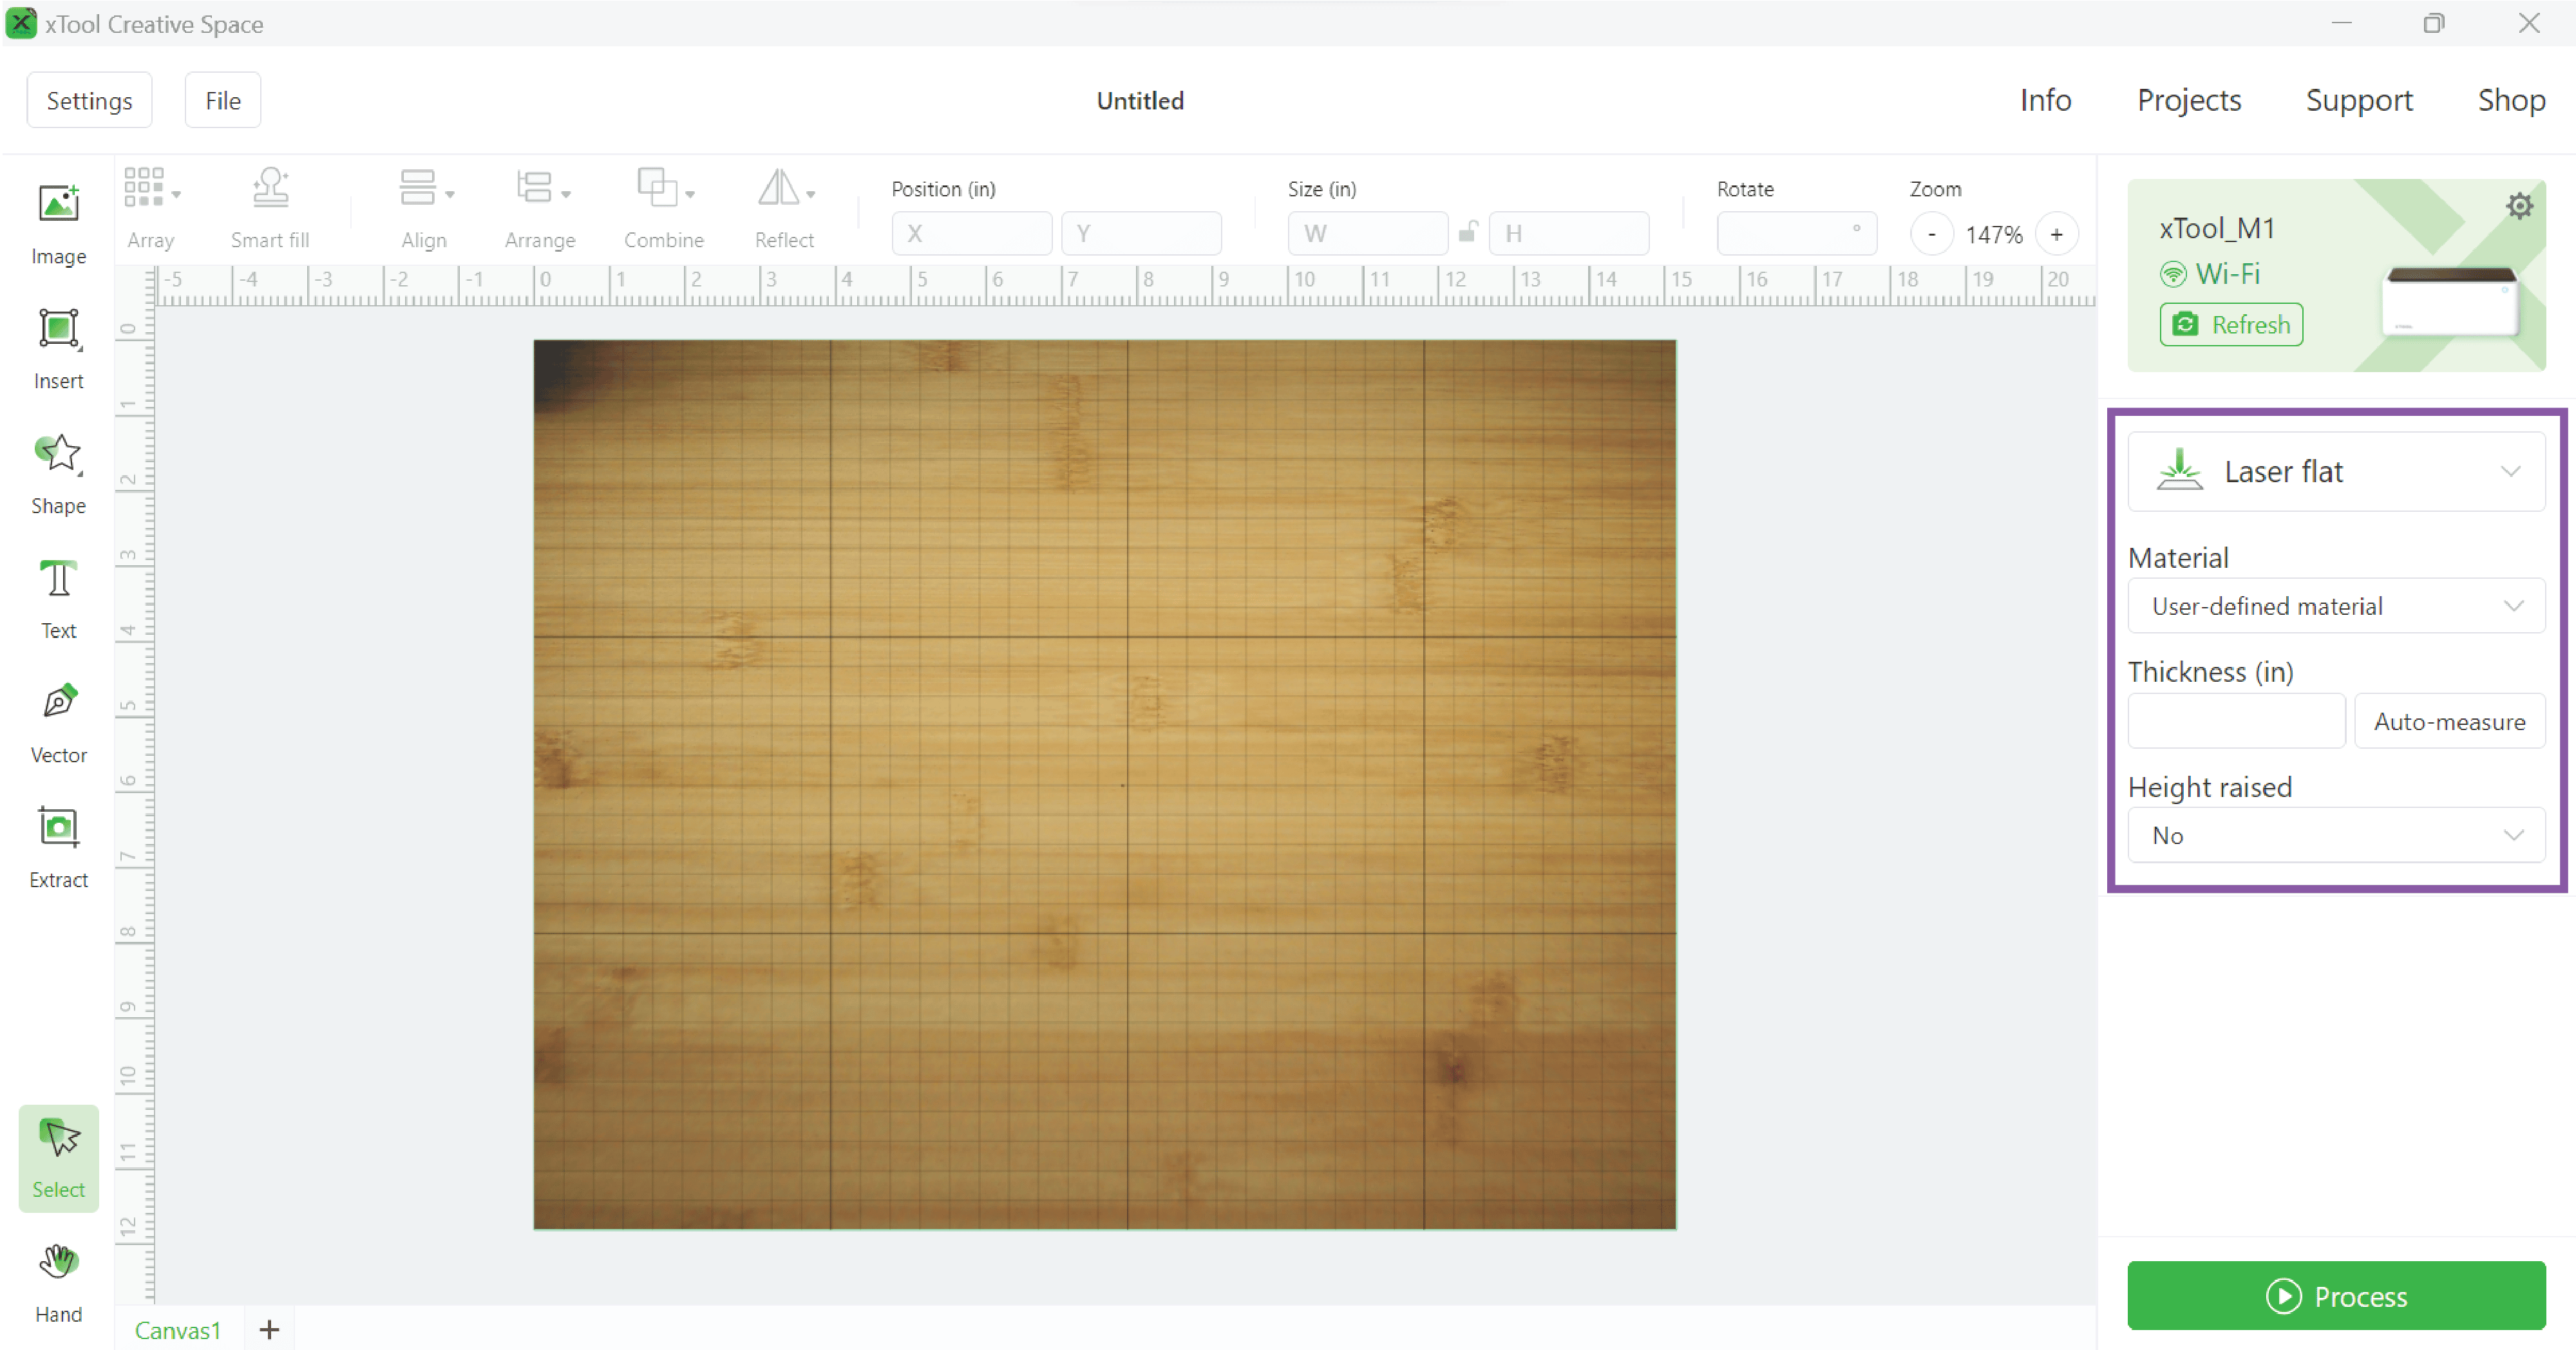
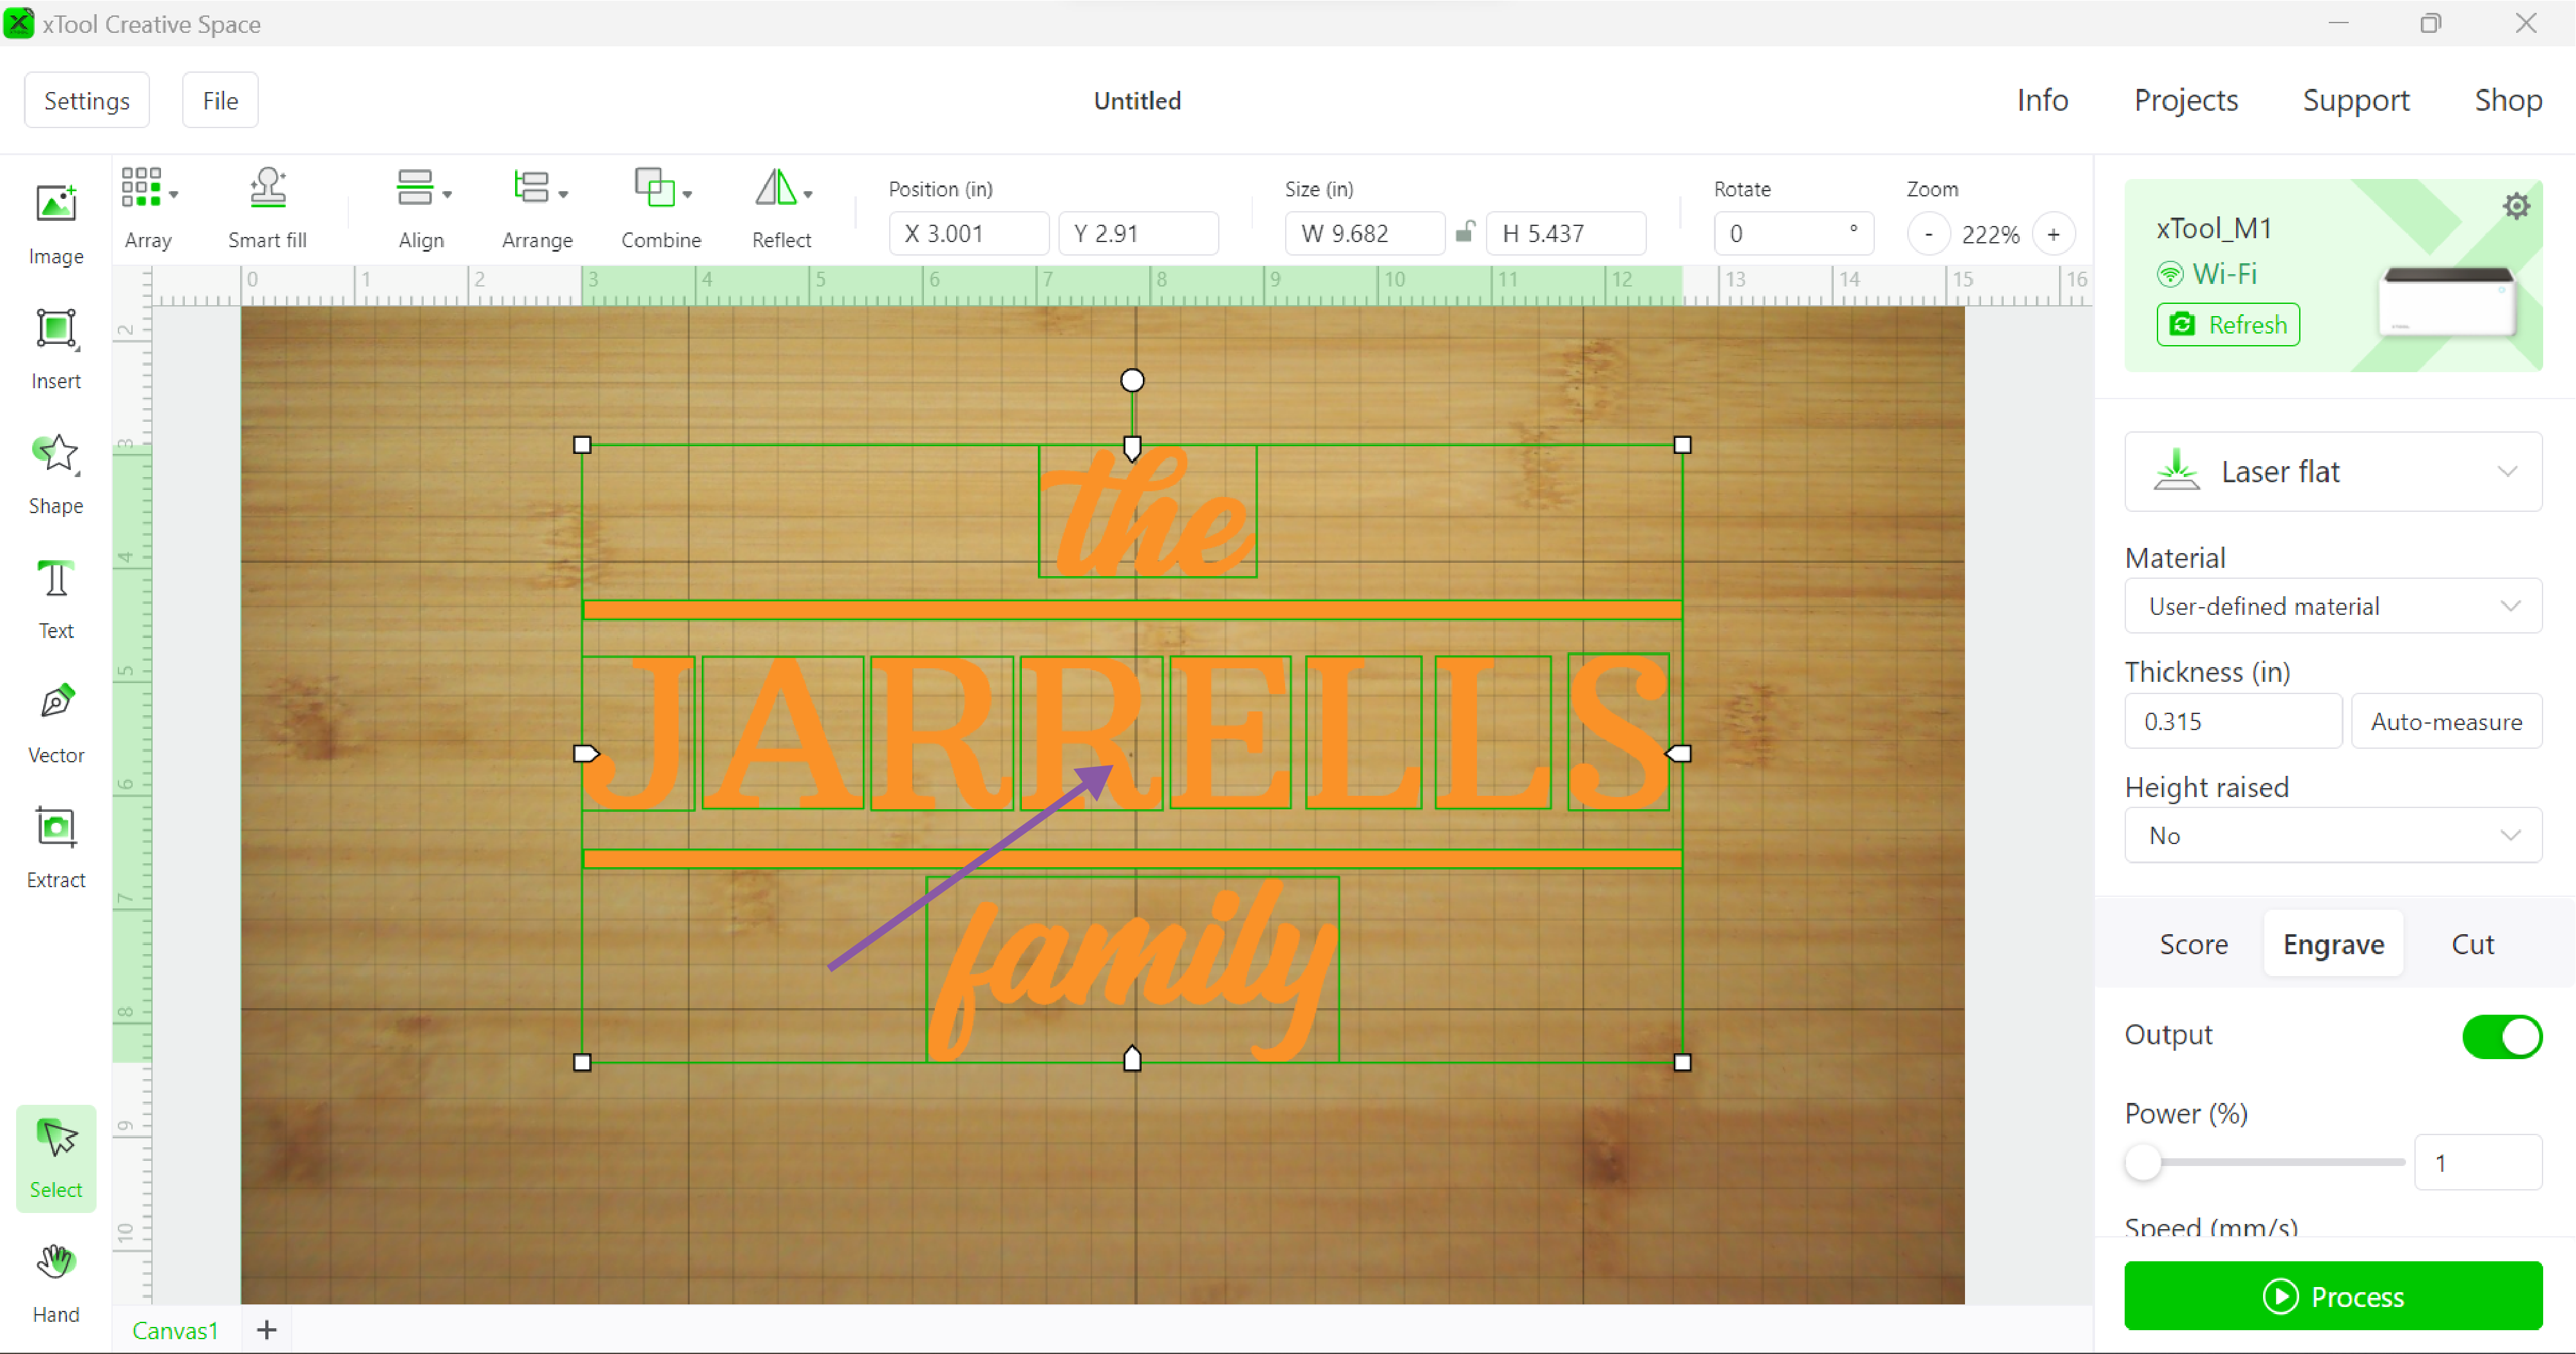
Before inserting the design, first off we need to tell the camera the correct settings for the live view. To adjust these settings, make sure you have LASER FLAT selected, choose USER-DEFINED MATERIAL for the Material, as bamboo is not yet preset in the software, and then skip down to HEIGHT RAISED and select NO.
- Auto-measure Thickness
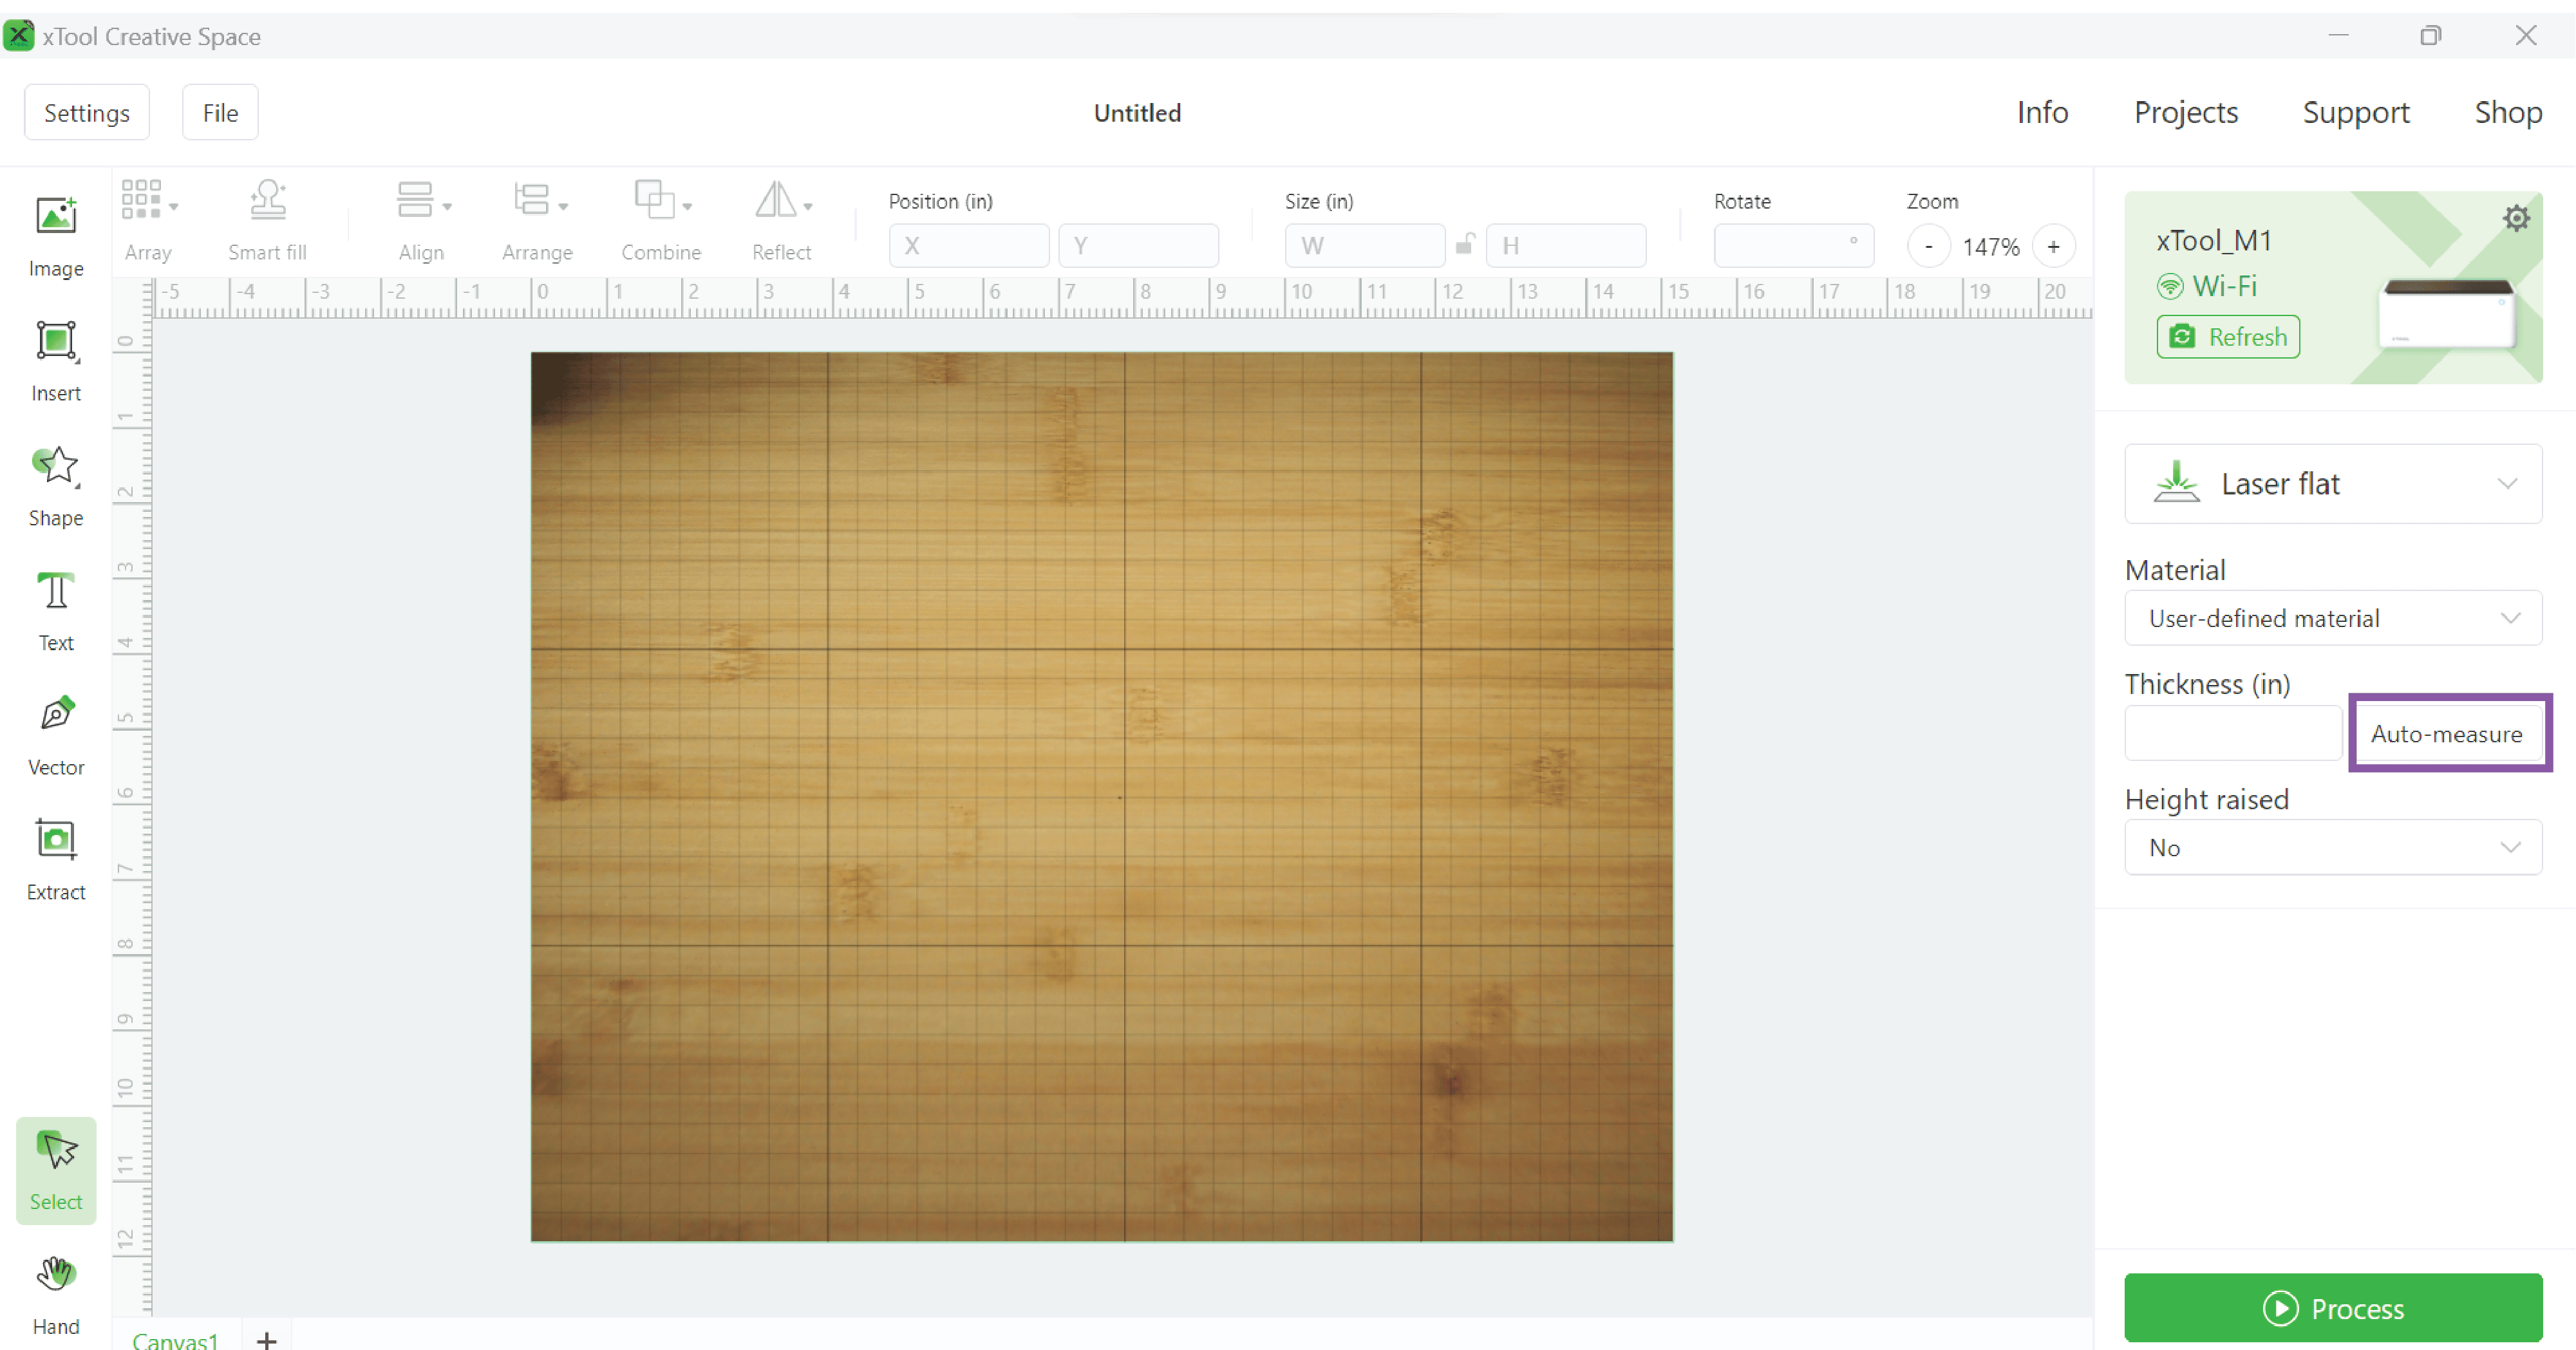
Next, you will click the “AUTO MEASURE” button and that is where that red laser dot will auto-measure the thickness of the cutting board. When this is complete, the box next to the button will have a thickness measurement inserted.
You will notice the image on the screen may have shifted. If we were to have centered our design before this step, we would now have to do it again so it’s important to adjust these settings first! - Insert the SVG Design
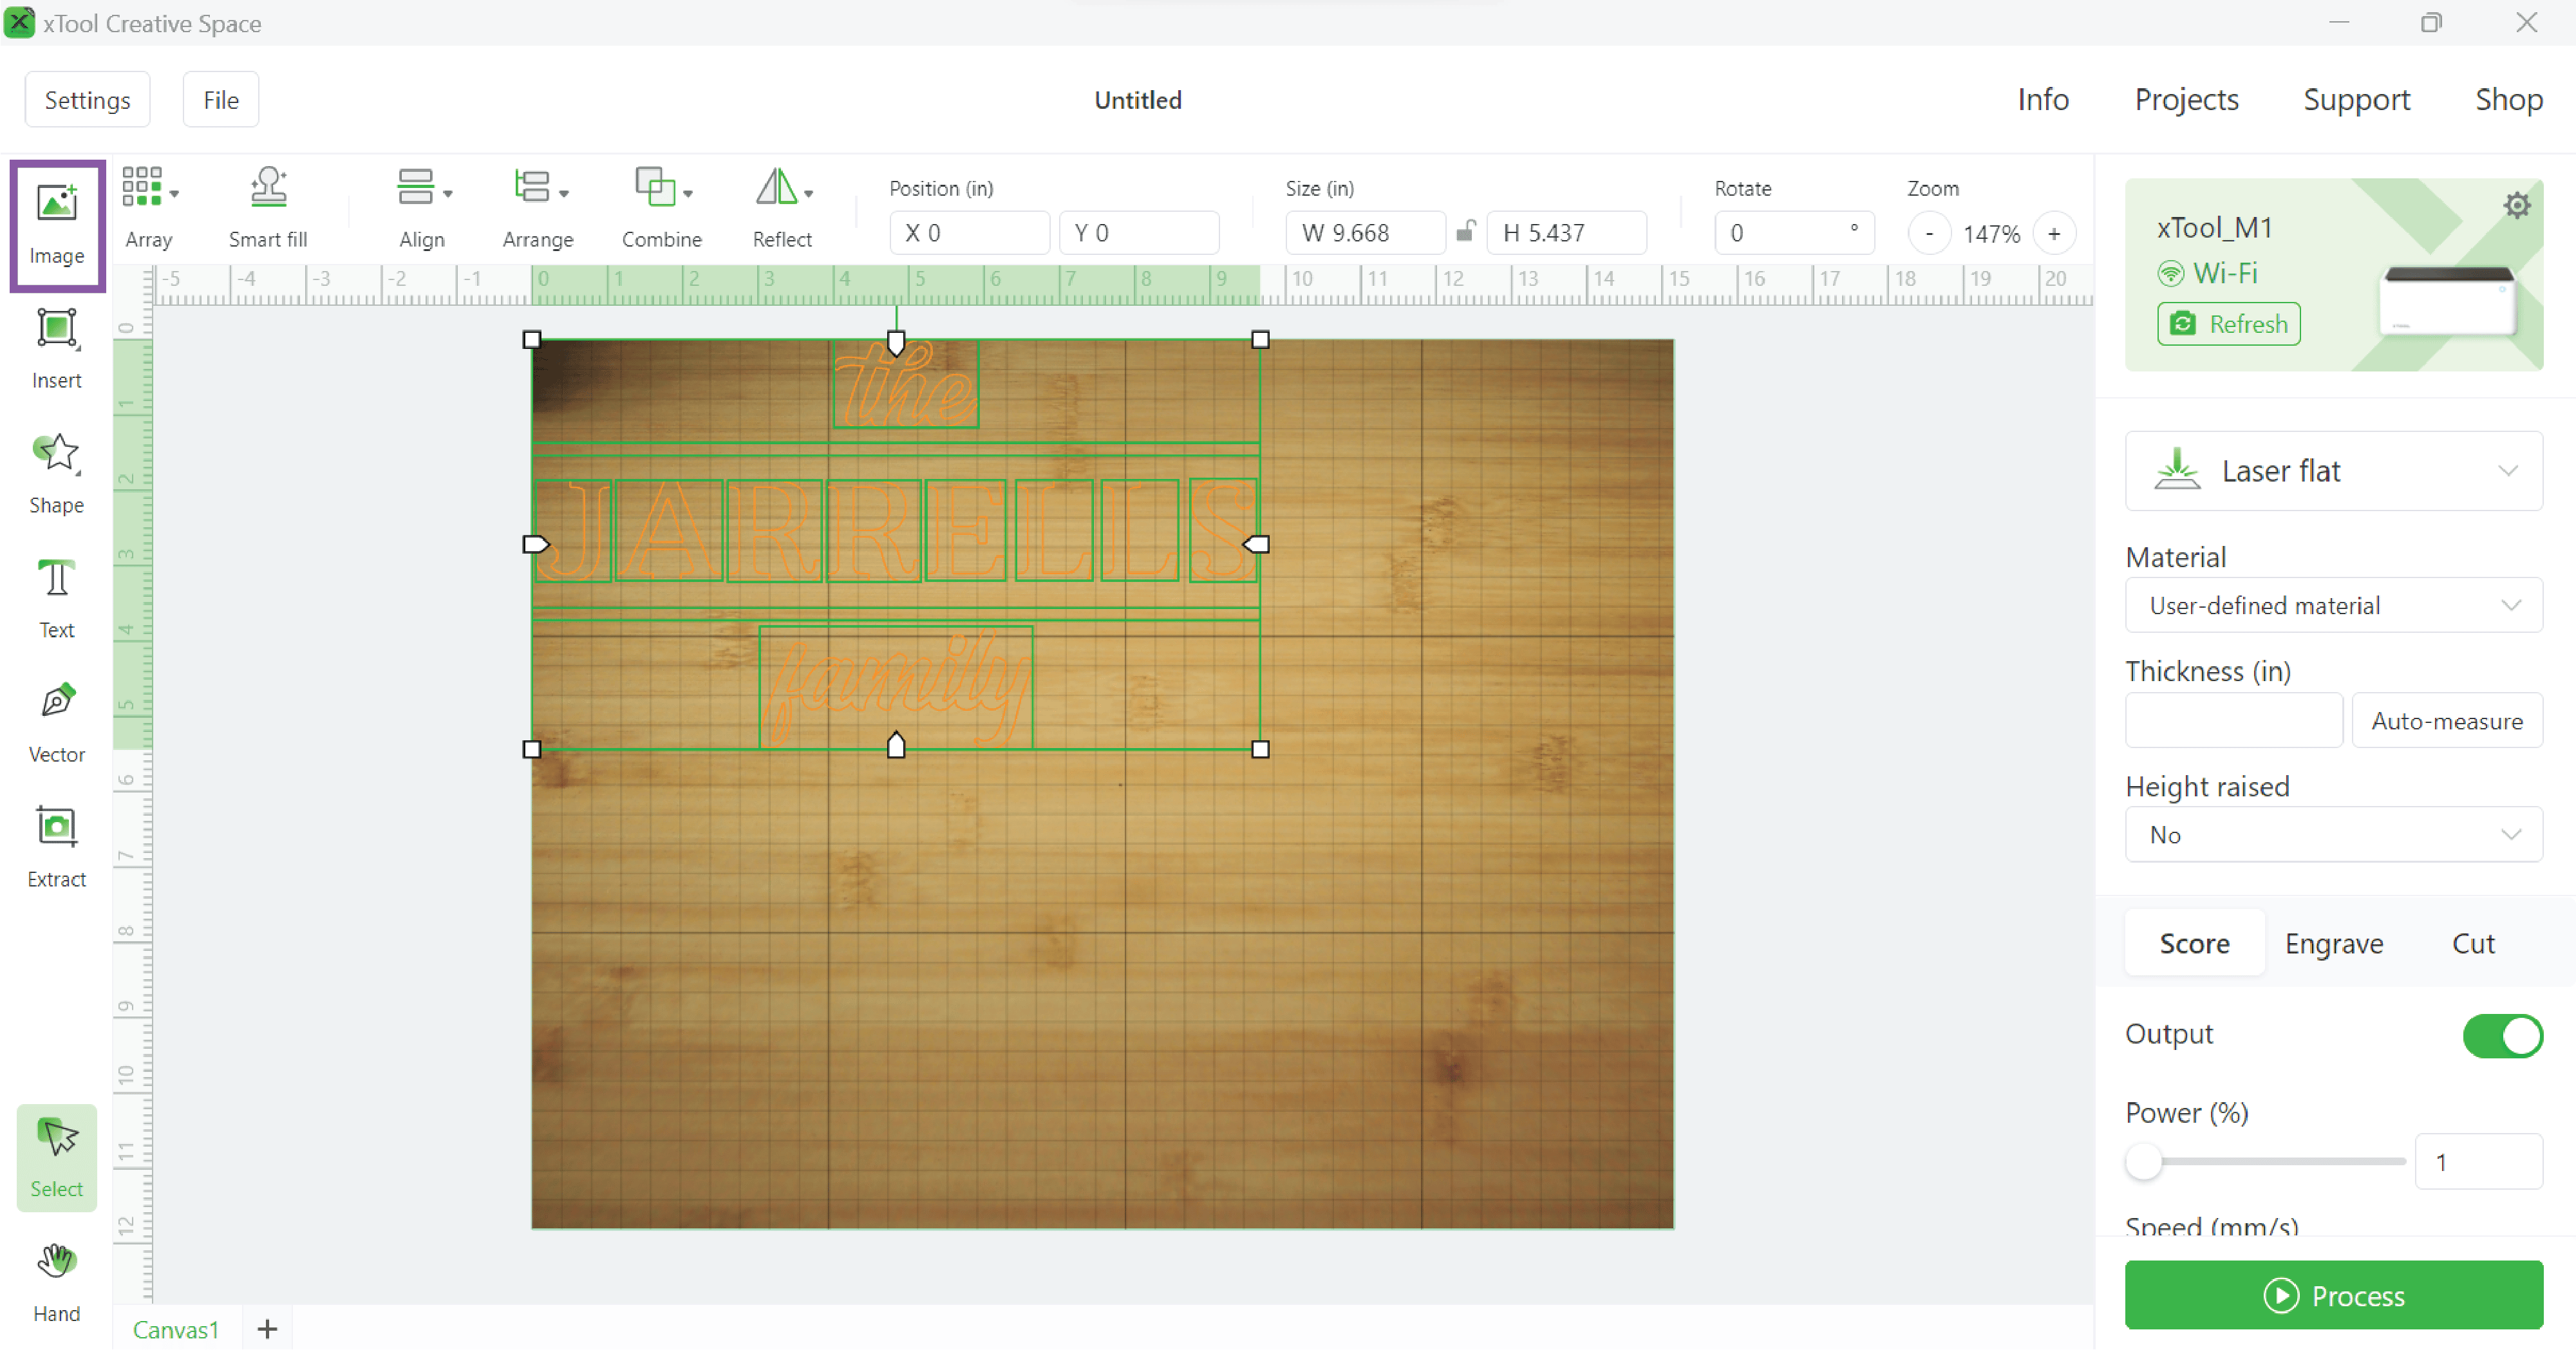
Near the upper left corner, select IMAGE, locate the SVG design on your computer and select Open. This will insert the SVG onto your canvas. The design will input as default, to the SCORE output (orange outline).
- Switch to Engrave Output
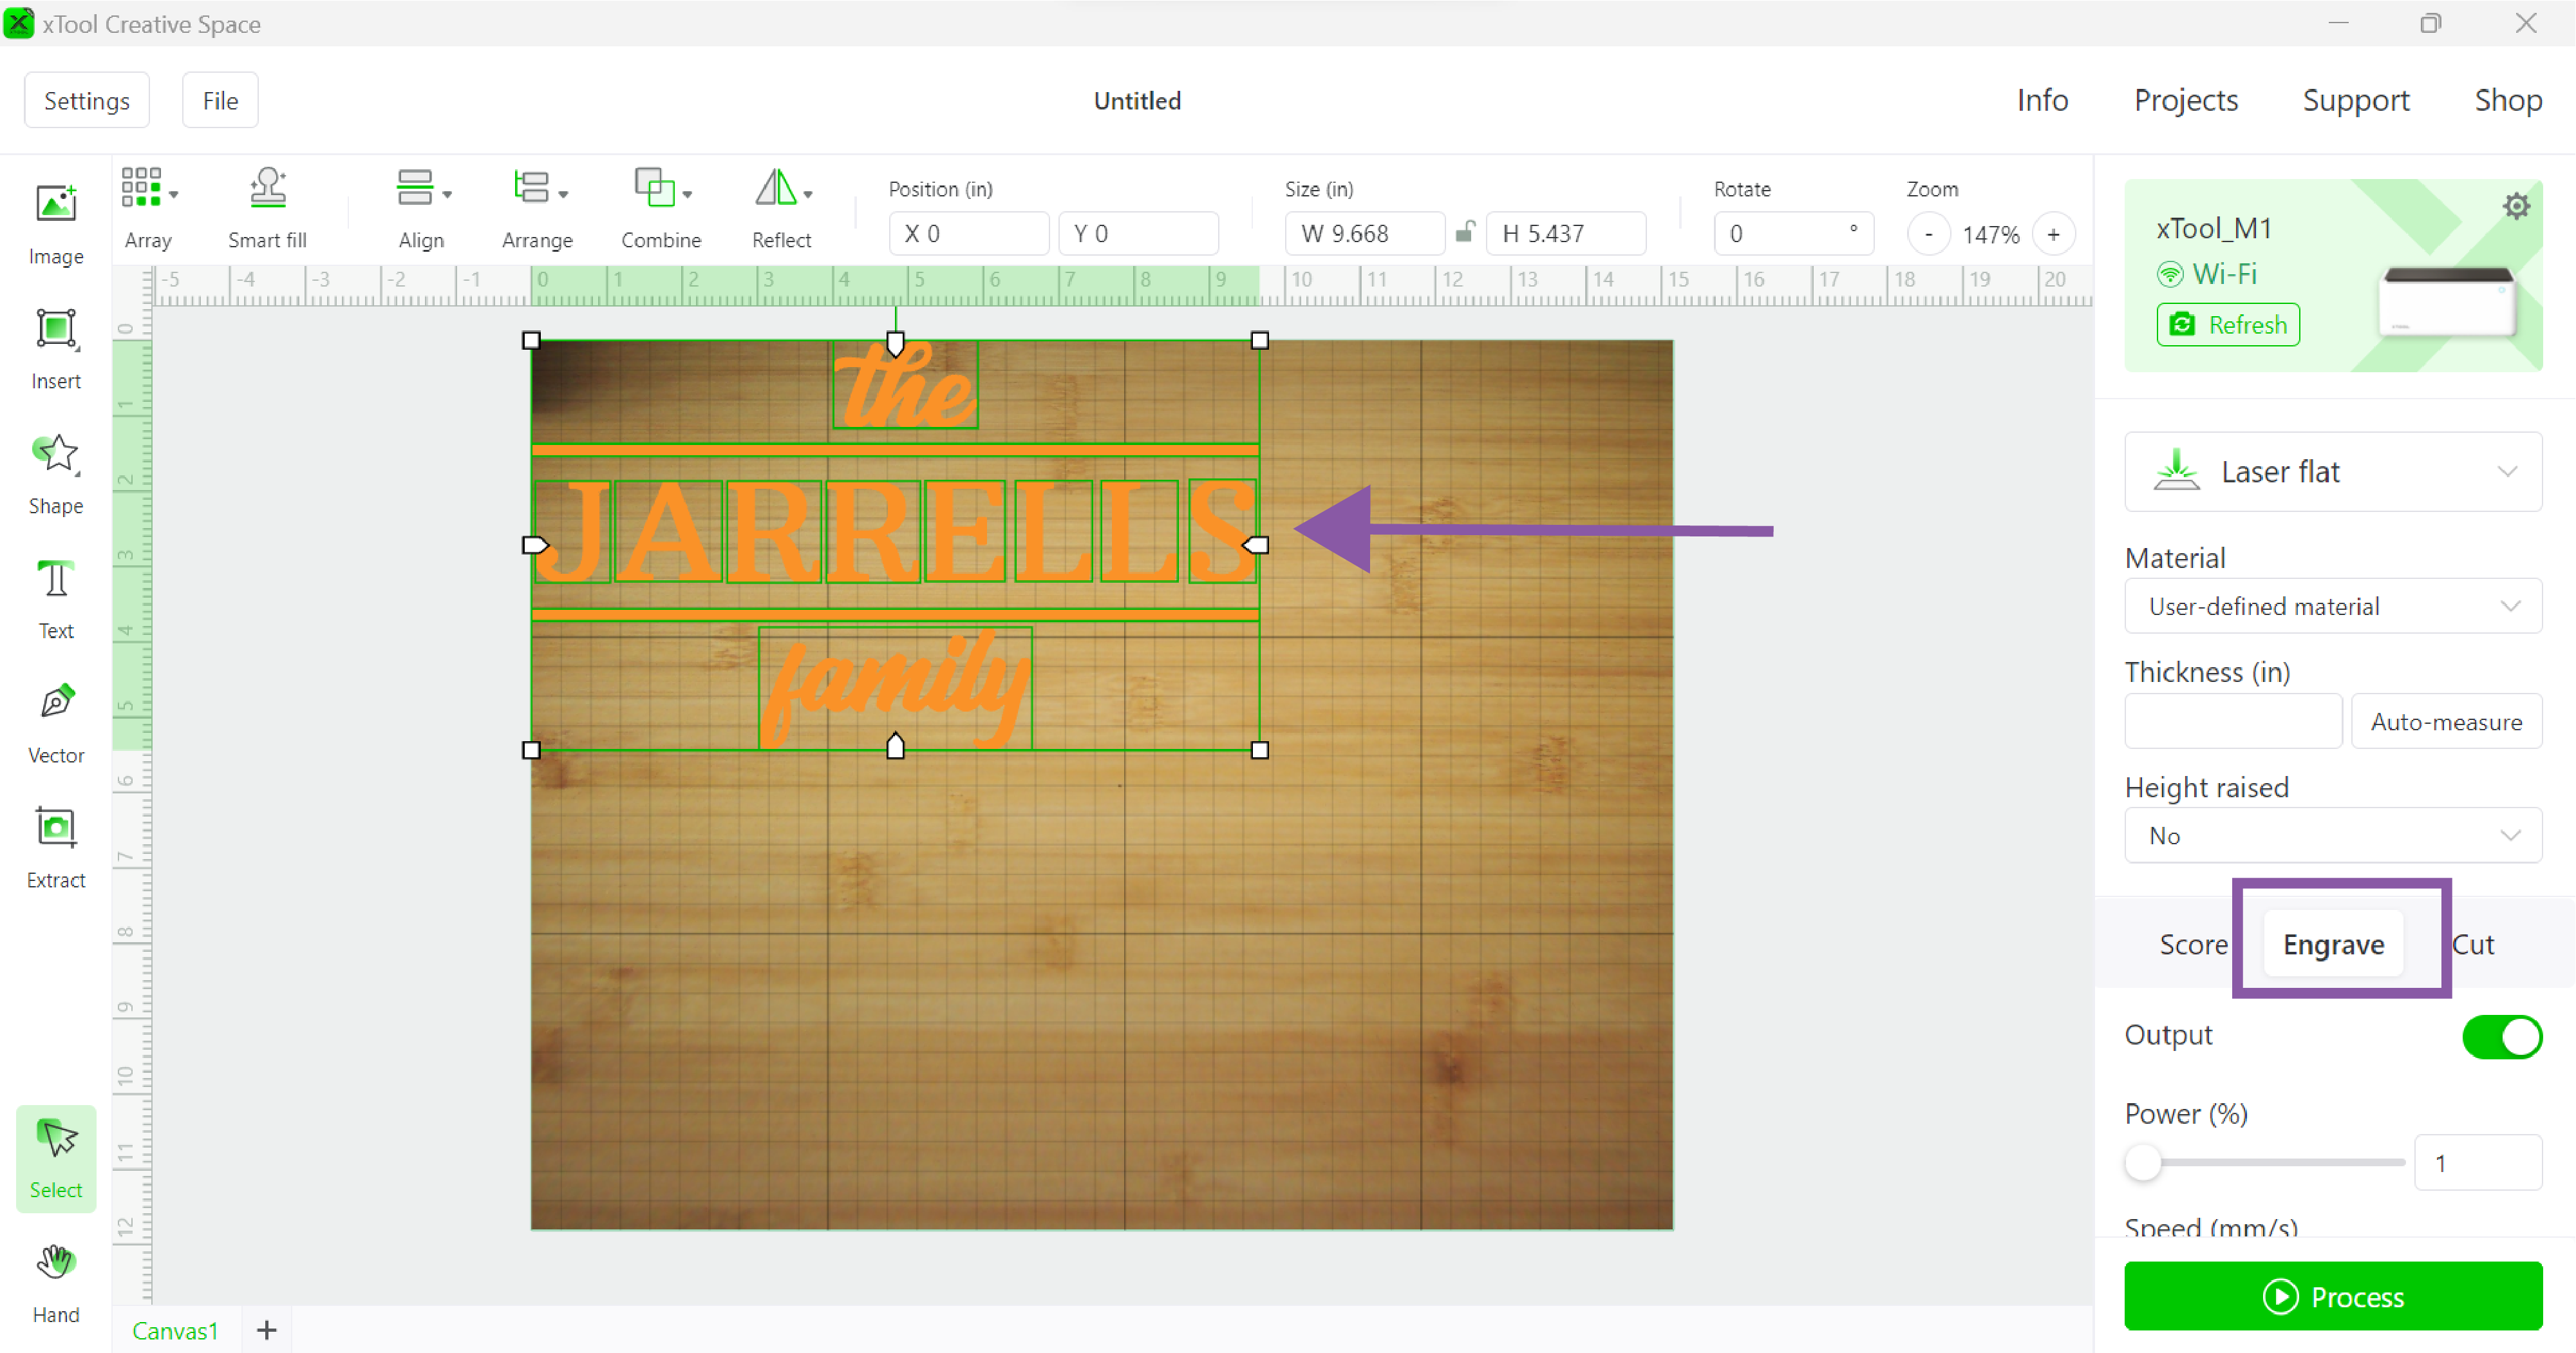
In order for the Output settings to appear within the right menu bar, your design has to be selected. So make sure you have it all selected and then click the ENGRAVE tab. You will notice your design has gone from an ORANGE OUTLINE to SOLID ORANGE.
- Center SVG Design
Select all components of your design and center on the small pencil dot that you made earlier. You may use the zoom function if needed to see the dot better and get your alignment correct.
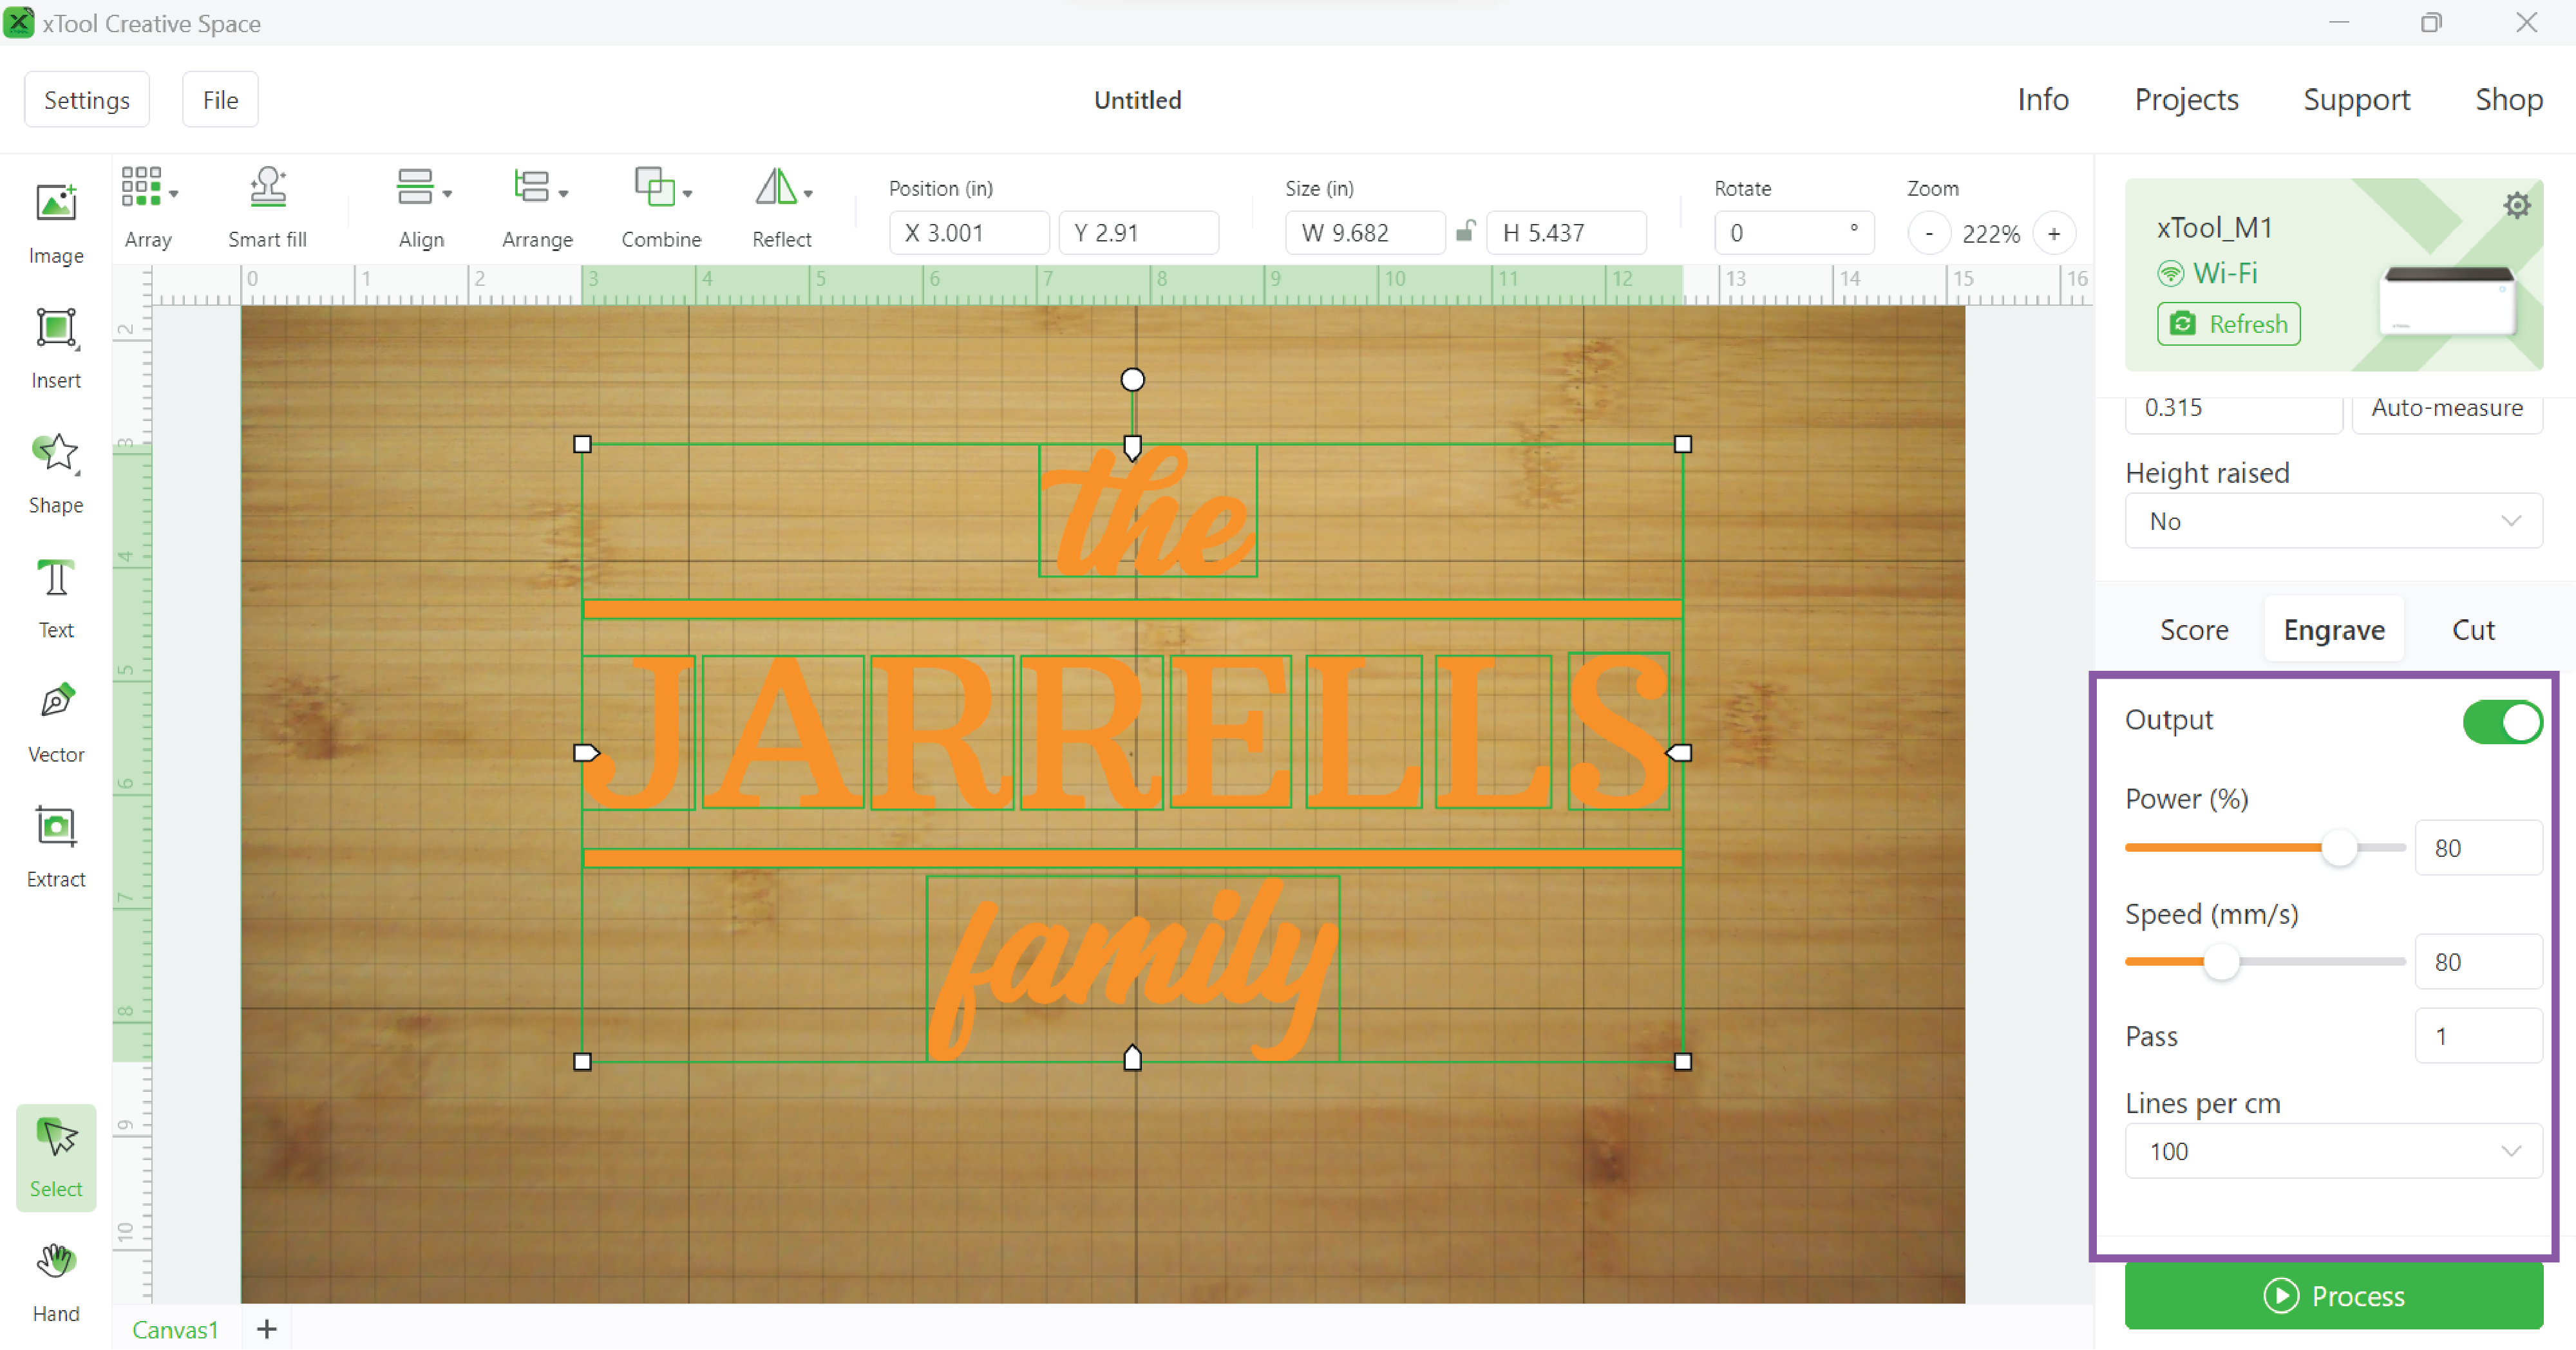
- Set Engrave Output Settings
Under the Output section, scroll down a smidge and enter 80 for the POWER, 80 for the SPEED, 1 for the PASS, and 100 for LINES PER CM. These options are available to manipulate because we selected “USER DEFINED MATERIAL” in the previous steps! You will commonly see these settings described as 80/80/100 for power, speed, and lines respectively. Once these settings are entered Click PROCESS in the lower right corner.
- Start the Engrave Process
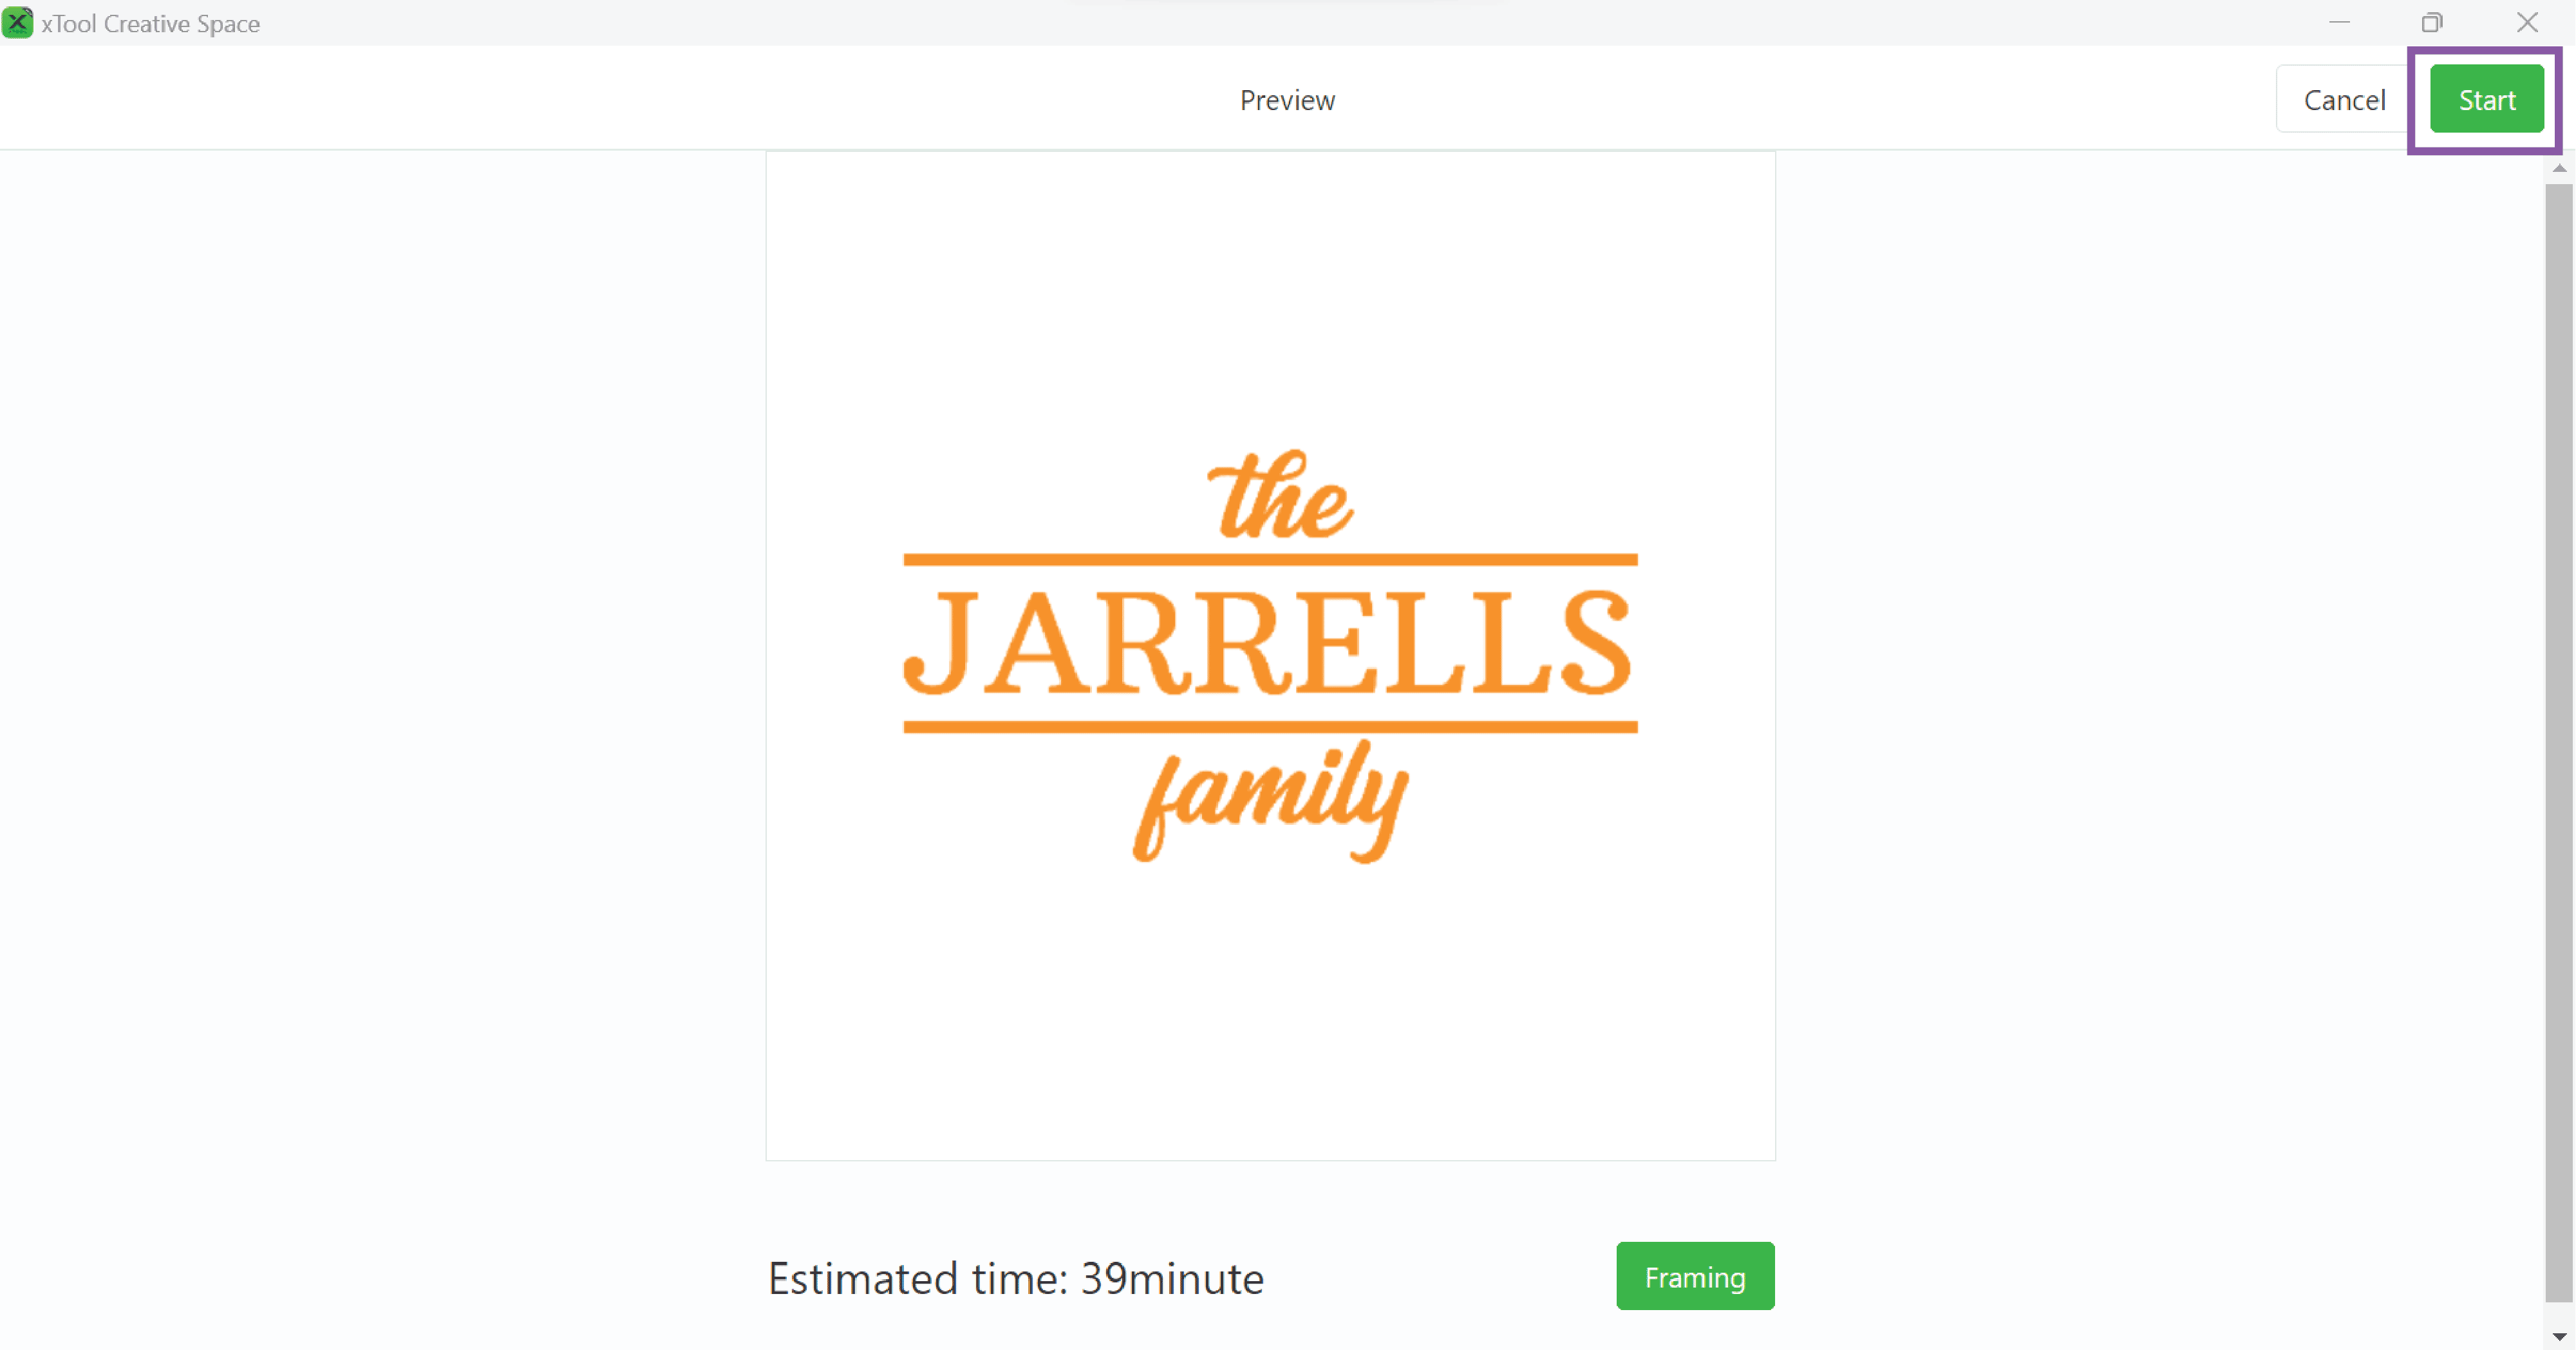
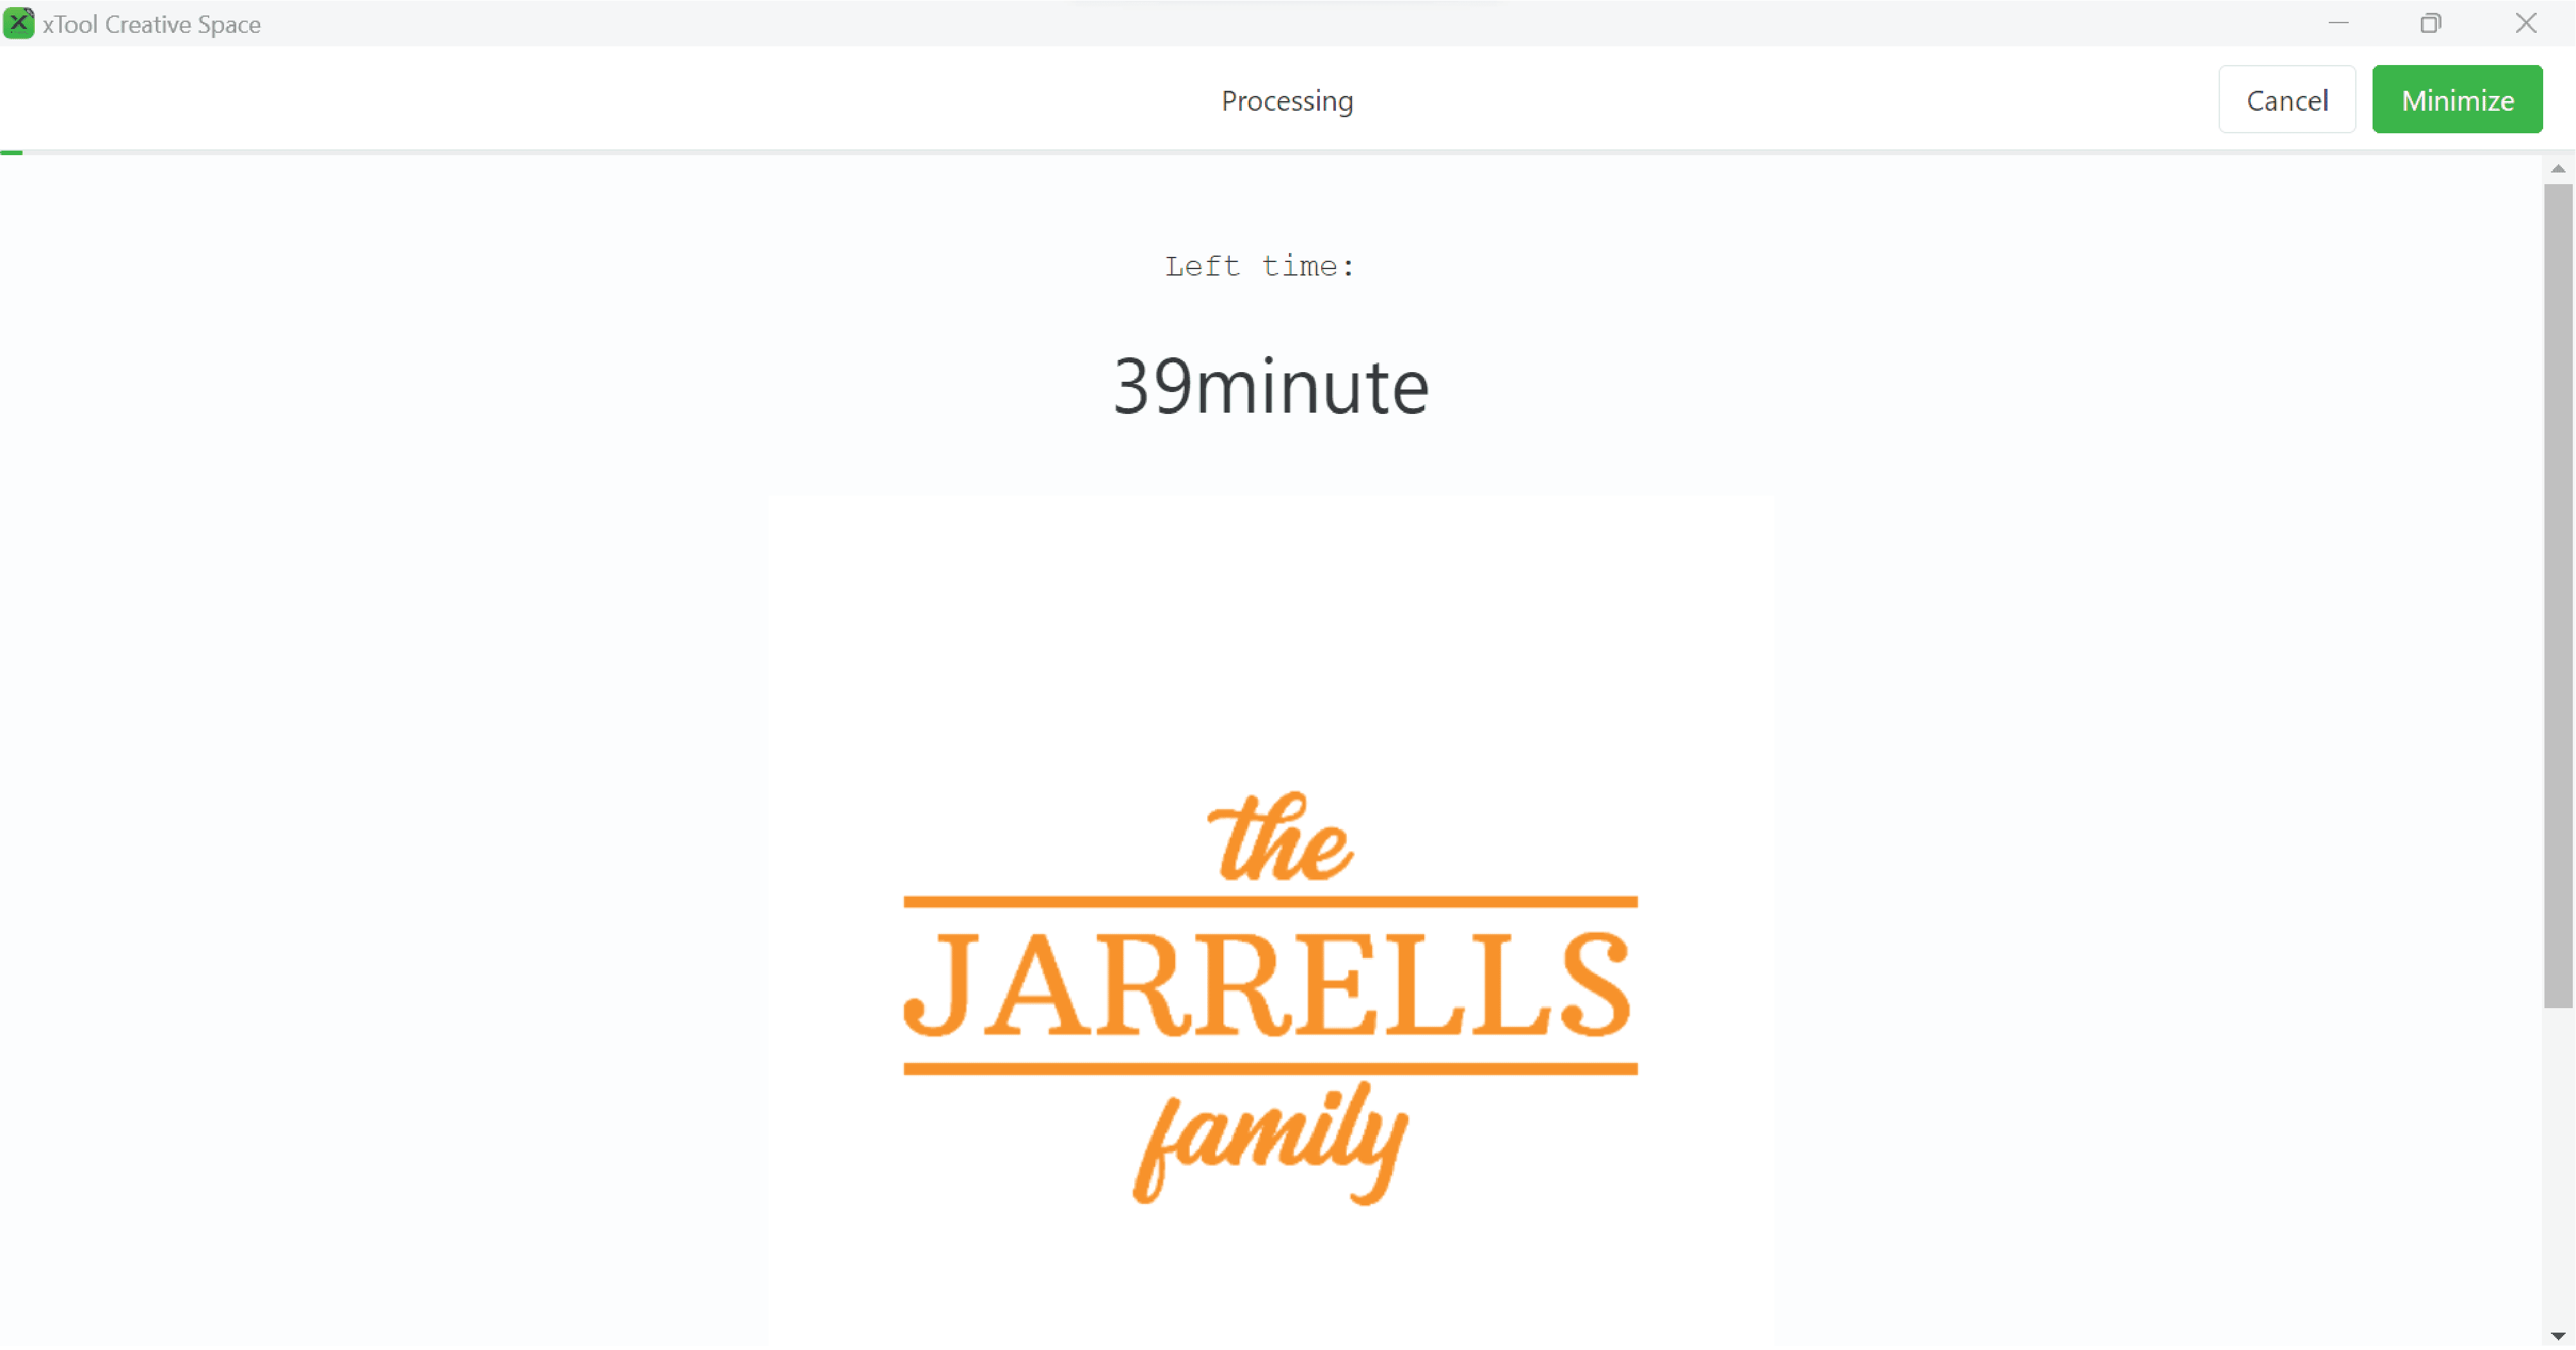
Once you click PROCESS in step 11, you will then see this screen on your computer. If you want to double-check where the design will go, click framing and then press the button on the machine and the laser will make a rectangle outline of the area it will be working in.
Otherwise, click START in the upper right-hand corner and this will send your design to the laser box. - Start the Laser Box
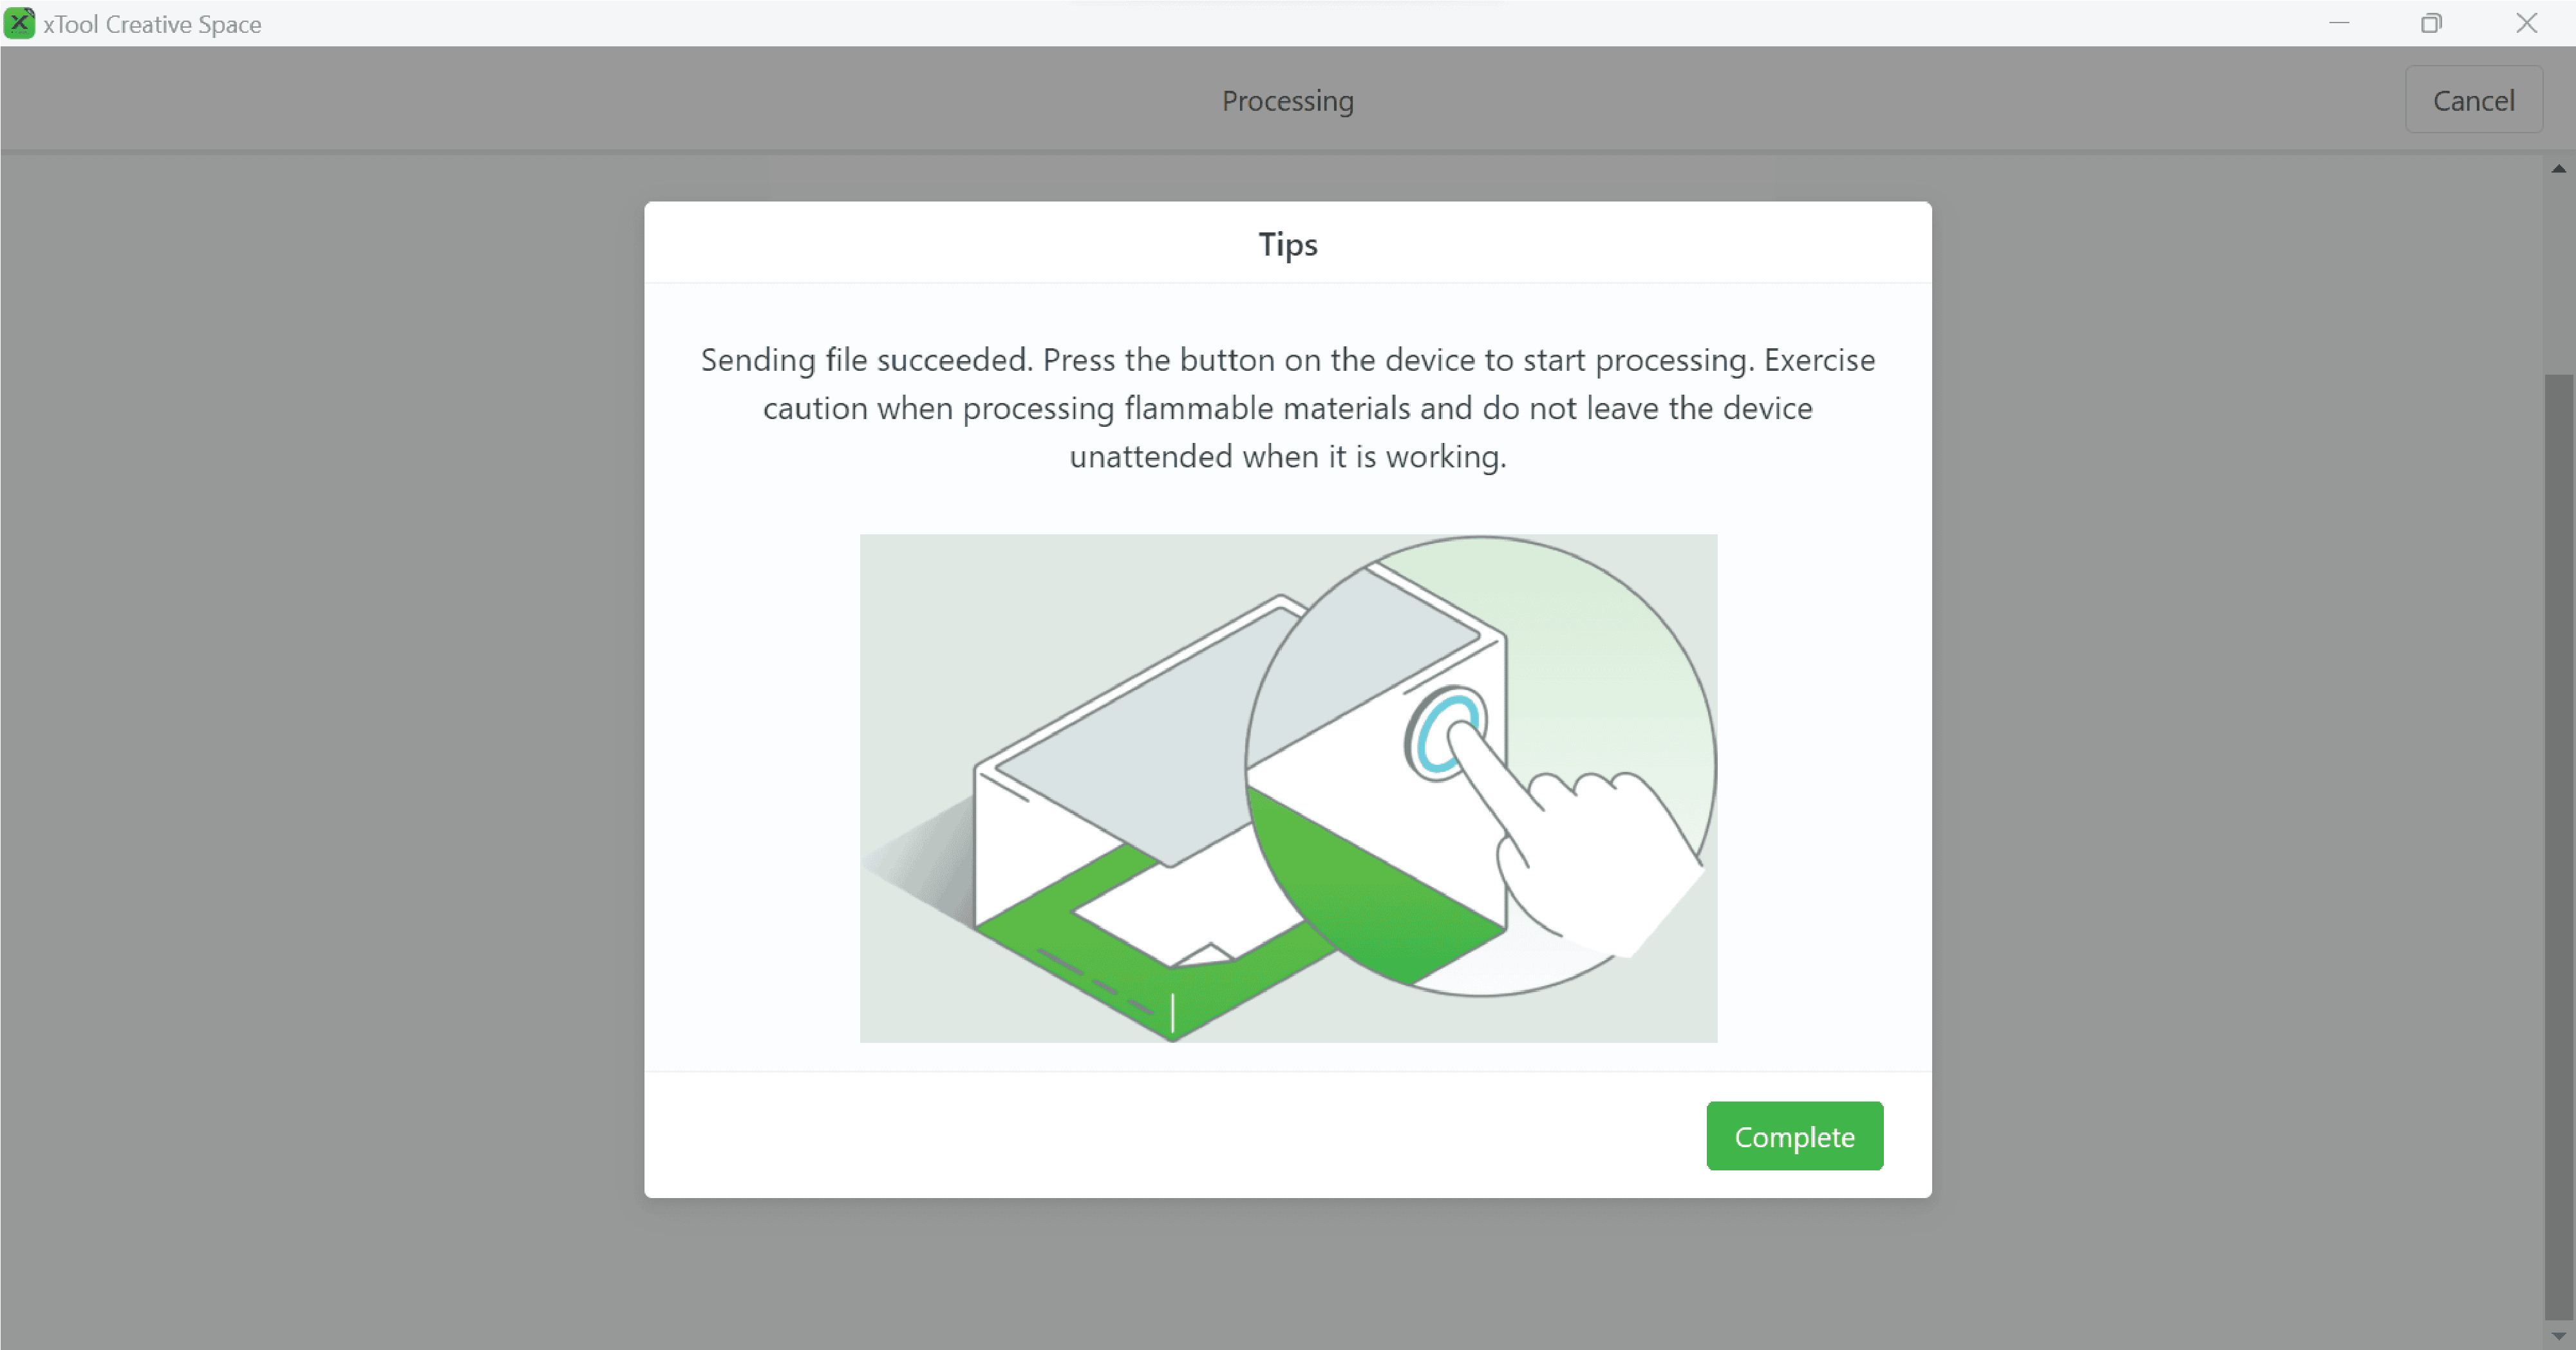
There is one more step to get the machine going and that is to physically press the blue flashing button on the front of the machine. This is a safety feature so you are right with the laser as it is working!
- Processing Time
There will be a processing screen on XCS that appears after the machine is started. This processing time is NOT accurate, don’t freak out. My designs took about 45 minutes if you need a time reference. Hoping xTool fixes this in a future software update. You can minimize (or cancel) this screen and continue working on other things on your computer.
- Finish!
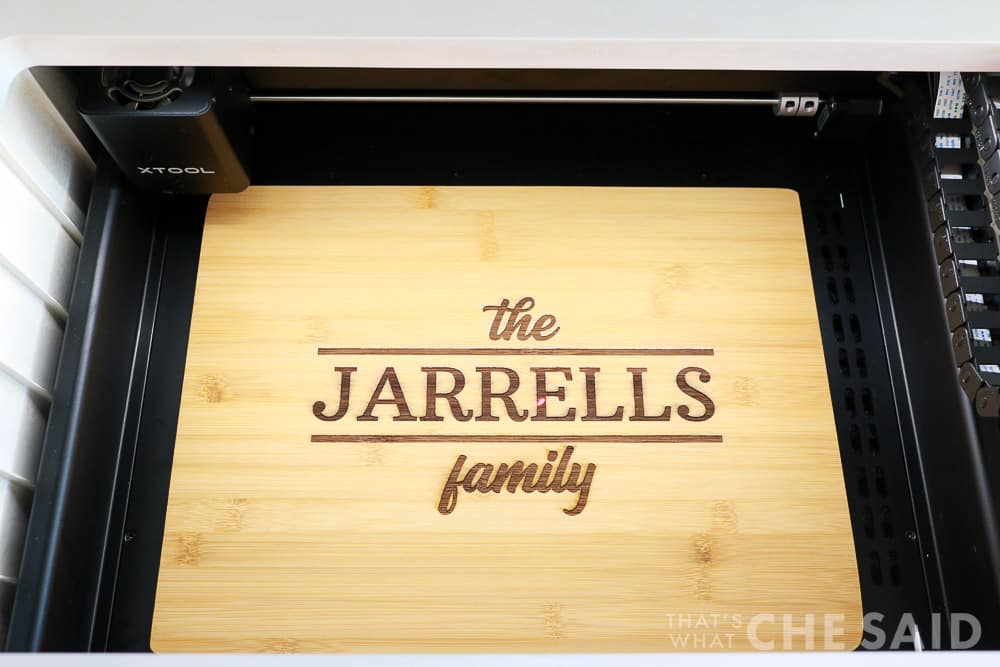
When the laser is finished the machine will beep and the laser module will return to its home position in the top left of the laser box. You can then open the lid and remove your cutting board.
You now have a finished engraved chopping board! - Clean up the design
There may be some scorch marks on your board outside of the design area. To clean these, simply use some rubbing alcohol and a paper towel or a baby wipe to clean! You now have the perfect gift!
Engraving multiple cutting boards?
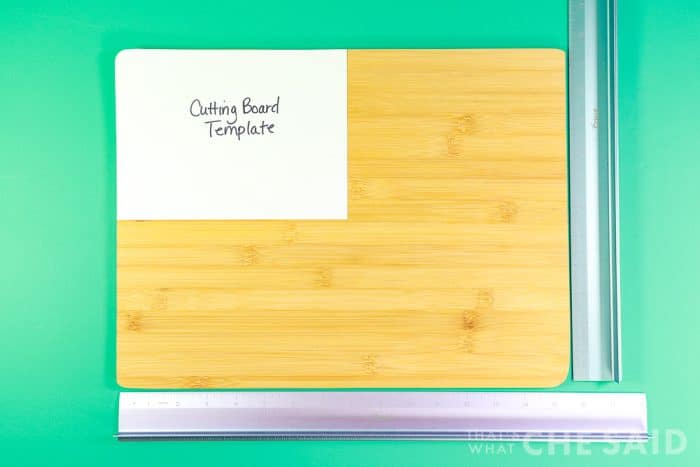
Save time and make a template! I found the center of a cutting board and then placed a piece of cardstock with the corner directly on the center mark. I then traced around the cutting board onto the cardstock and cut it out. Now you have a template for quick centering for your future boards!
Do you have to seal a cutting board after engraving?
After personalizing the cutting board you may leave it as is and are not required to seal it. Some like to cover the surface in food-safe mineral oil to bring out the graining in the wood. This is not necessary especially if your recipient is using it for decor purposes.
How do you clean an engraved cutting board?
If being used for actual purposes, here are the recommended care instructions. Bacteria can live in the crevices of the cut board if not properly cleaned. Remove food debris and hand-wash with dish soap and warm water and allow to dry before storing the board. Proper care for wood cutting boards includes not using the dishwasher.
Proper care will ensure your beautiful board lasts!
Make Personalized Cutting Boards to Sell
Not only are these great handmade gift ideas for wedding showers, housewarming gifts, neighbor gifts, a personalized gifts for your favorite chef, but these are also great handmade items to sell.
You can personalize with names or simply personalize for the closest holiday to your craft show or online event!
If you are looking for more information on how to sell handmade goods, how to figure out pricing, how to market, etc. I invite you to check out my dear friend Heidi’s small business e-books. They are packed with information and helpful tips!
MORE XTOOL PROJECTS






Comments & Reviews
Janet Black says
Thank you for this wonderful blog. When I click auto-measure I get a pop up window that say “material exceeds the thickness limit and cannot be processed.” What do I do when I have this happen?
TIA,
Janet
Cheryl Spangenberg says
Hi Janet, how thick is your cutting board? If your board is too thick, you will need to remove the base plate in the work area, use the risers to lift the machine and then select “open plane” vs “Laser Flat”. You should then be able to engrave.