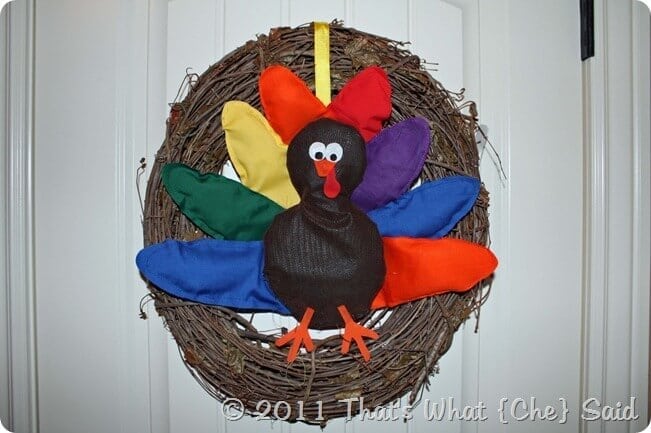
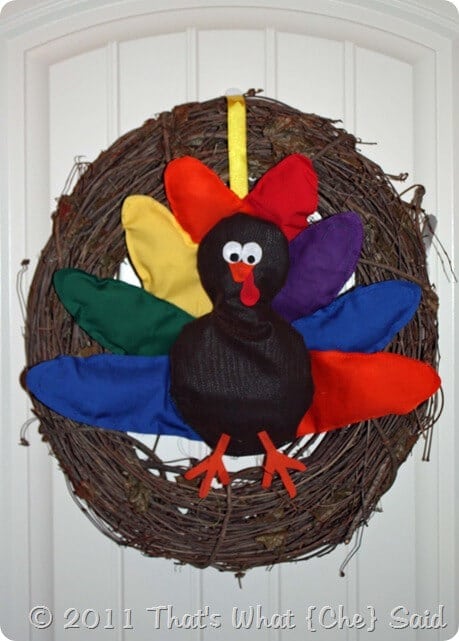
I’ve told you before, we are currently renting a new townhouse. Because I can’t paint and decorate the way I like I am forgoing the option to make a fall wreath with beautiful fabrics that match my décor and accents that are shiny and elegant. I am opting to keep it fun and I am making a Fall Turkey Wreath! Yes, a turkey…as in “Gobble, Gobble!”
I made this totally out of scraps I had already and a grapevine wreath I had as well. Hmm…I made my Halloween wreath out of things I had around the house also. The next one I promise I will buy something!
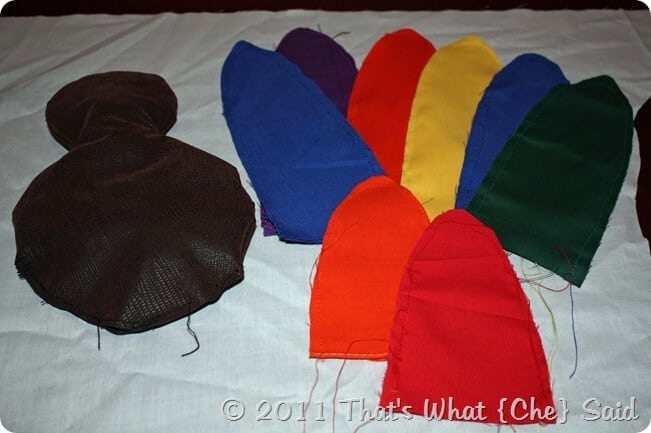
First I made a body out of some brown alligator skin looking suede fabric we had left over from when Freddy and I made our headboard (WAY before my blogging days). I just free handed a head and body, essentially just 2 circles stacked and cut 2 patterns out. I flipped the fabric so that good sides were facing each other and sewed that bad boy together leaving about a 3 inch opening at the bottom. Make sure to cut the hem close to the stitch or cut notches out around the rounded edges, so that when you flip it right side out it doesn’t bunch along the curves. I filled this guy with left over fabric scraps and then sewed the opening together.
Next I cut a feather pattern out of paper and then made feathers in several different colors. I didn’t flip these inside out, I just sewed a hem around them. I didn’t want my turkey to look liked a stuffed animal, I just wanted him to be 3-D. I stuffed the feathers with the fake cobweb material I just took down from Halloween. It had been used a couple of times and was starting to get non-web like so it now has a new life in my turkey! I didn’t even sew the bottom of the feathers because the ends are hidden by the turkey body.
I attached the feathers to the body with hot glue. Mine kind of looks like he is wearing a hair bow, so make sure to position yours a bit better, or maybe add one straight up in the center!
I cut eyes and a beak and the gobbler thing…what’s that technical term? Oh who cares you know what I mean! And I cut feet. I used tacky glue to stick them on. I just free-cut those pieces I didn’t use a pattern.
I then used a piece of ribbon and hot glued one end to the back of the turkey, looped it around the grapevine wreath and then attached the other end of the ribbon to the back of the turkey with a safety pin. I am planning on using the wreath again so didn’t want my little turkey guy to be permanent!
I hung him up and the next morning, Michael noticed and said, “Oh Mom, I love that turkey wreath you made!” He then proceeded to ask me if I learned how to do that in school! Silly kid! This whole project took me about 45 minutes. Most of that time was searching for my fabric scraps, and working while watching Burn Notice reruns.


Comments & Reviews
Shannon Kosub says
TOOOOO CUTE!!!!! I might have to try this! 8-)
Cheryl says
Thanks Shannon! I appreciate the nce comment. It was REALLY easy so I think you should definitely try it :)
amy says
*giggle* That turkey is too cute! Totally makes me smile. Would you pretty please share here?
http://oneartmama.blogspot.com/2011/11/our-home-for-holidays-party.html
Cheryl says
Thanks for the invite Amy! I linked up and put your button on my {Che} Parties Page!
Dee says
How cute is this turkey wreath!!! Love it!!! Be sure to come link this up to my blog, CSI project on Thursday. It is all about Thanksgiving and Fall. SO this is perfect and you can enter to win the giveaway.
http://www.thecsiproject.com
imklvr says
A-dor-a-ble!! Just like you! Oh, and that thing is called a wattle. Not to be confused with waddle. Which is what I do.
Cheryl says
Ha! That made tea come out of my nose!!! Thanks also for the technical term! I will never forget it now :)
Megan says
That’s one good lookin’ turkey!
Meredith Resnick From A Mother Seeking... says
Cute idea! Can do with the kids which is always nice!
Meredith From A Mother Seeking Come find me on my blog, A Mother Seeking…
Sara says
haha gosh it’s sooo cute! :D You gave me a great idea for the next Thanksgiving day.. i will copy this ;)
Cheryl says
Thanks Sara! I hope you love yours!