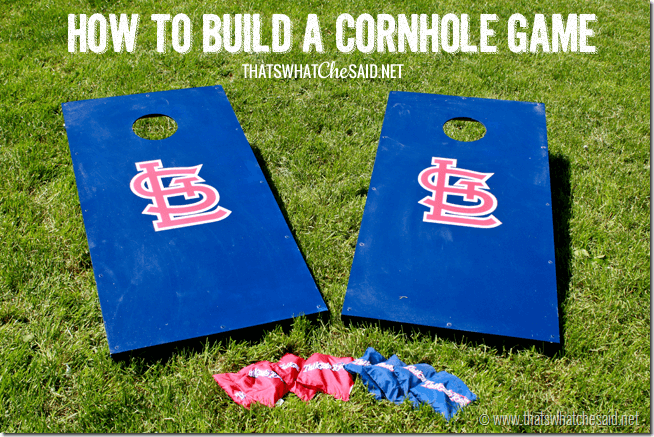
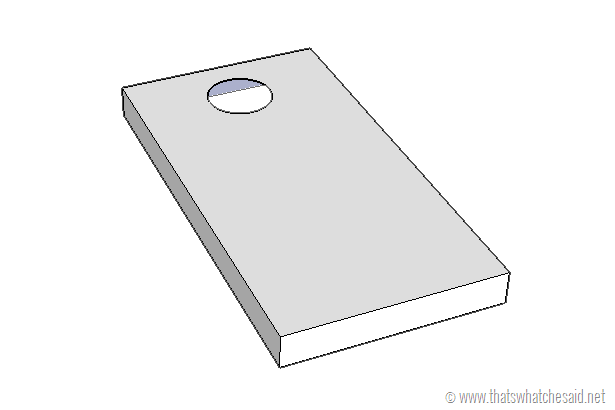
Have you ever played the Cornhole Game? Along with Washers, it’s a favorite of my family and friends! My siblings and I built a set for my dad and thought I’d share How to Build a Cornhole Game so you too can enjoy this fun game at your next party or BBQ! When you build them yourself, you can personalize them just how you like! In this case there was only one way to go for my dad…St. Louis Cardinals!
Supply List:
- (2) 2’x4’ pre-cut sanded plywood {You can also use a 4’x8’ sheet of sanded plywood and cut down to size.)
- (4) 2 x 4 x 8 Studs
- (4) 4″ x 1/2″ SST Bolts, Lock Nuts and Washers
- 1 box of 3” deck screws
- 1 countersink bit
- Ryobi Compound Miter Saw
- Ryobi Power Drill
- Dremel Trio
(or Jigsaw & String)
- Sander
- Wood Filler
- Pencil
- Measuring Tape
Cut List:
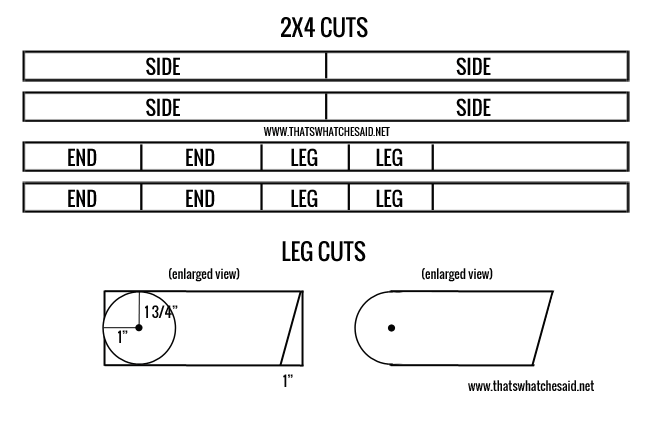
- (4) 2×4 – 48 inches long (cut 2 of the 2x4x8’s studs)
- (4) 2×4 – 21 inches long (cut 2 each from each of the 2 remaining studs)
- (4) 2×4 – 11 1/2 inches long (cut 2 each from the remaining scraps from above)
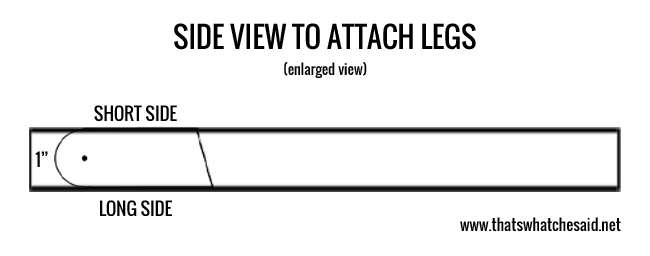
(see diagram below)
To cut the legs to shape:
- From the left side of your leg, measure in 1”. Measure down 1 3/4” and mark the center intersection. I then used a drinking glass that was the same width as the 2×4 and used that to make my circle lines. You can also drill a screw in the intersection mark. and use string tied to 1 3/4” long and a pencil and draw the circle too.
- From the right side of the leg, measure in 1” from the bottom and draw a diagonal line to the top right corner. You will cut this section off with your compound miter saw.
- To shape the circle I used my compound miter saw and cut the corners of the leg off and then used my sander to finish sanding the legs into the round top.
- Drill a 1/2” hole at the intersection on each leg.
Building Directions:
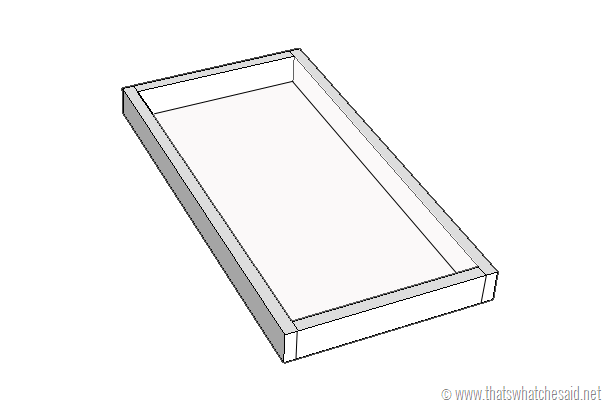
- Start off by screwing (2) ends and (2) sides together to form your boxes. Check for Square. Use 2 screws at each joint. Pre-drill holes for your screws so that your wood does not split.
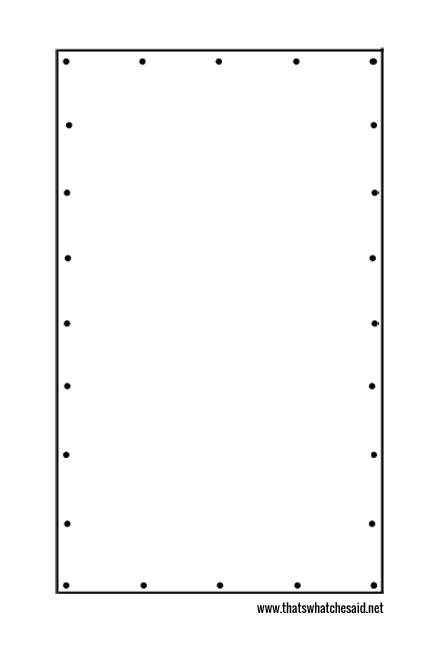
- Place the 2’x4’ plywood piece on top of the box frame and using a countersink bit and countersink screws, screw down the top. Start by screwing in all four corners, then the centers of each length and finally the centers of those resulting spacing
- At this point you can fill the holes with wood filler, let dry and sand smooth. (This step is optional)
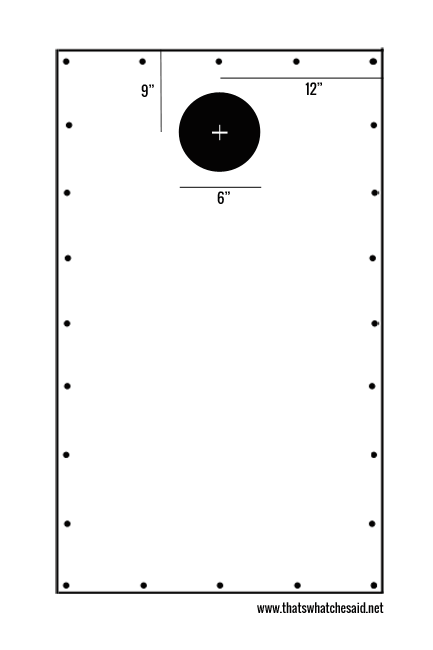
- To mark you circle, measure from the top down 9 inches and then from left to center 12”. Mark the intersection.
- 2 methods to cut the circle out of the center:
A. Use a Dremel Trio (which is what I used!). I drilled a hole in the center of the intersection and then I used the attachment arm to create a perfect circle cut!
B. Use the same method as above when making the legs with a screw in the intersection. string to 3 inches and draw a circle. Drill a hole along the traced line. Using a jigsaw, cut out the circle with a steady hand.
- Sand the circle opening if needed.
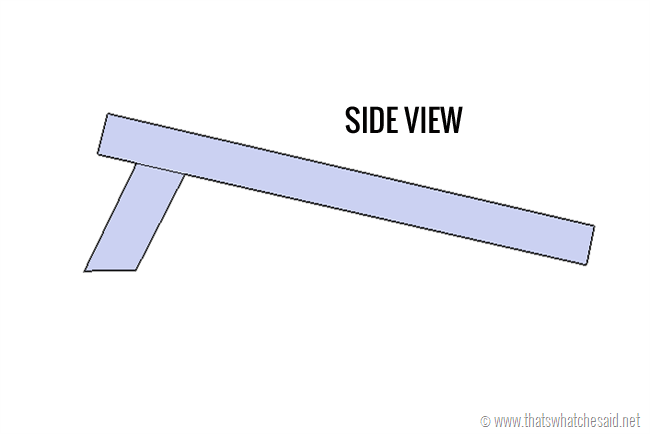
- To attach the legs, turn the boards over with plywood side down. From the bottom edge of the top 2×4, measure down 1 inch on each side. This is where the top of your leg will sit. Line up the leg flush with the side and using a clamp, clamp down the leg against the side. Be sure that the shorter side of the leg is facing up.
- Drill through the existing 1/2” hole into the side of the frame and through it. This will line up your bolt holes perfectly. Repeat for remaining 3 legs.
- Attach with bolts from the outside and use the washers and nuts to secure from the inside. Tighten or loosen until the legs move easily.
I also added a handle on each of the boards for easy transporting. You can also add latches if you wish to keep both boards together. Latches will also come in handy if you make the accompanying scoreboard!
Your games a re complete! You can paint as you wish!! Be sure to check back to get my tutorial on how I personalized mine and also for the Scoreboard I made to accompany the game! Enjoy your backyard fun!
You can find tons of Cornhole Bean Bags or you can make your own! If you enjoy this project you might enjoy some of my other outdoor projects such as:
Make your own Garden Infinite Fountain



Comments & Reviews
Lindsay @ Makely says
This is great, Cheryl! My neighbor just built one last weekend. Can’t wait to use it!
Cheryl Spangenberg says
Thanks Lindsay! They are so much fun!! Stay tuned…I am sharing how I made the scoreboard to accompany them soon! xoxo
Emily says
So fun!! I love corn hole!! :)
Trish @ Uncommon Designs says
How fun is this and your tutorial is incredible! Thanks for sharing!
Take care,
Trish
Casey says
Where did you get the “STL” decals?
Cheryl Spangenberg says
Casey I made them on my Silhouette Cameo! If you have one I can send you my cut file if you’d like!?